The style of boat in the banner is my idea of quick and dirty. She is a 33 foot flat bottom slab sided shoal draft yacht. Built for as little as possible and as quick as possible. The base/cradle is made out of yellow tongue particle board ($36 a sheet) good for three months in the weather. I am building her right side up to save time.
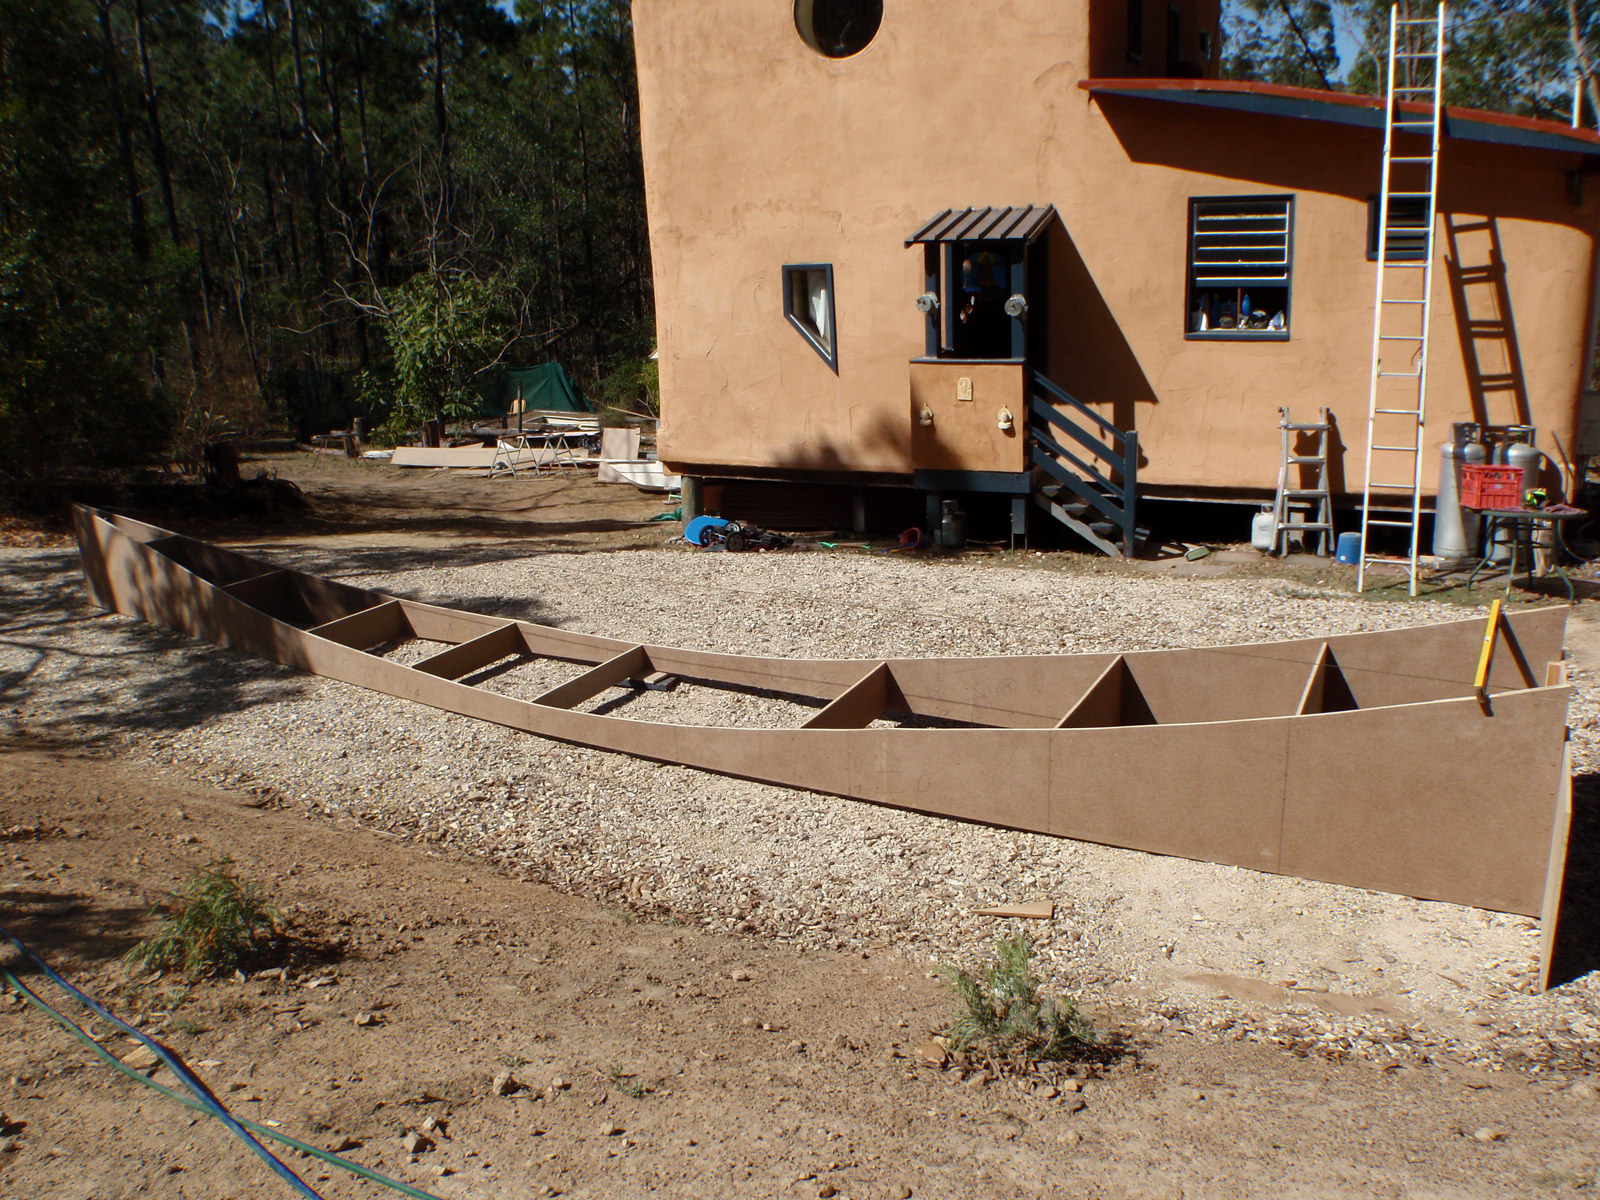
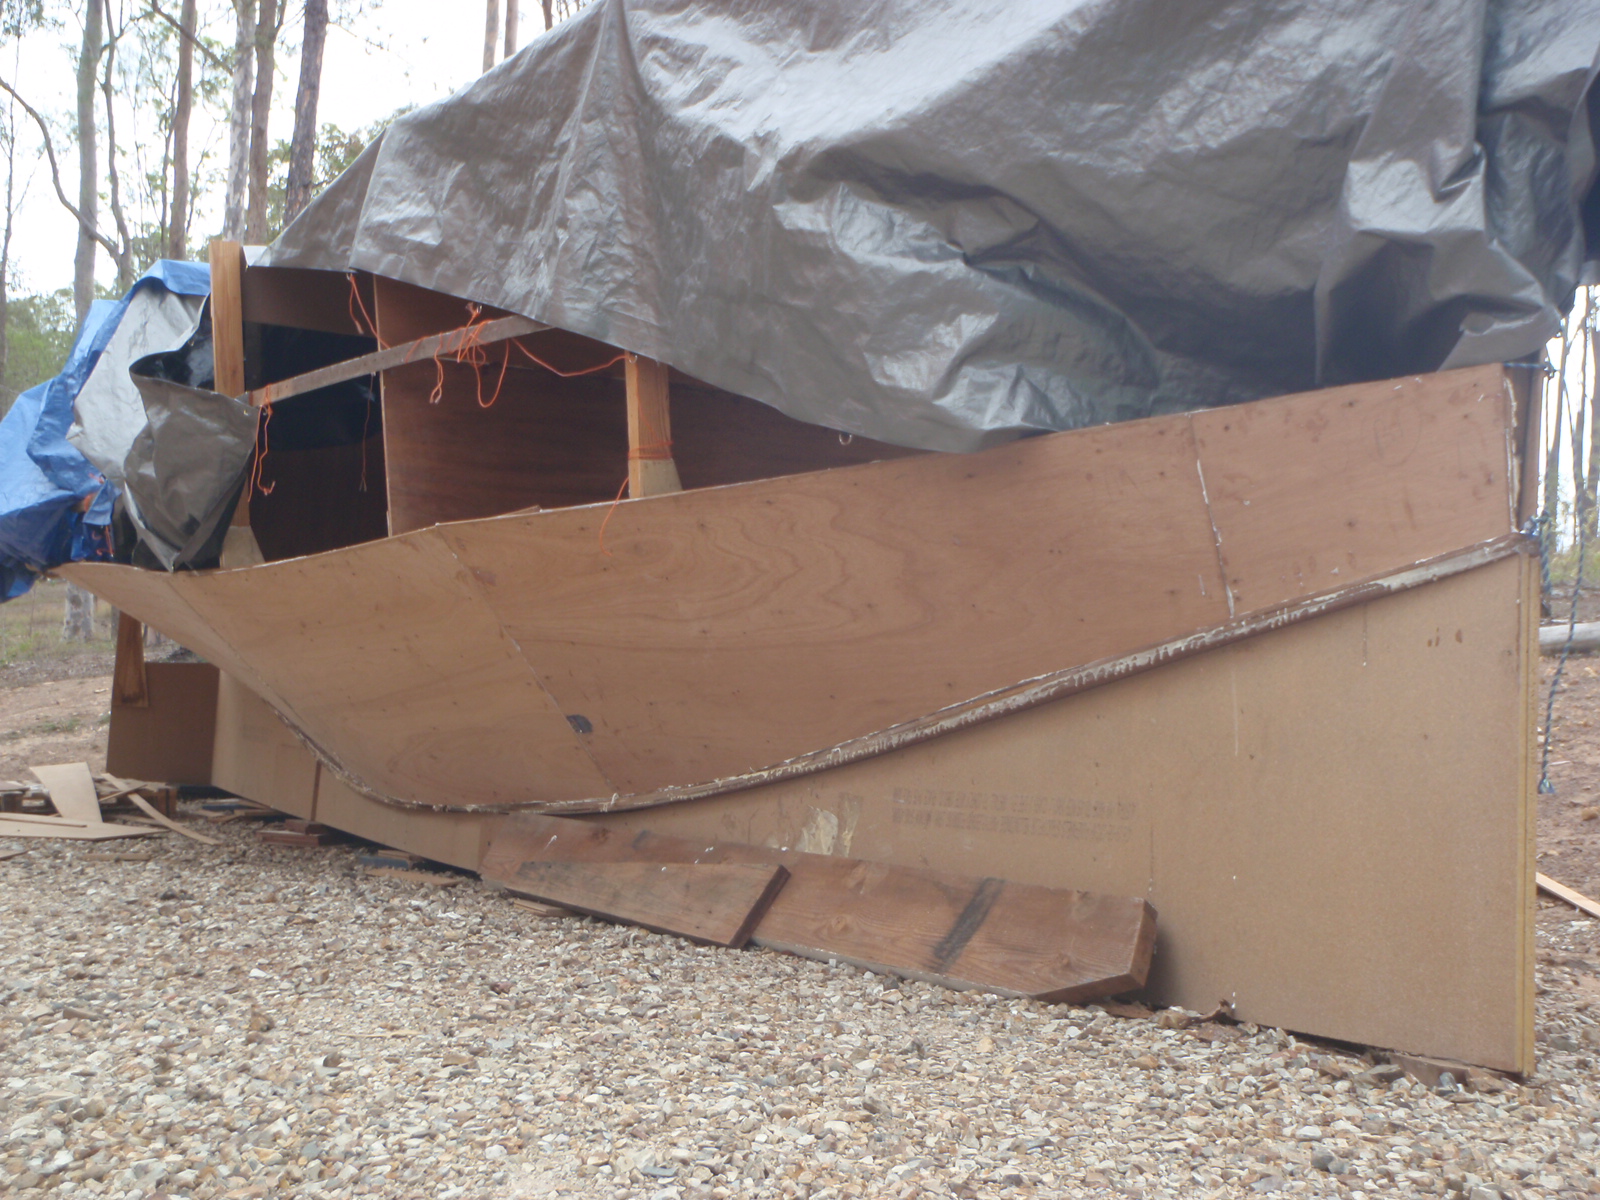
I believe this boat would fit into the VolksCruiser catergory, a great little blog by a boat nut in the Carribean. As you can see I am building her outside until I can find a carport or shed at the right price to cover her. The cradle is really just a simple box with the bottom rocker cut into it. I just drew a base line on the plans and measured up from there. Then I transferred it onto the boards and cut it out. The base is the width of the bottom panel tapering to 50mm in the bow. I then had some pre-glassed 9mm ply to lay down on the rocker and then two layers of 12mm ply on top of that. So the whole bottom is 450 gram double bias cloth done with epoxy resin, then 33mm of plywood laminated with epoxy glue. The plywood was screwed together with stainless steel screws, some have been buried as I needed to hold the ply against the cradle. When I remove the cradle I will cut these off and glass the patches. Most are near the chine, which will need to be glassed any way. Listening to Cynthias Choice (Opera), great sound. The thing I learned this week was that you can buy real kids industrial earmuffs, so two sets it was.

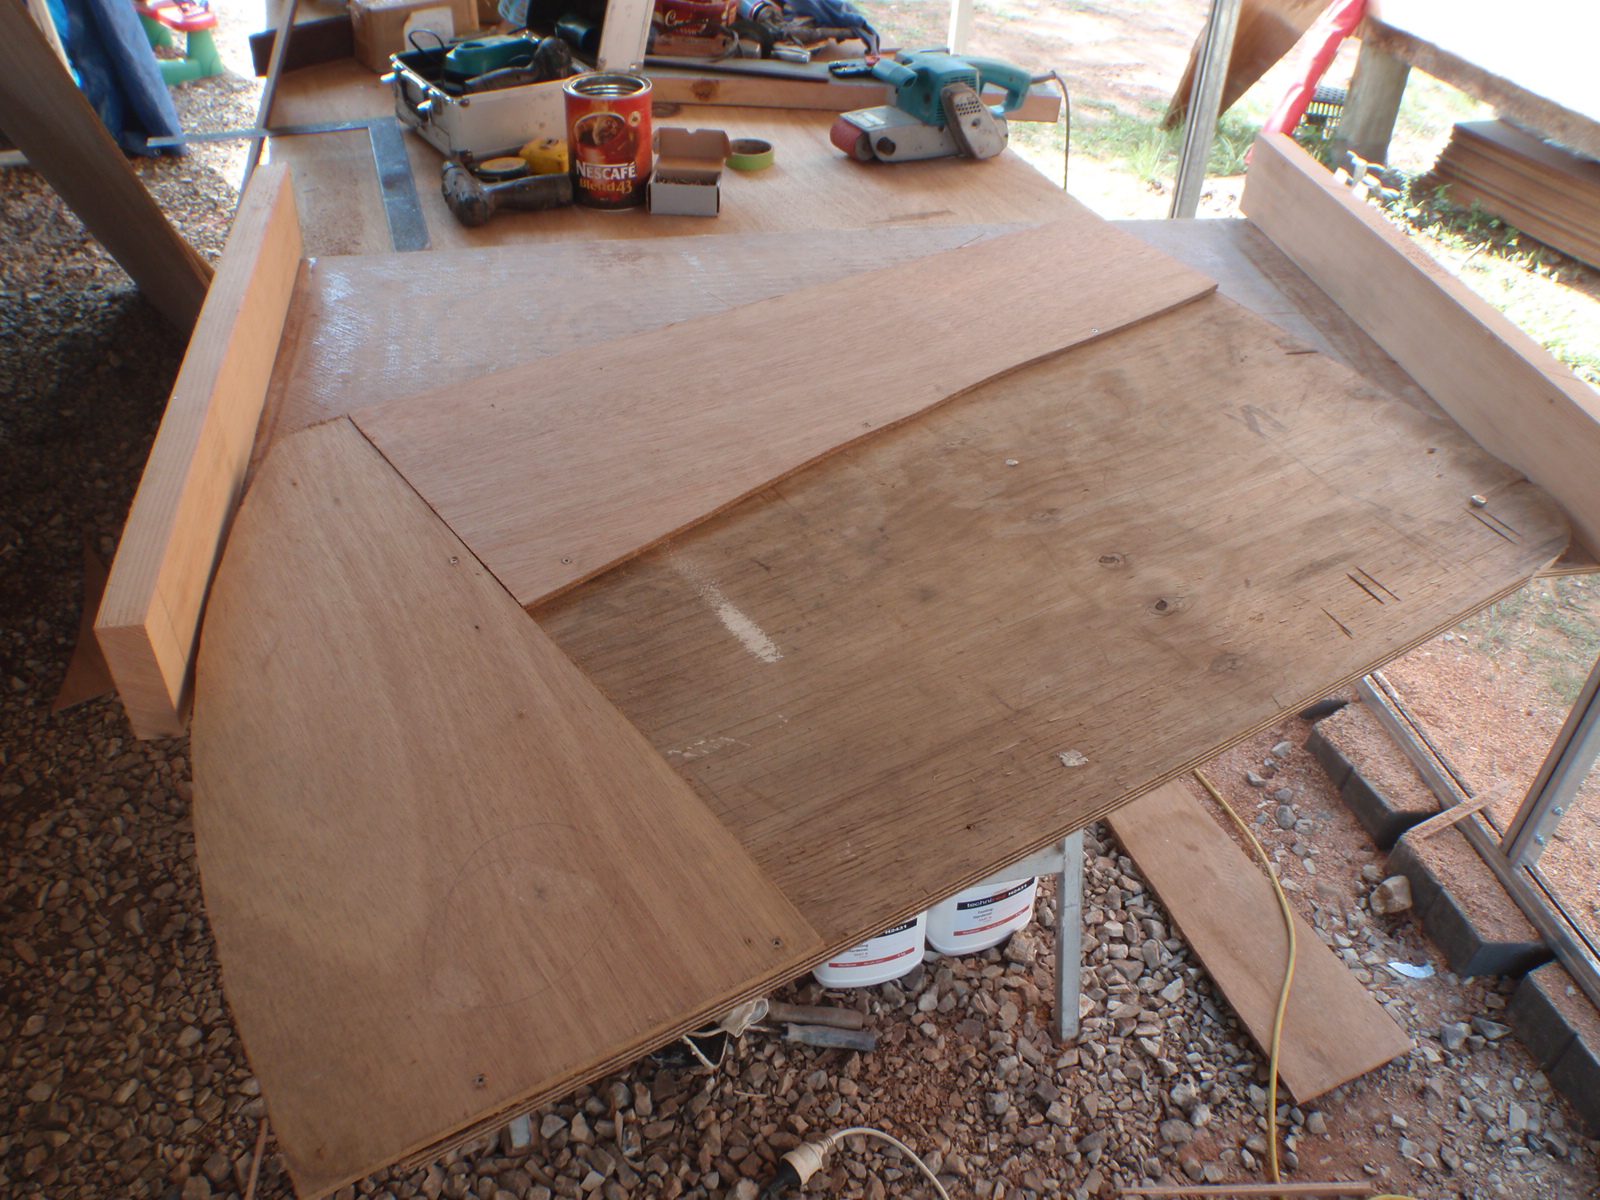
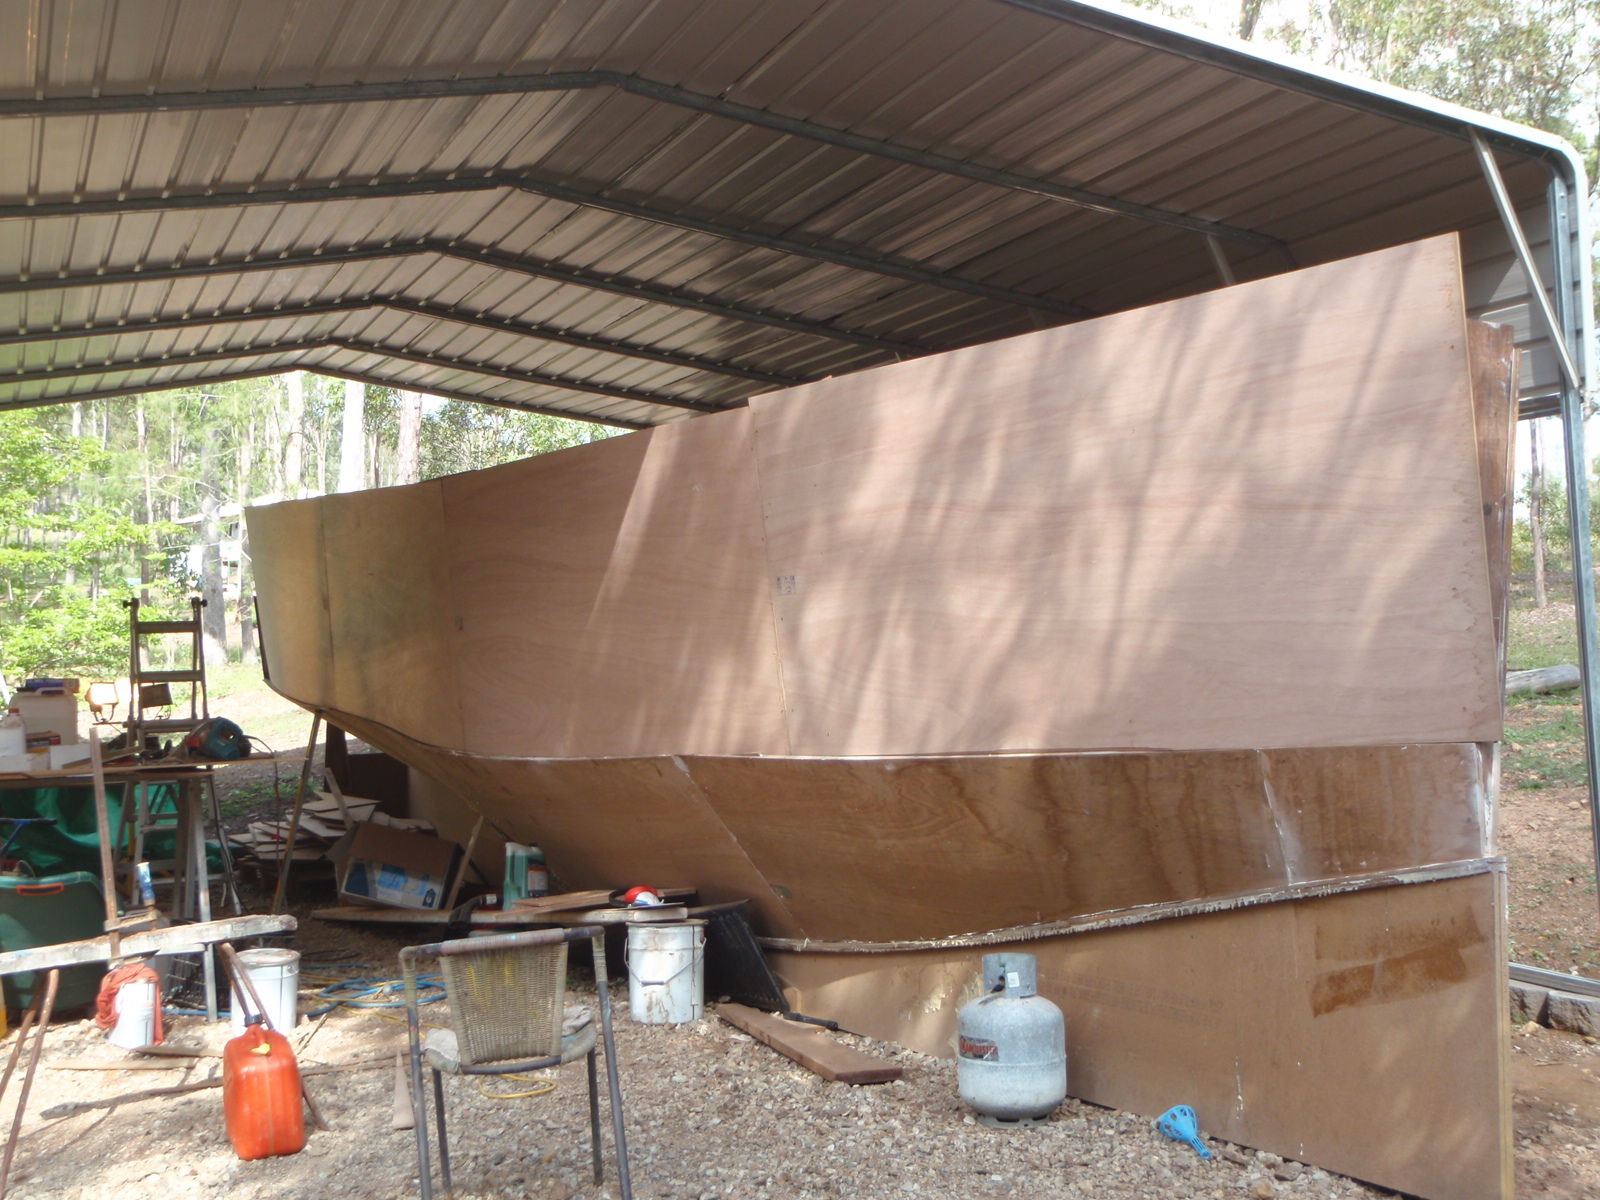
Thinking back on this page I realised I was a little quick of the trigger (been a problem my whole marriage Tina would tell you). So I better start from the beginning. This quick and dirty yacht is my design, 10 meters by 3.3 meters by 0.7 draught. Gaff rigged with mast in tabernacle, 20hp four stroke outboard and swing keel. Sleeps four with a big double in the bow and two quarter berths and she can sit on the beach. The bottom is 33mm thick ply and the topsides are two layers of 9mm, the deck is two layers of 6mm. Everything is sheathed with 450 gram double bias cloth and epoxy resin. The general construction dimensions I borrowed from my friend Erik who built a Benford dory.The two photos of the model are a little distorted, but the general idea is a three panel hull with the bottom panel being the exact width of a sheet of ply. The whole design and build process is very fluid ( by the seat of my pants more likely). I am not 100% sure of the final result but I have used some great yacht design books and the web to design this Volkscruiser. I have manually drawn her and done all the calculations by hand ( I learned all this back in NZ in the 1990's) as my computer skills are some what lacking. Listening to the Mumford and Sons and I have learned this week that that if I buy a gaff mainsail of e-bay sight unseen then Tina can buy a tent sight unseen as well......if only I had bid on the tent!
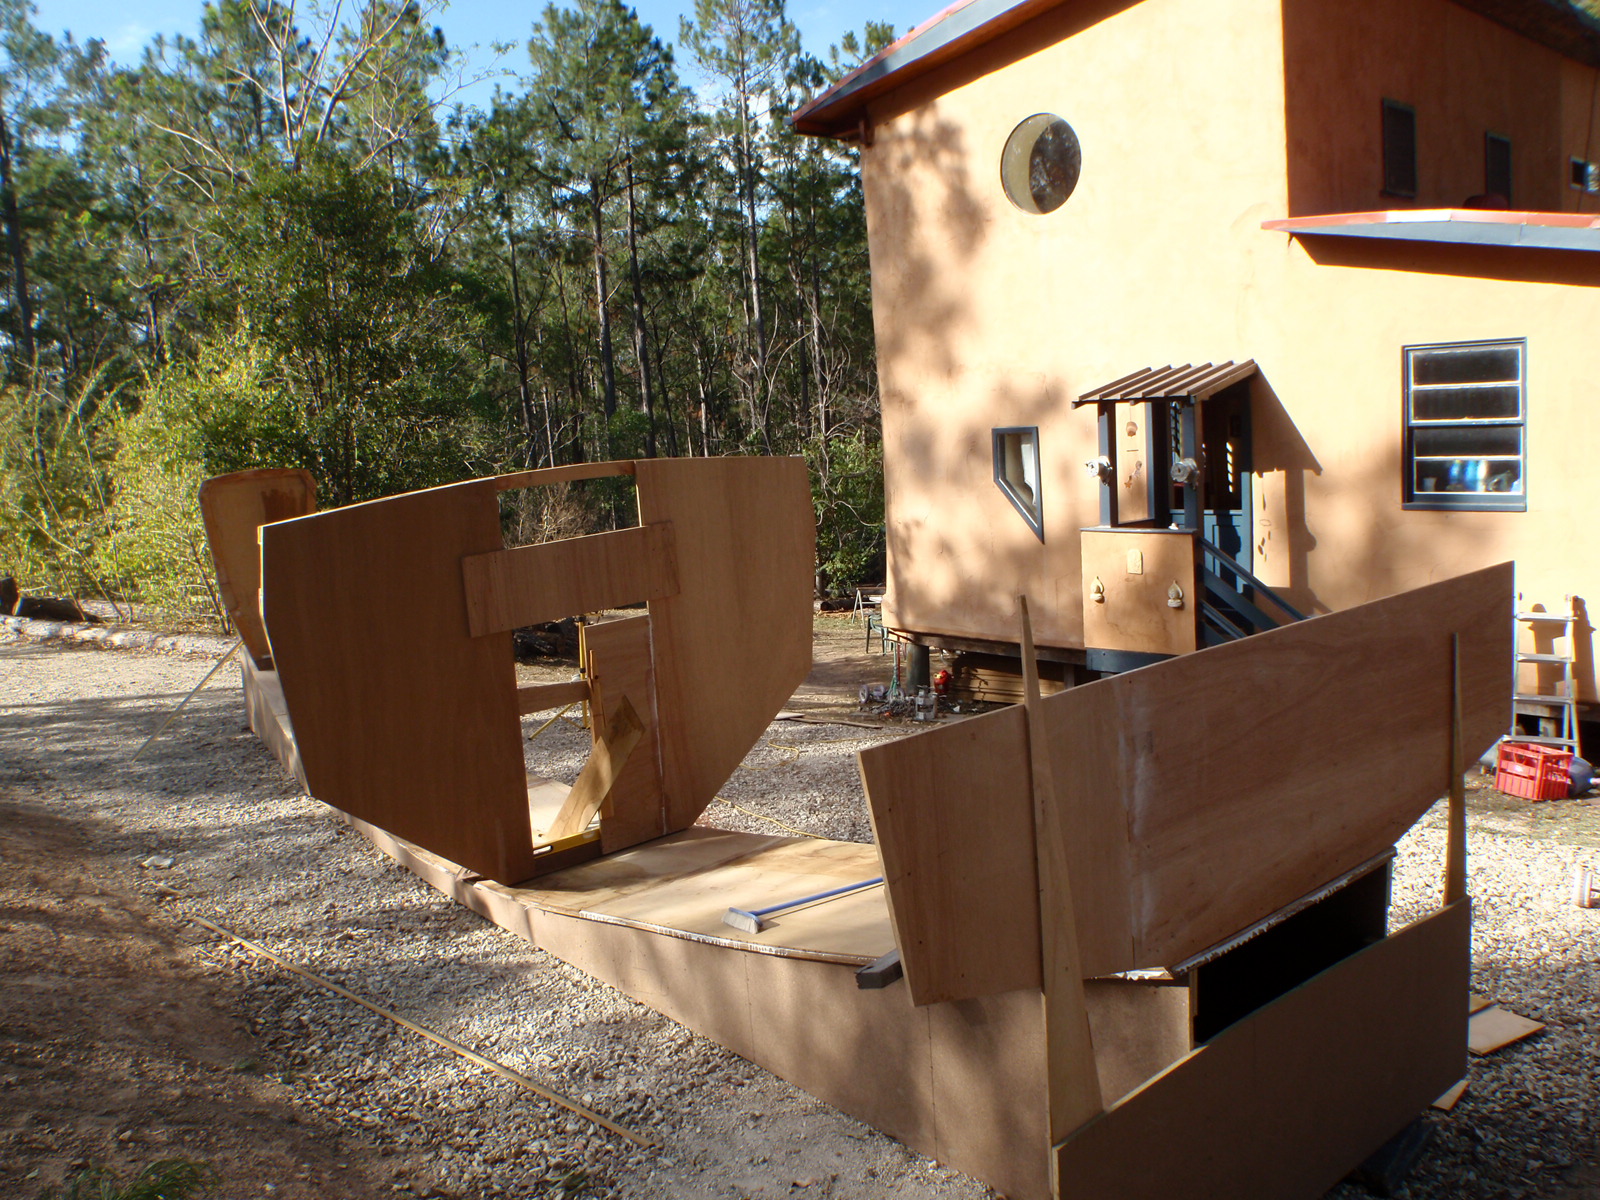
Well the picture on the left is my first big mistake of this project. This anchor locker bulkhead is so wrong that I cannot believe I even used my plans to build it! The biggest mistake is the positioning of the chine (green tape line) this is 200mm higher than it should be. The quickest way to fix my mistake was to just build a whole new bulkhead and this time I triple checked the measurements. In the foreground are two Barlow 20 winches and handle that I brought of Gumtree for $150. On top of the winches is a 12mm clutch, I brought 8 of them all new for $400 again from Gumtree. I also brought a large new Weaver hatch for $300 of Gumtree as well. I love the net for used boat parts shopping. The second photo is the first two layers of 9mm ply glued together and wrapped around the frames. This was a major effort that finished at 9pm as I glued both layers together and to the frames. The photo has distorted the fairness of the plywood sheets, they are not a 100% fair but close enough for me. You can also see the tarps over the boat, I am getting rid of these and buying a carport to cover the boat. I have learned this week that a helpful wife is worth her weight in gold. Tina helped me glue the two sheets of ply together while at the same time cooking dinner for us and putting Pippi and Jonah to bed. Then helping me pack up at the end of the night. The best part was we managed to then have dinner without the kids. Bliss
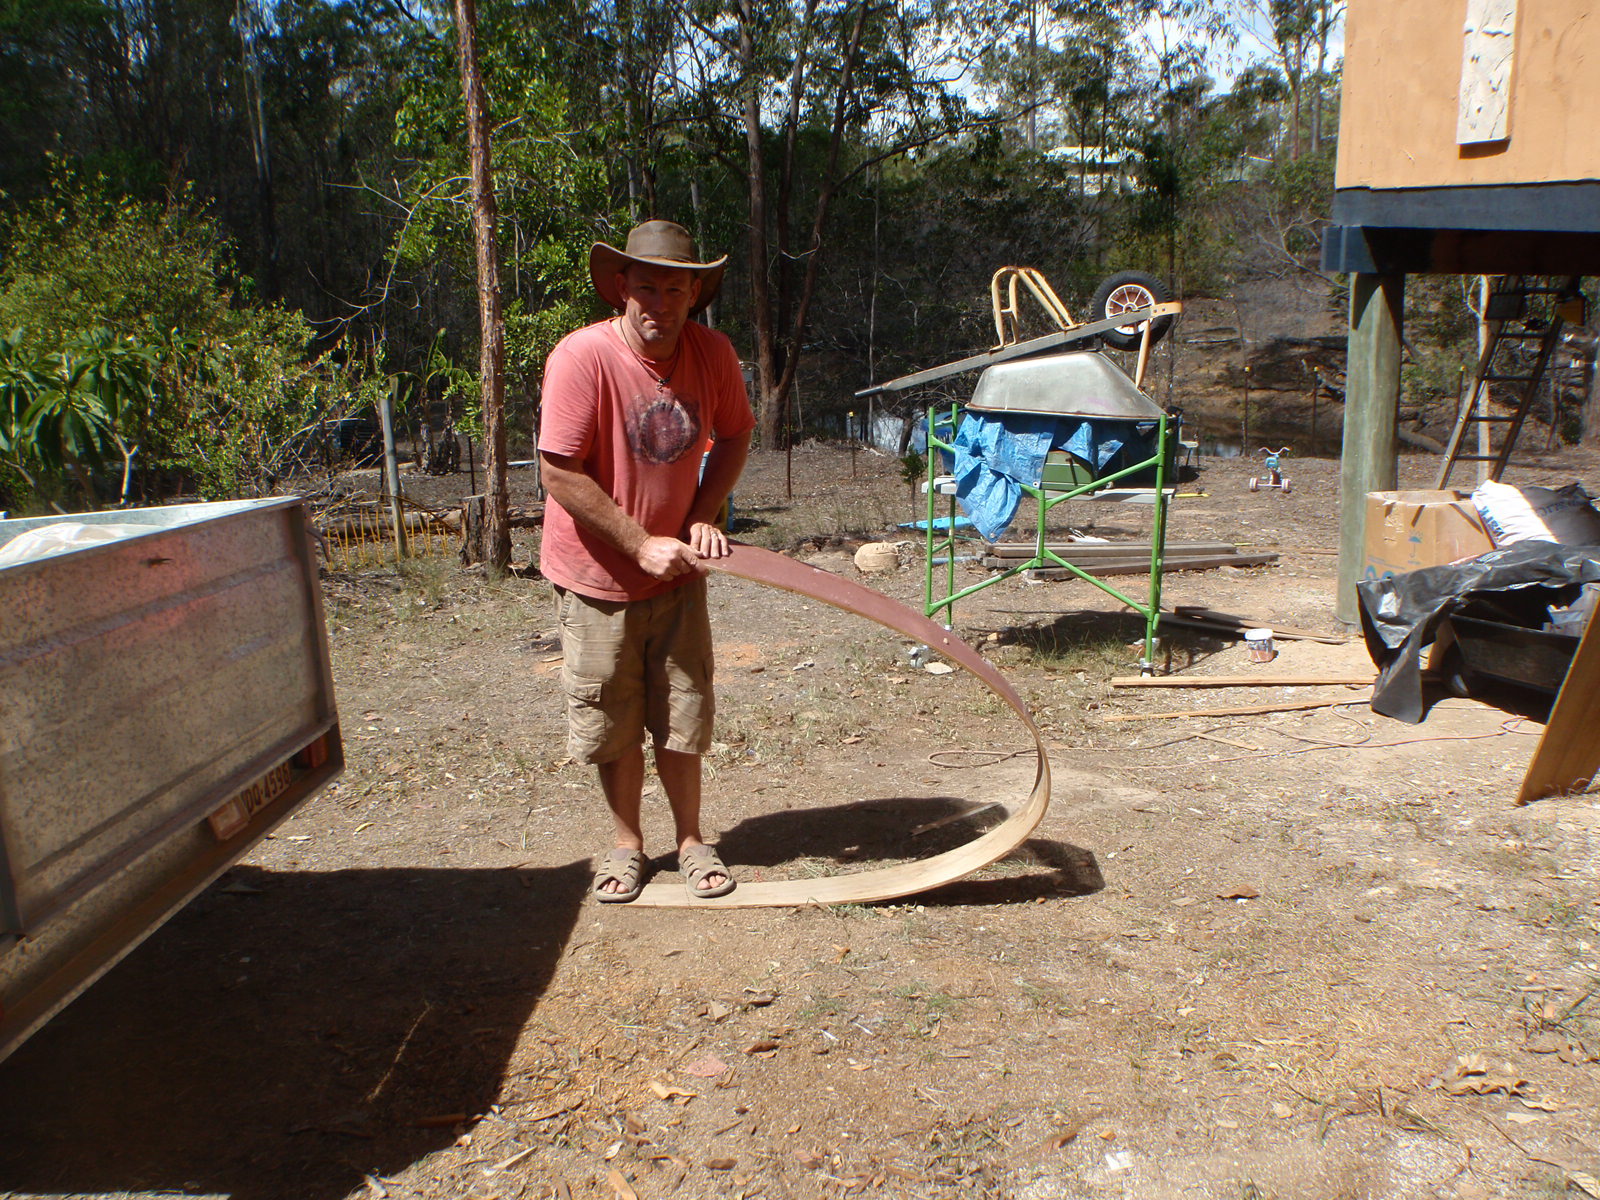
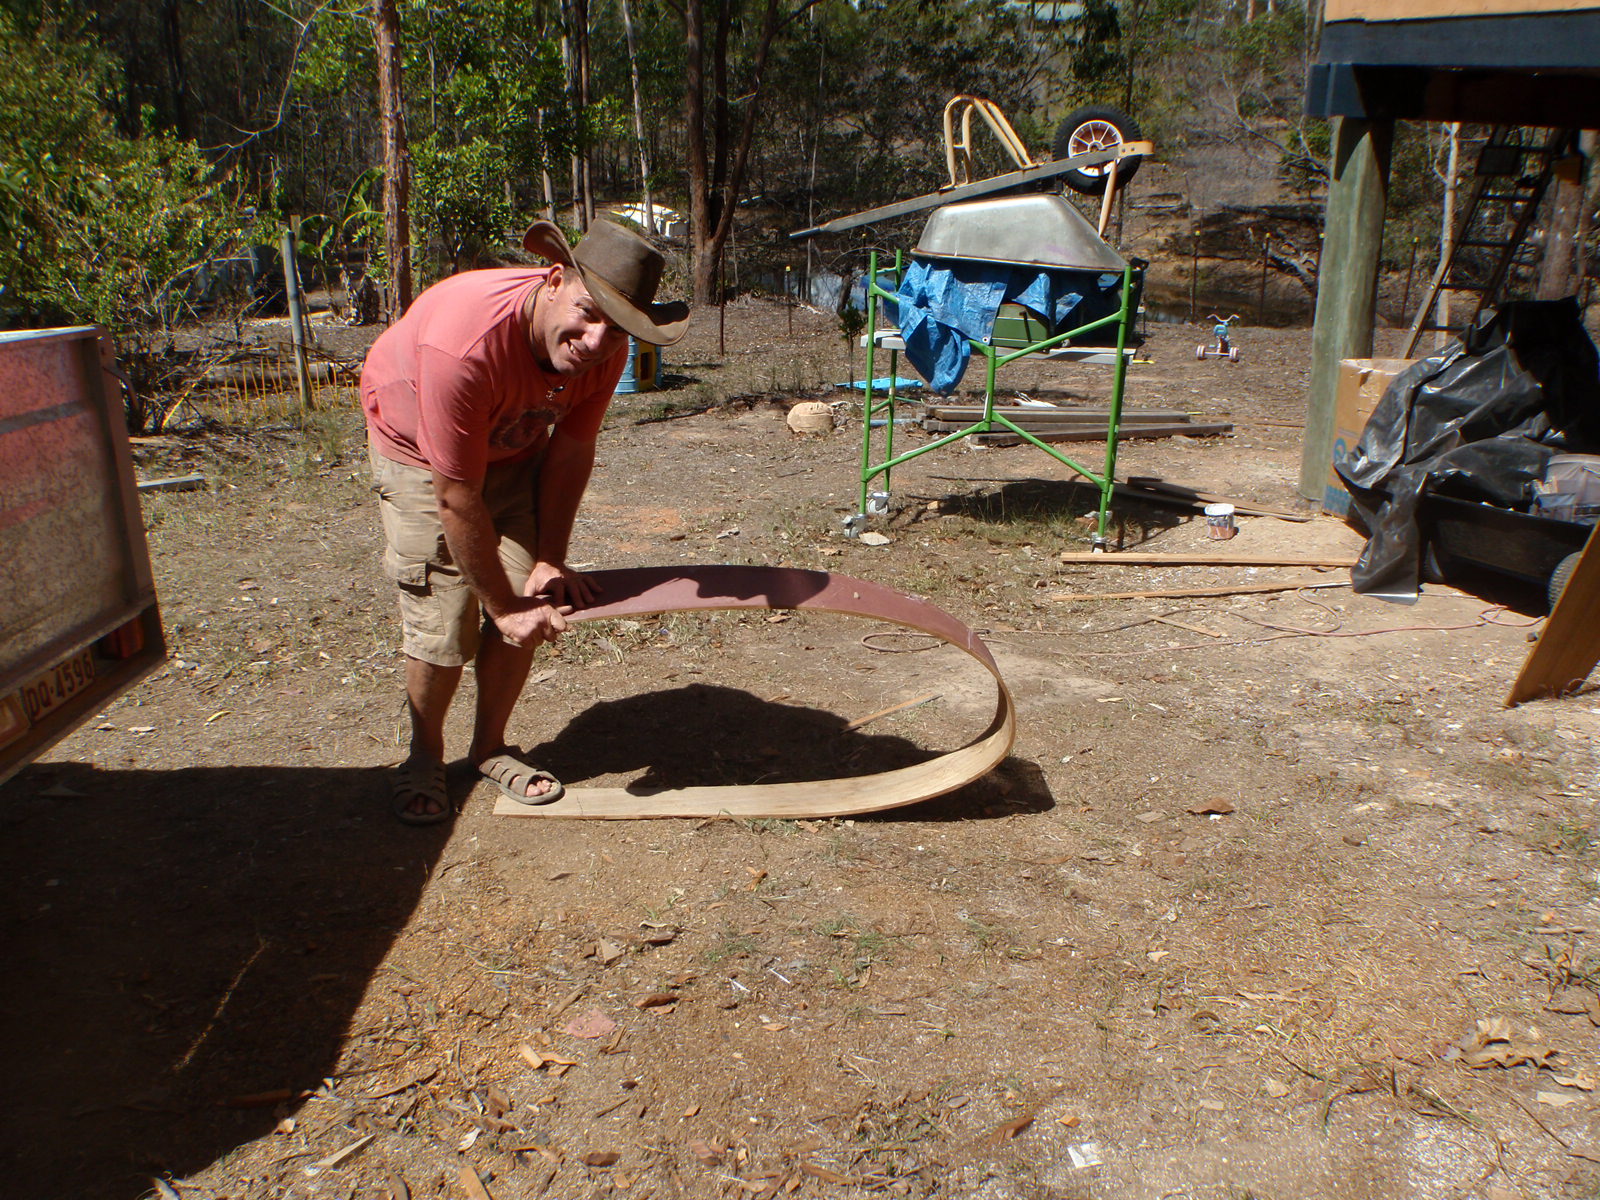
Here is a piece of scrap from the bottom panel. The first layer of plywood on the bottom of the boat is 9mm hardwood ply (there is another two layers of 12mm ply glued on top of this) with a layer of 450 gram double bias mat covering it. The maroon colour is microballoons that I rolled on before I finished glassing. Anyway before I chucked it away I decided to gave it a quick thrashing. The photo on the left shows me comfortably bending the ply with no hassle. Then on the right I really applied the pressure and you could start to hear the ply cracking just before total failure. Still it gives me some comfort for when I am bouncing on the bottom one day. Both Tina and I were amazed how far I could bend it before busting.
I got a good book from the library the other day Devlin's Boat Building by Samual Devlin. A bloody good book about plywood boat building using the stitch and tape method. He gives some detailed boat building scantlings that let me to know I am on the right track with the boat.
I have learned this week that I should check my pants arse before I sit down on the couch. I had just finished gluing up the port side panels to first chine and staggered inside for my first coffee since breakfast. Tina had one ready and I sat straight down for a break, getting back up I left a fair size piece of glue attached to the couch and then Tina took a fair size strip of me. Ah such is marriage.....
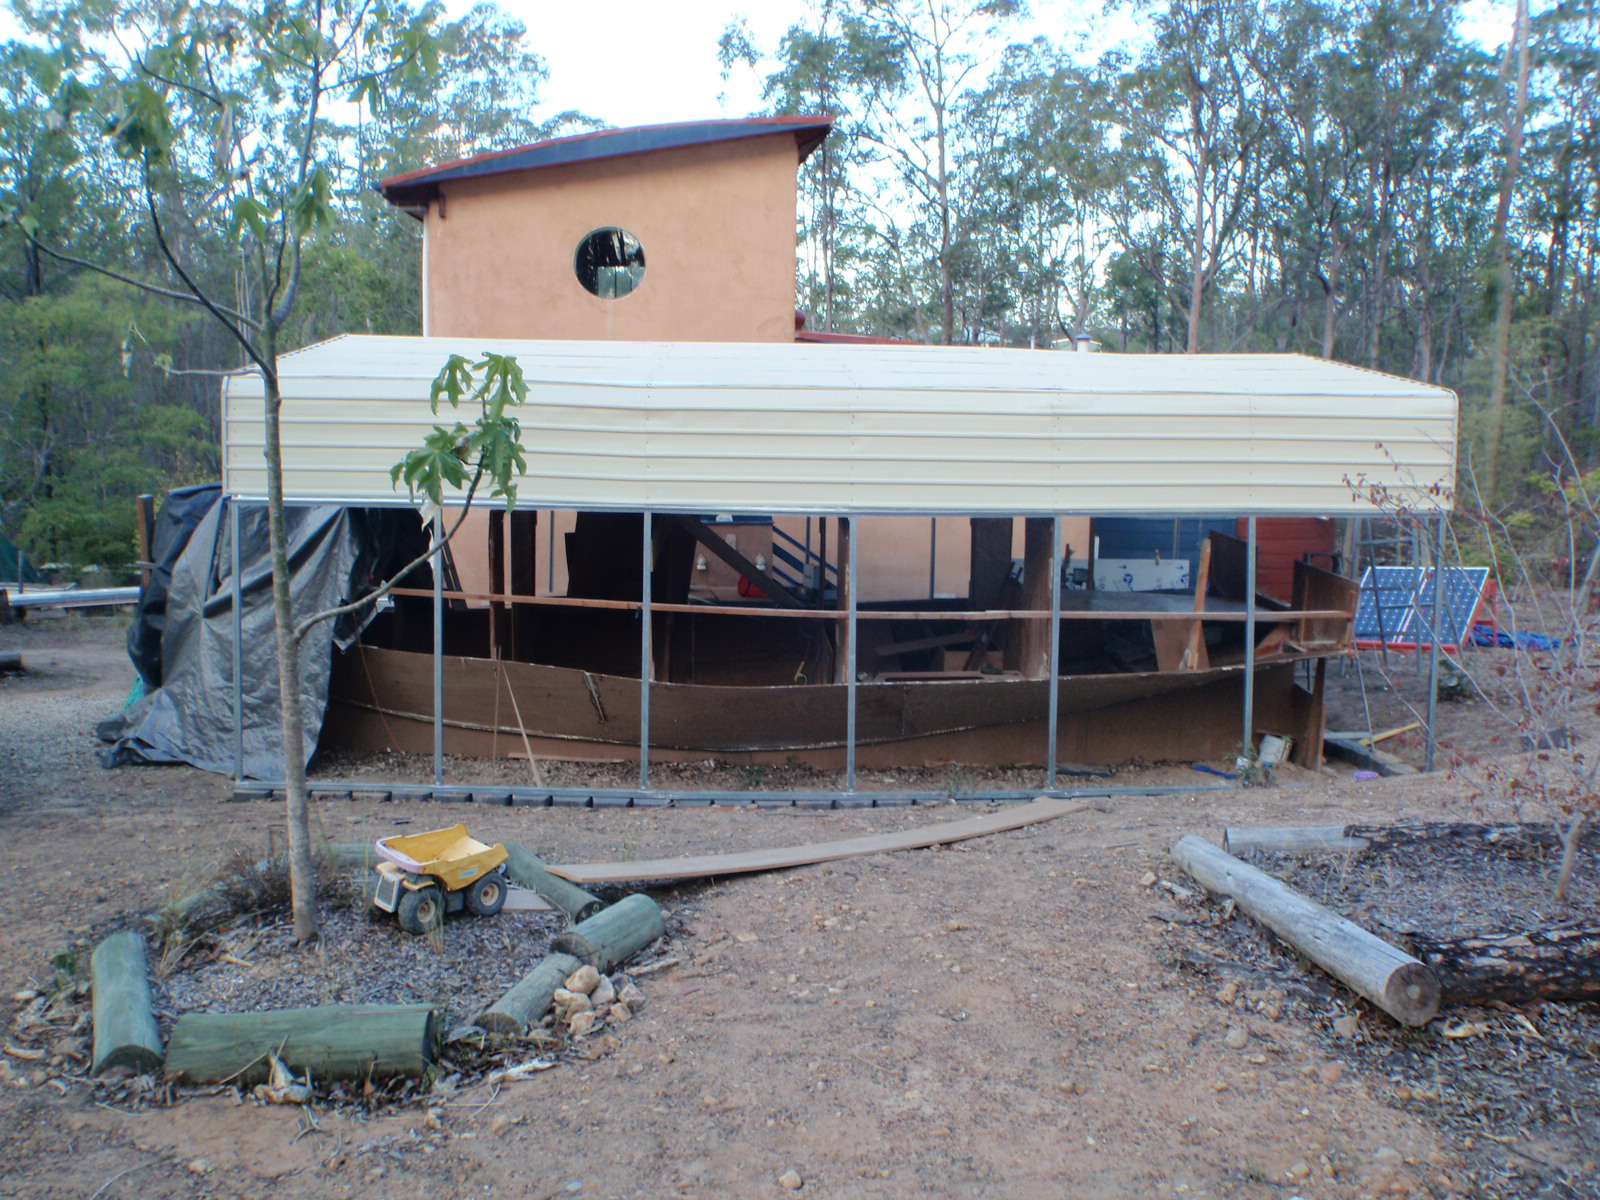
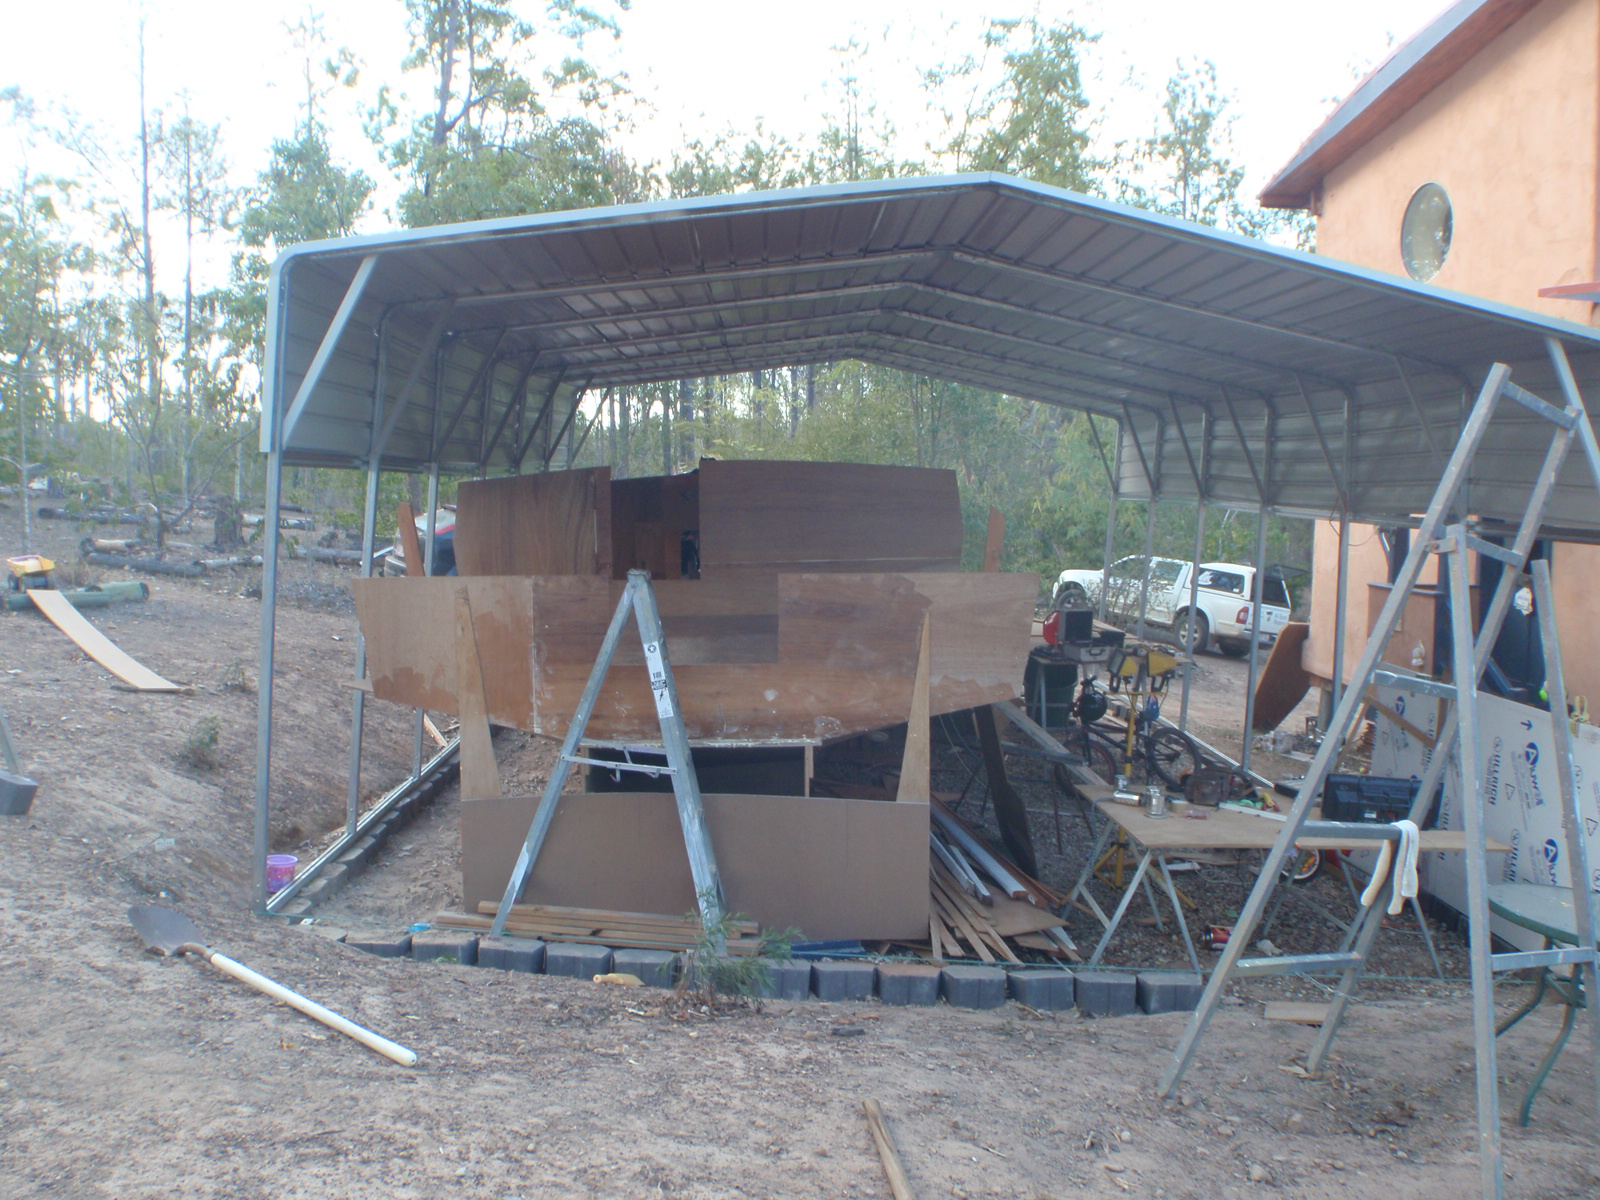
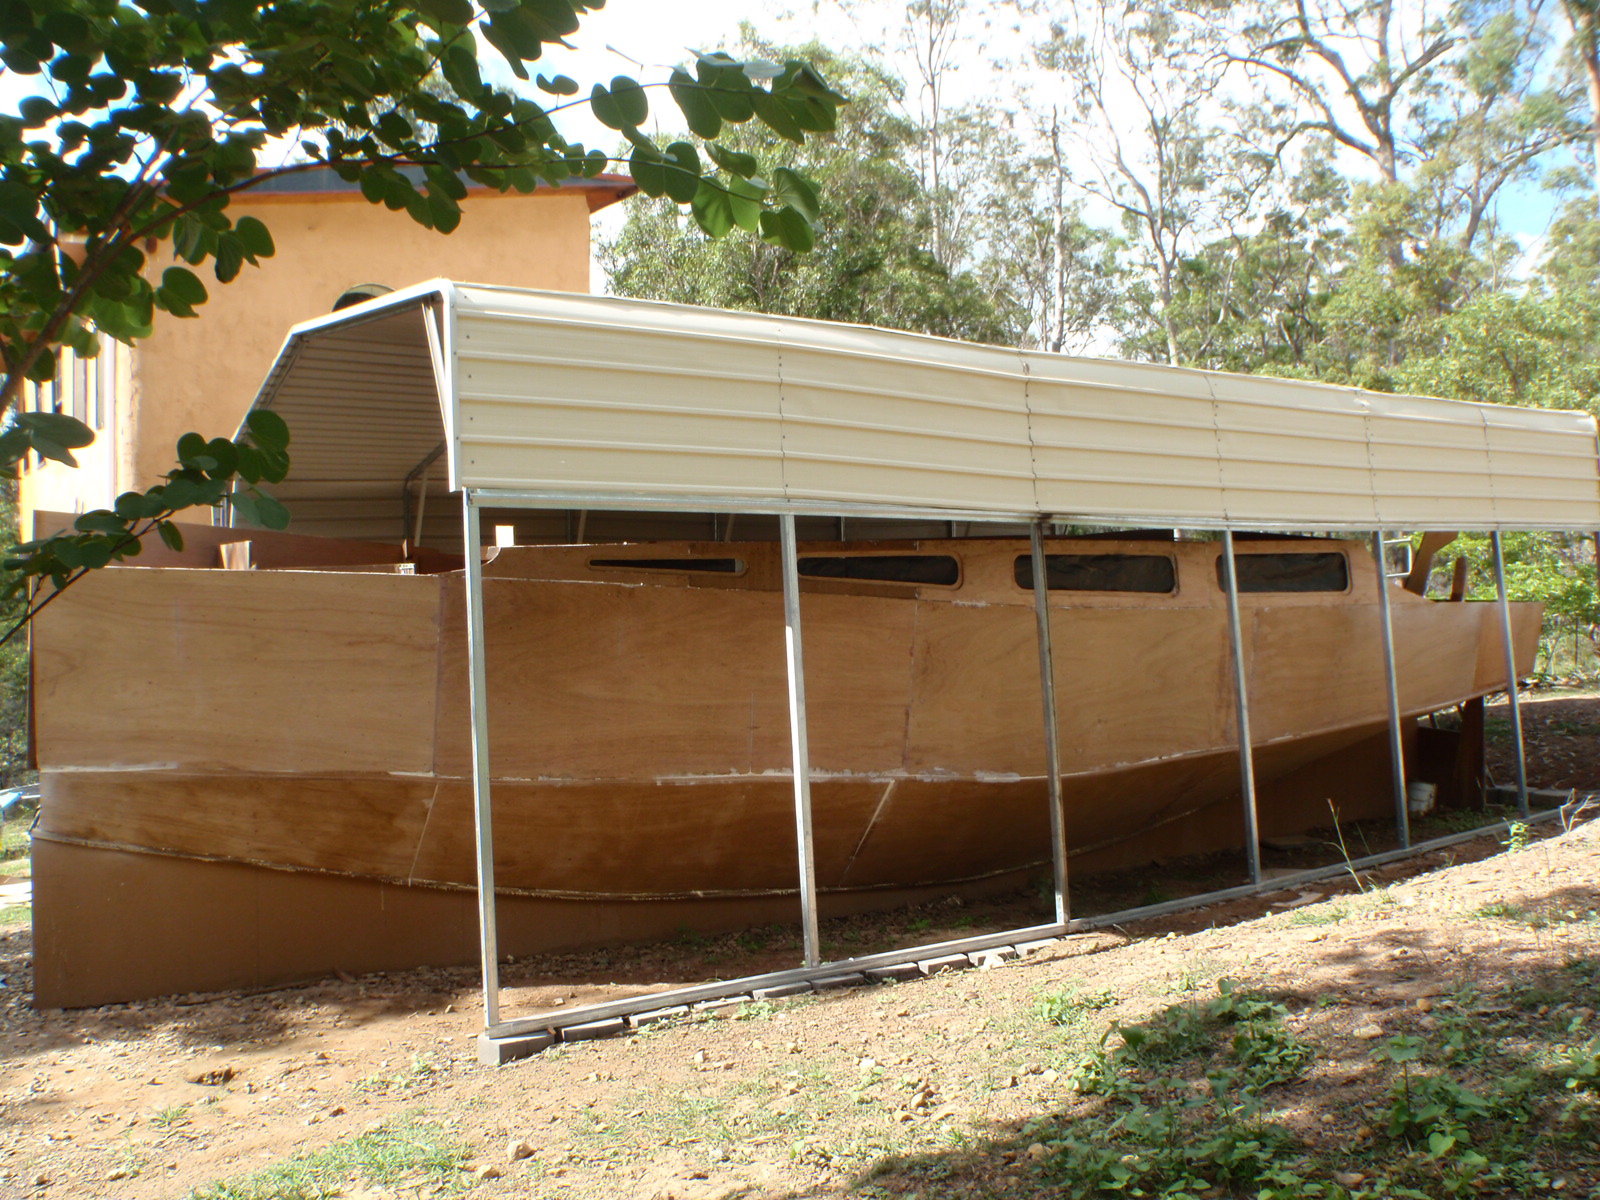
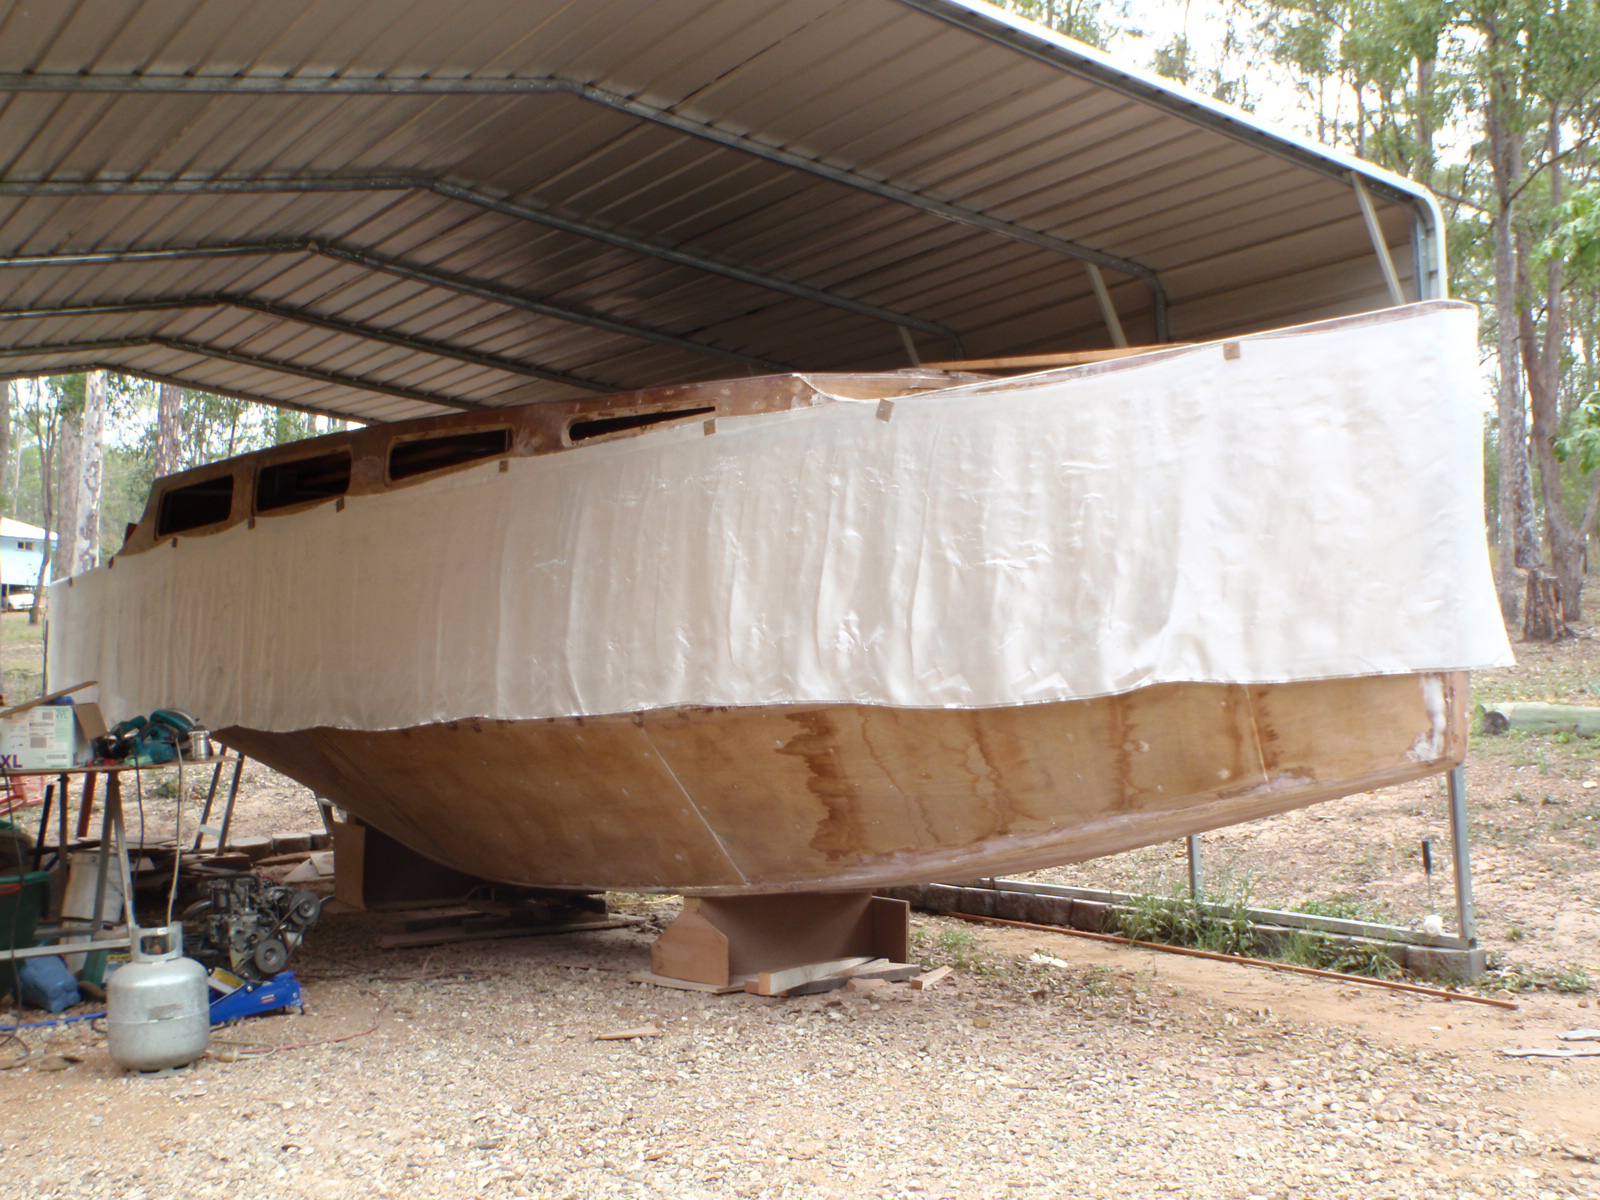
Well a lot has happened since the last time I edited my web page. I brought a Trade Tested 9x6 meter kitset carport and erected it over three days with the help of Blake and Jonah. Almost immediately my boat building efforts increased as now I didn't have to pack up every day and the Queensland sun was not trying to cook me. The shed was cheap ($2600 trust me that's cheap for kit carport) and the biggest pain in the arse was the roof sheeting was only 1200mm long. That caused us no grief as it was hard to line the sheets up. Anyway blah blah blah that's over and now it is full steam ahead. By the way if anyone has erected one of these in the 6 hours I was told it would take let me know?
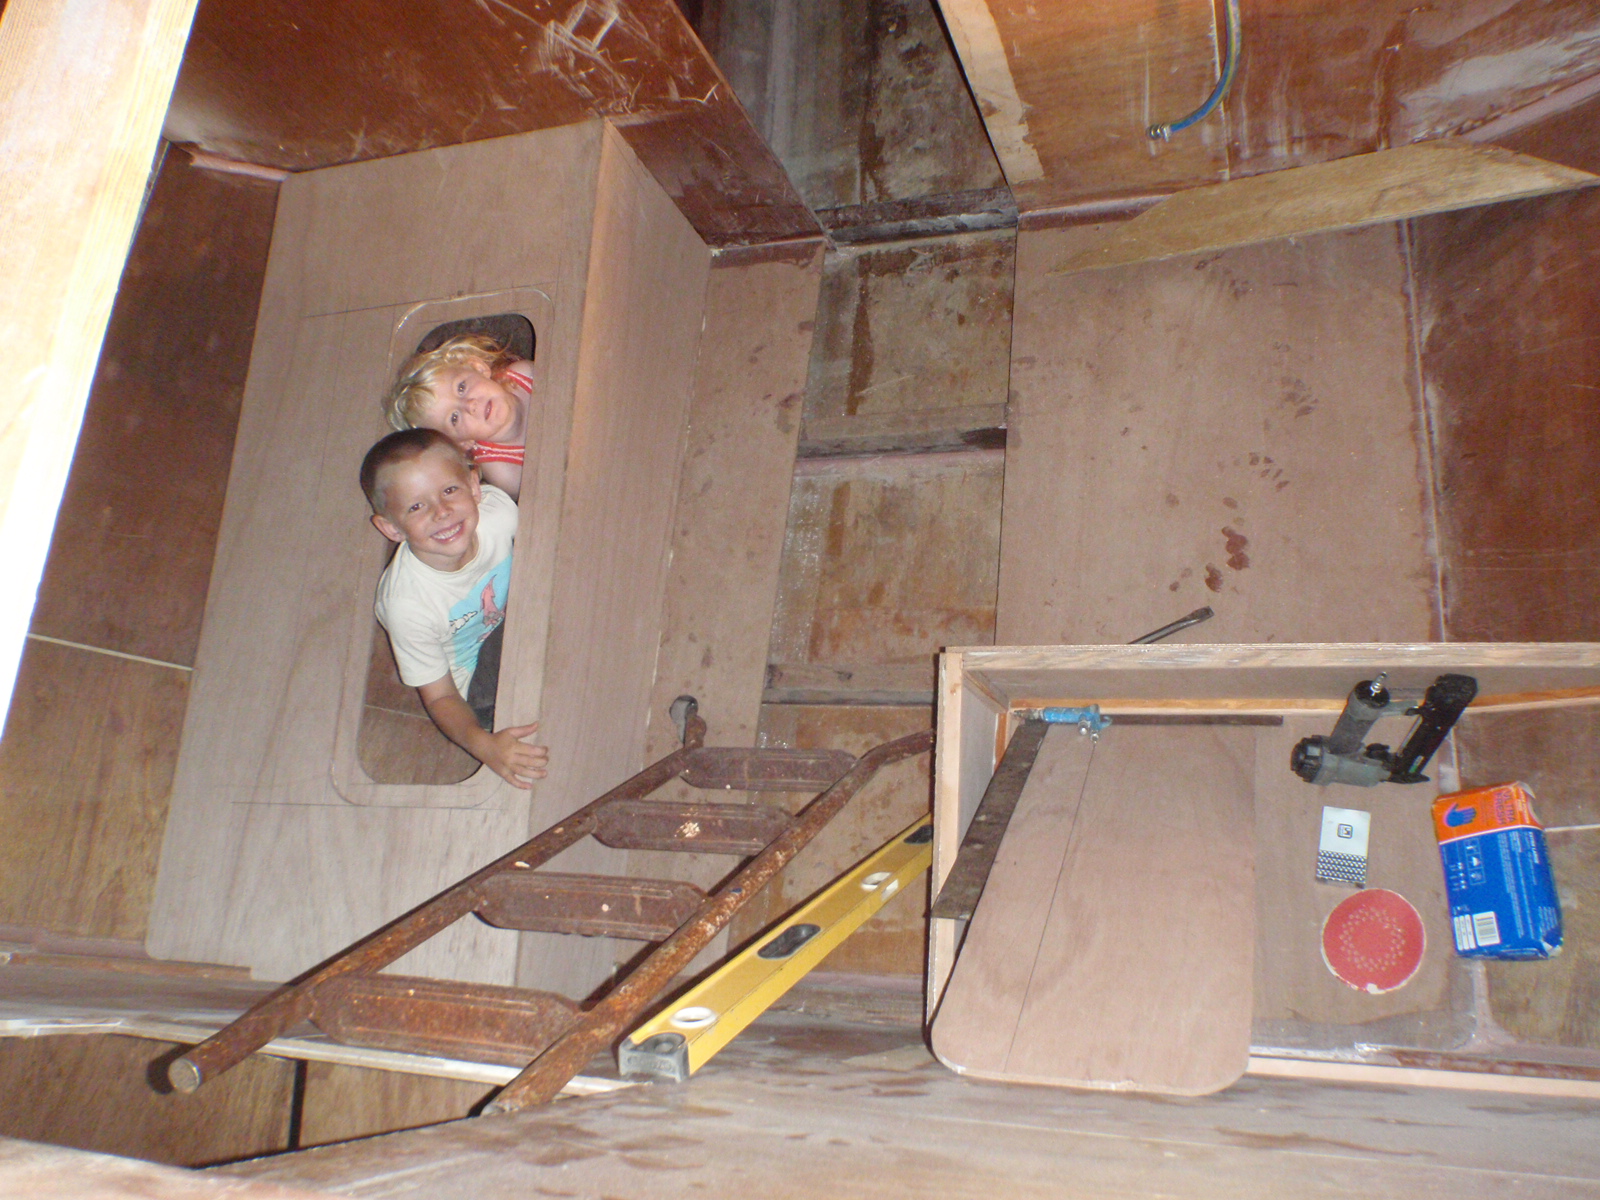
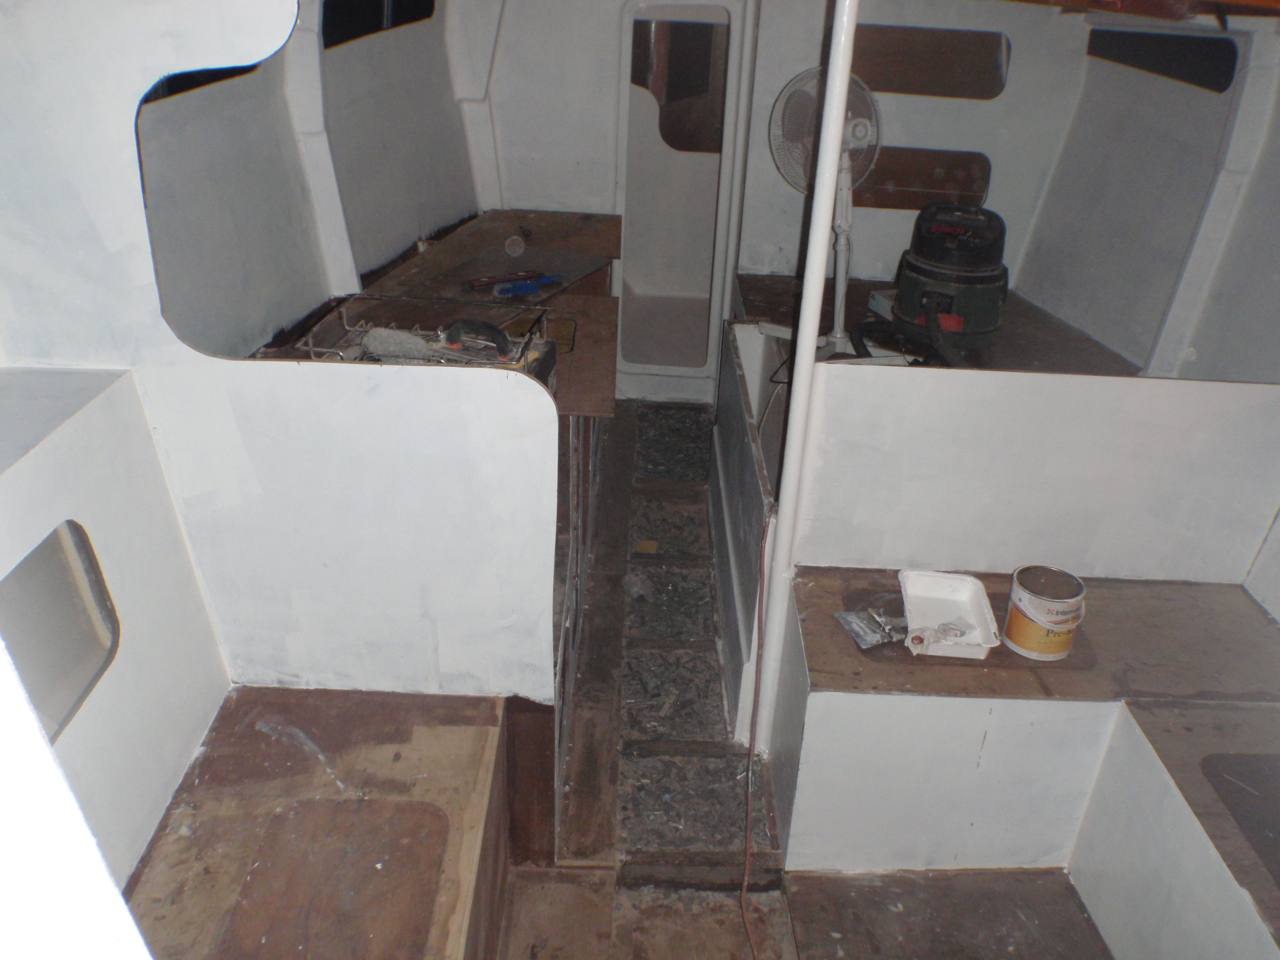
The photo on the left is our two kids Pippi and Jonah inside the port settee, directly across from them is going to be a U shape dinette, you can also see my brad gun in the starboard locker. This little beastie shoots stainless steel brads and along with Purbond (single pack waterproof glue) I can knock out a lot of joinery in a pretty quick time frame. The second photo is the bottom chine fiberglass tapes. The layup is 200mm wide tape then 300mm wide tape and then a final 400mm wide tape all done in 450 gram double bias cloth with epoxy resin. Devlin's book gave me the idea for that layup and it is really strong. I also second coated all the surrounding plywood with epoxy resin at the same time. That was a marathon glassing session and I had my 7 year old boy rolling all the air bubbles out of the fibre glass cloth. Nothing beats family when your building a boat.
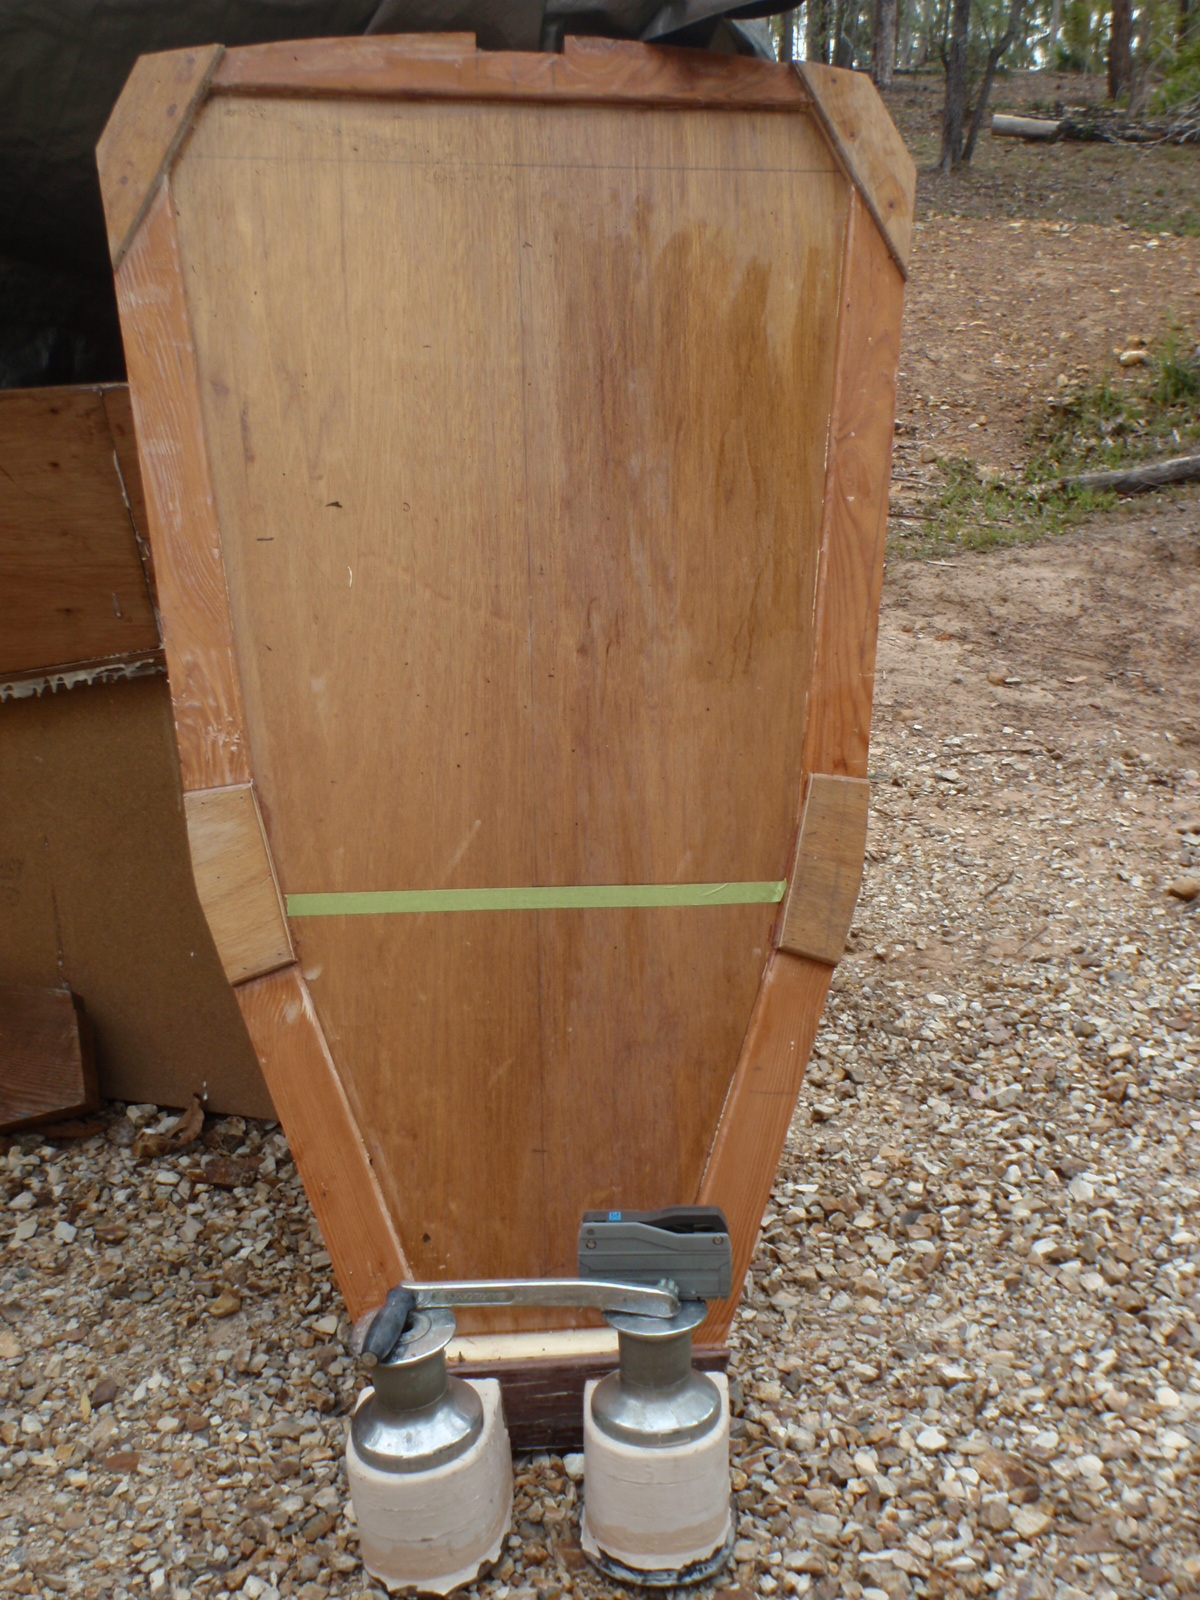
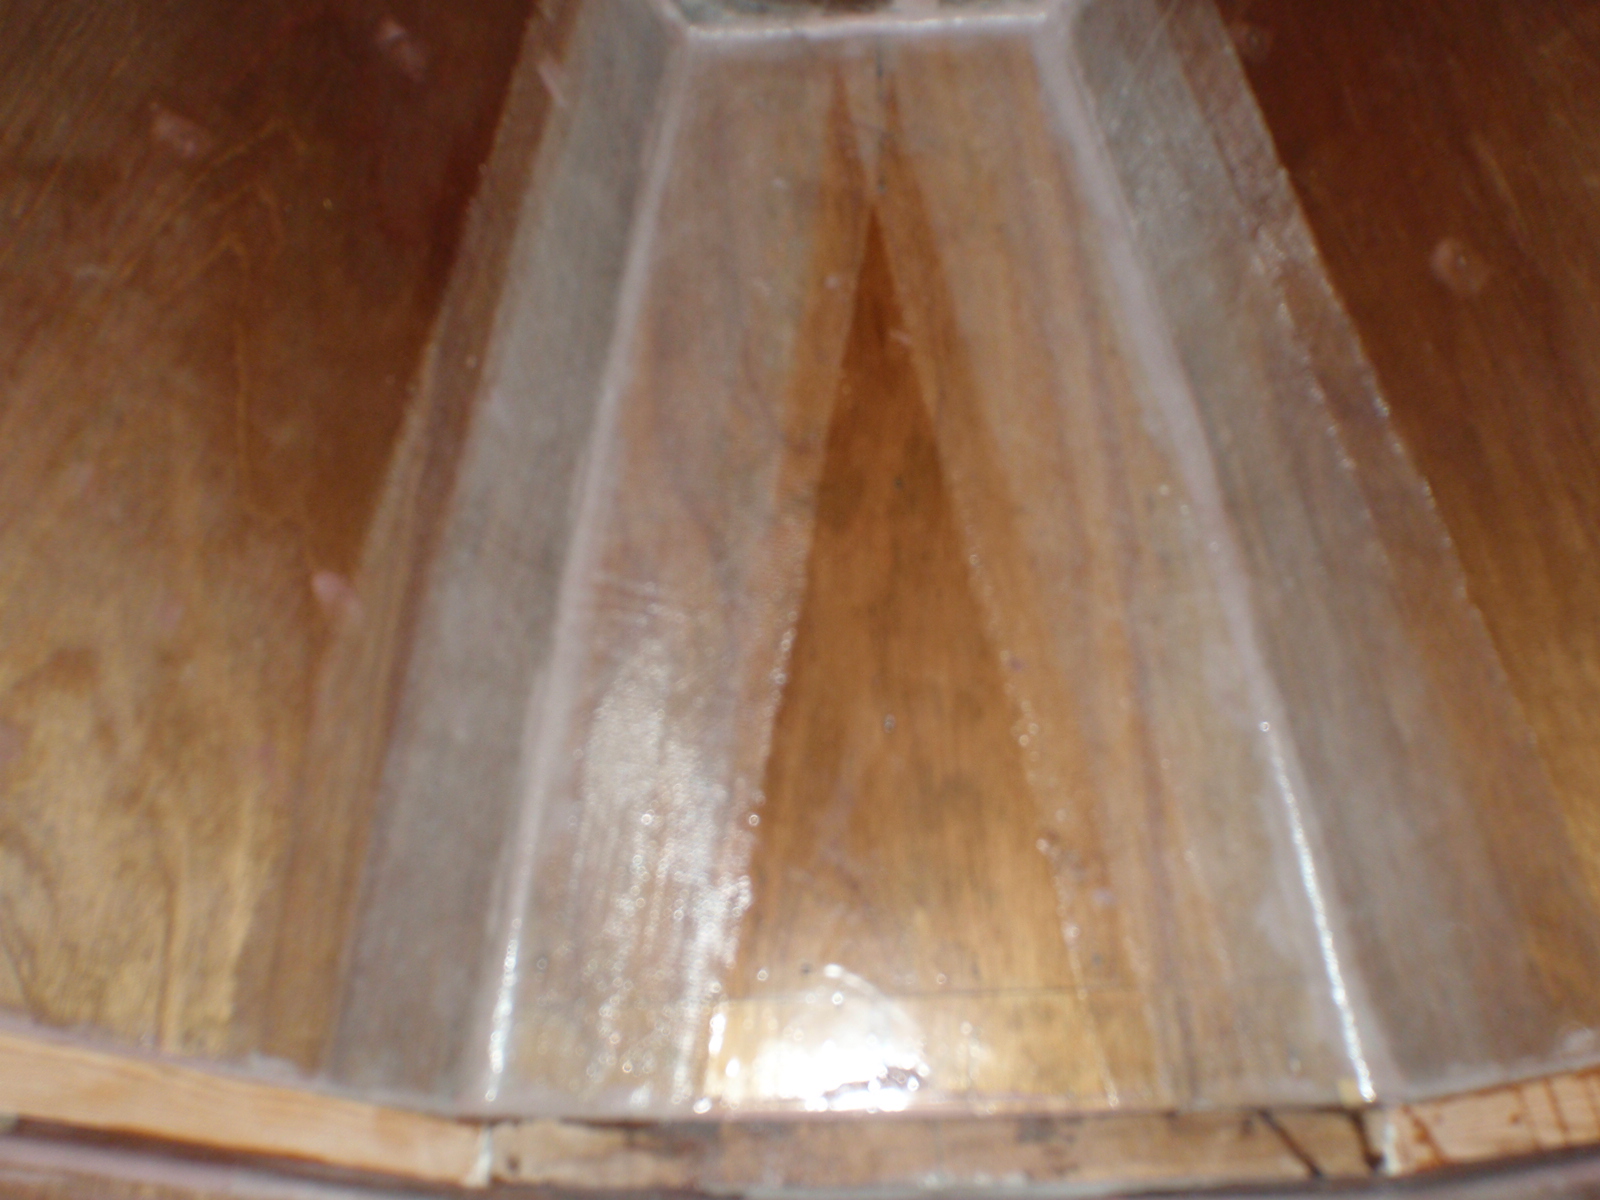
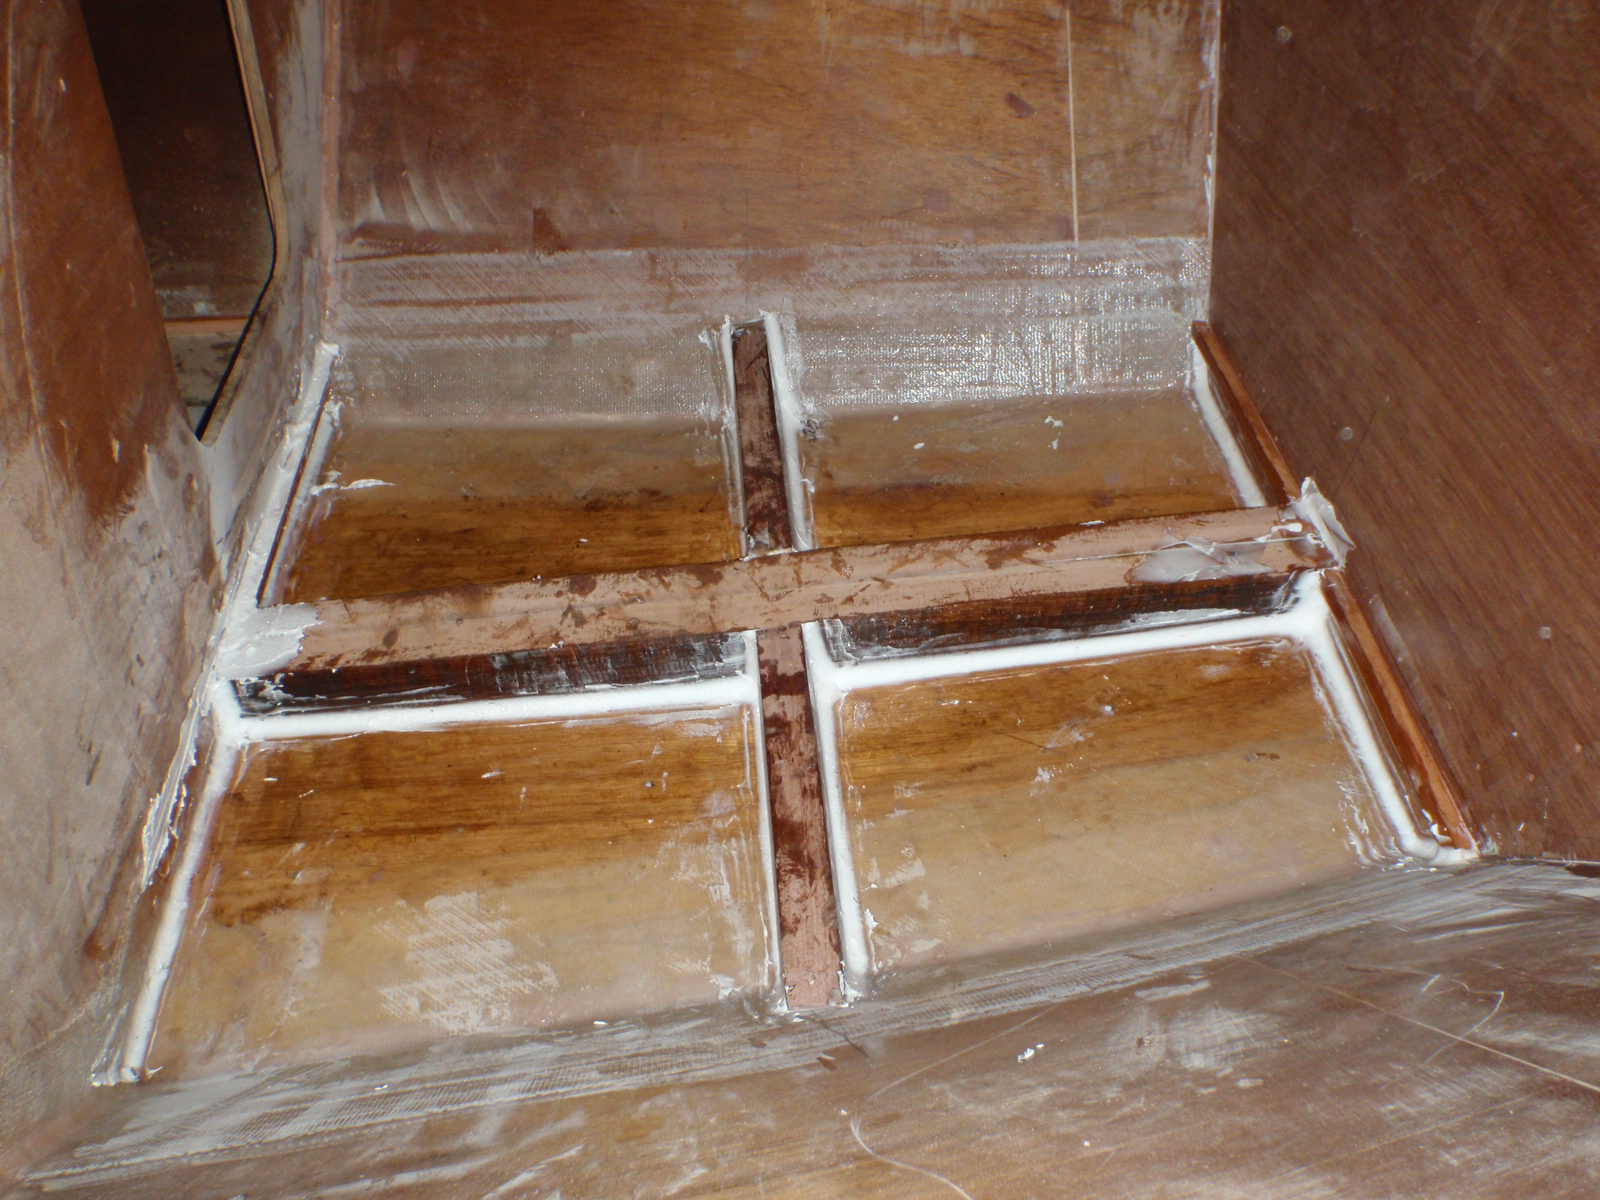
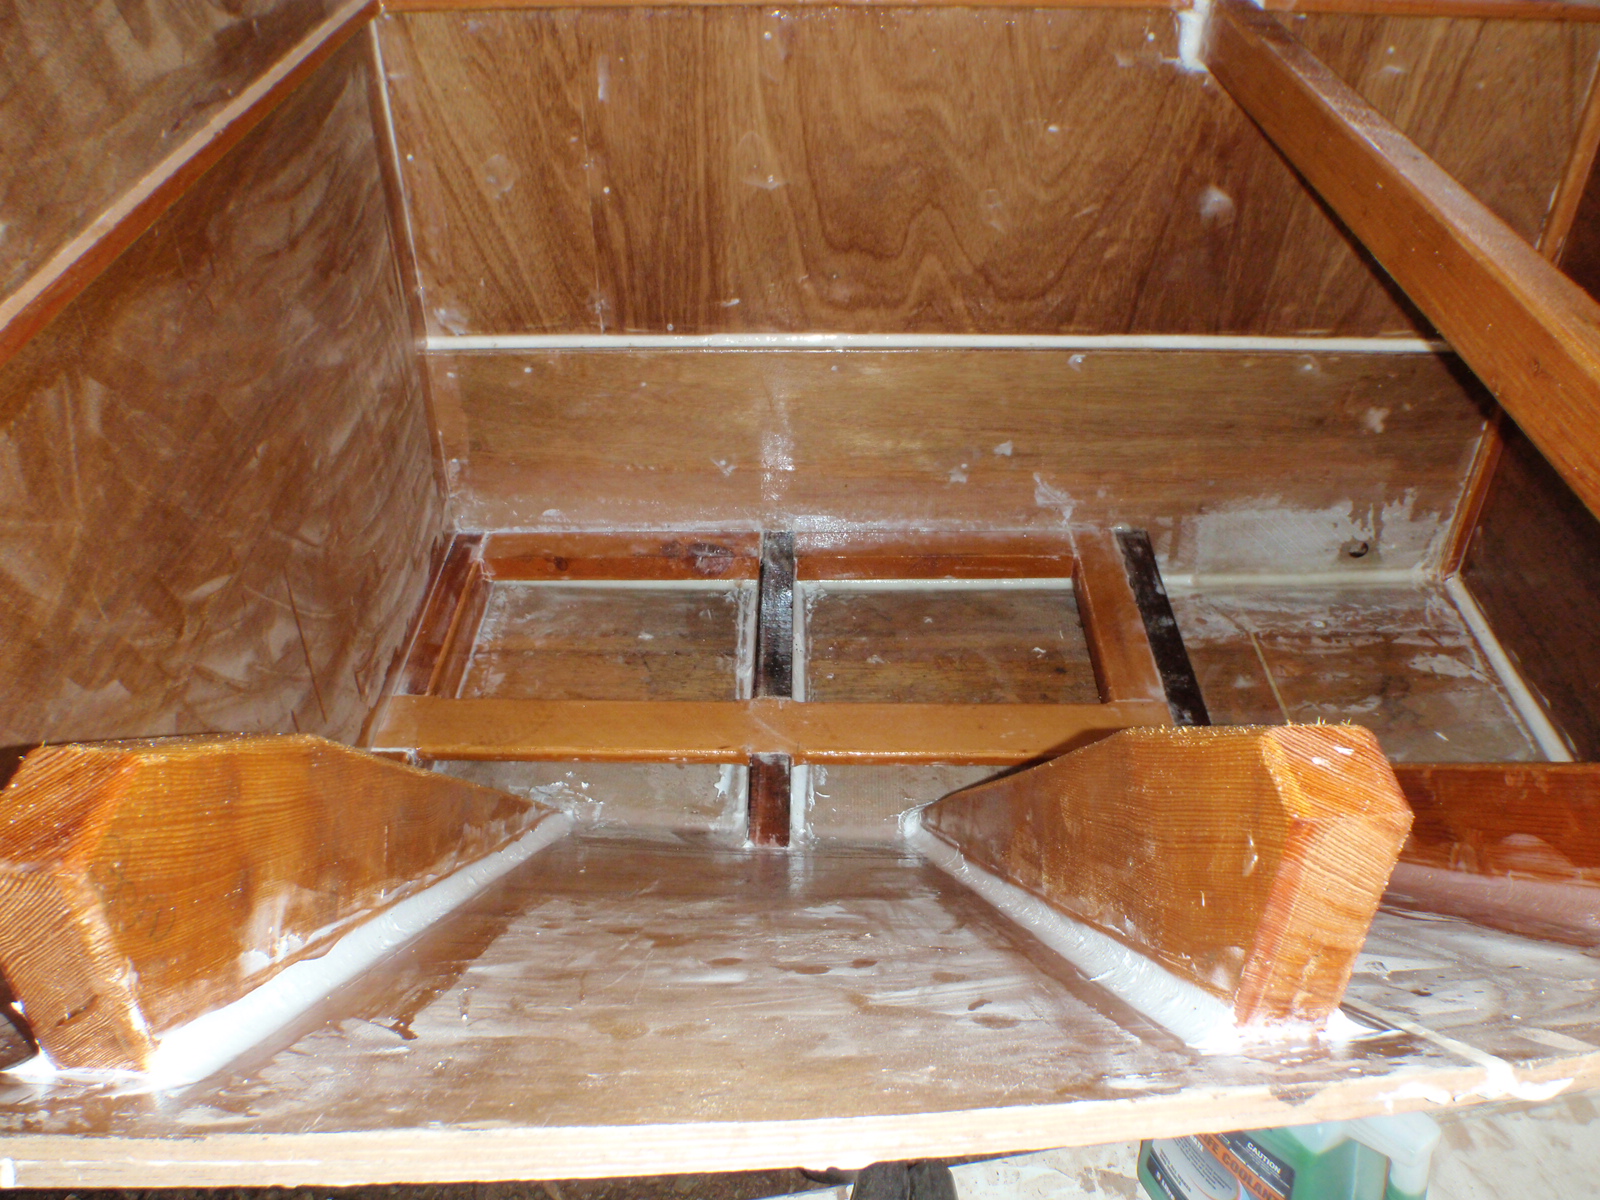
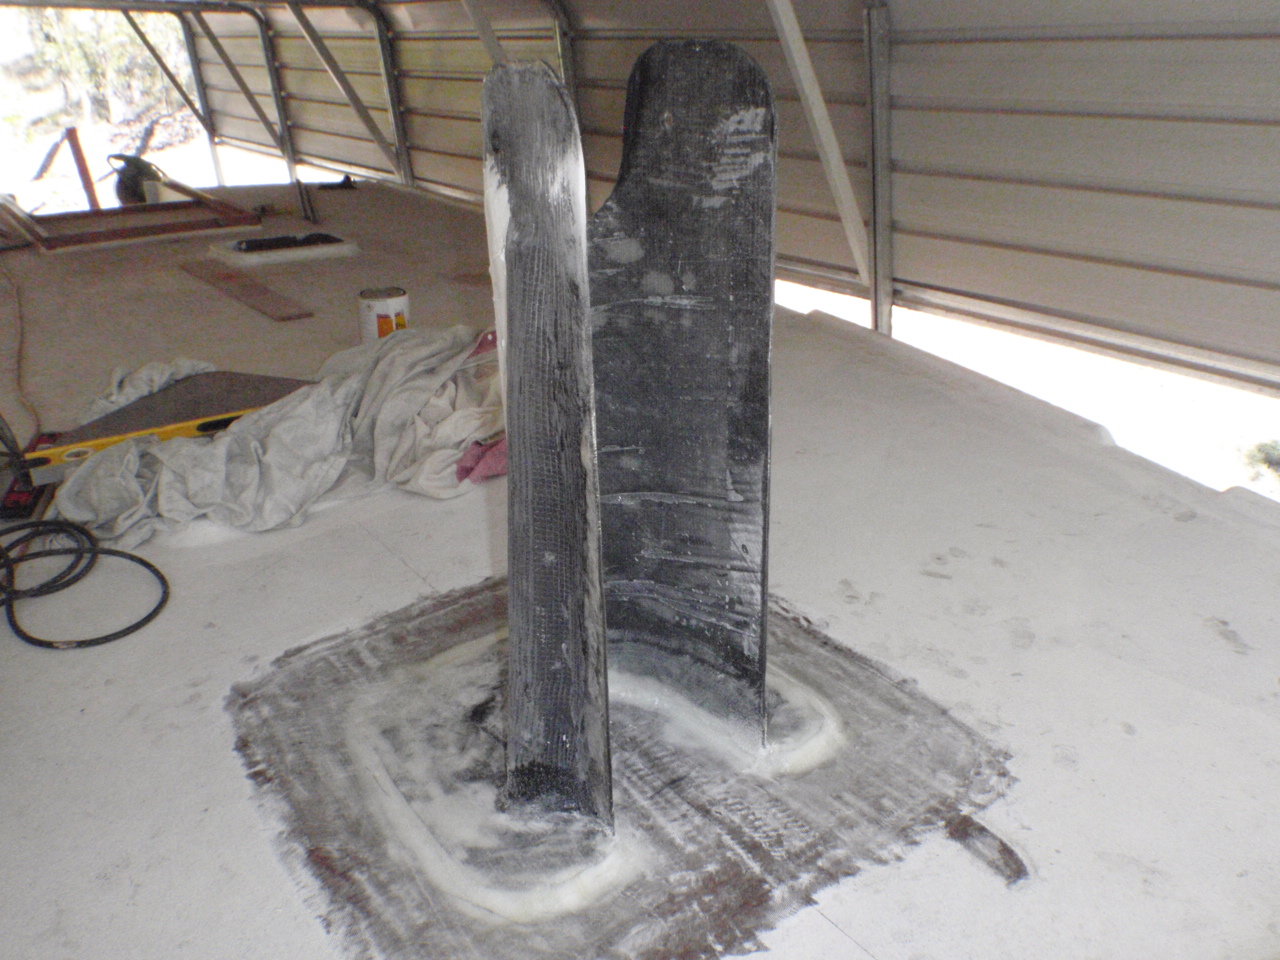
 That is the centreboard case in place finally, the photo on the right is a plywood pattern I made of the centreboard before I finished the case. In theory now as long as the centreboard is identical shape to the pattern it should work.....Anyway the case is 24mm thick each side then rebated into the hull bottom, then another layer of 15mm plywood glued half way up the side, then three layers of 450 gram double bias glass around the case. All the floor framing is hardwood 100x50, glued then coved. The lesson learned today is that if you let your 7 year old use your heat gun to clean your spatula it is only common sense he will try and see what else he can melt. So I can only laugh when he melted the air hose and now it is five feet shorter.
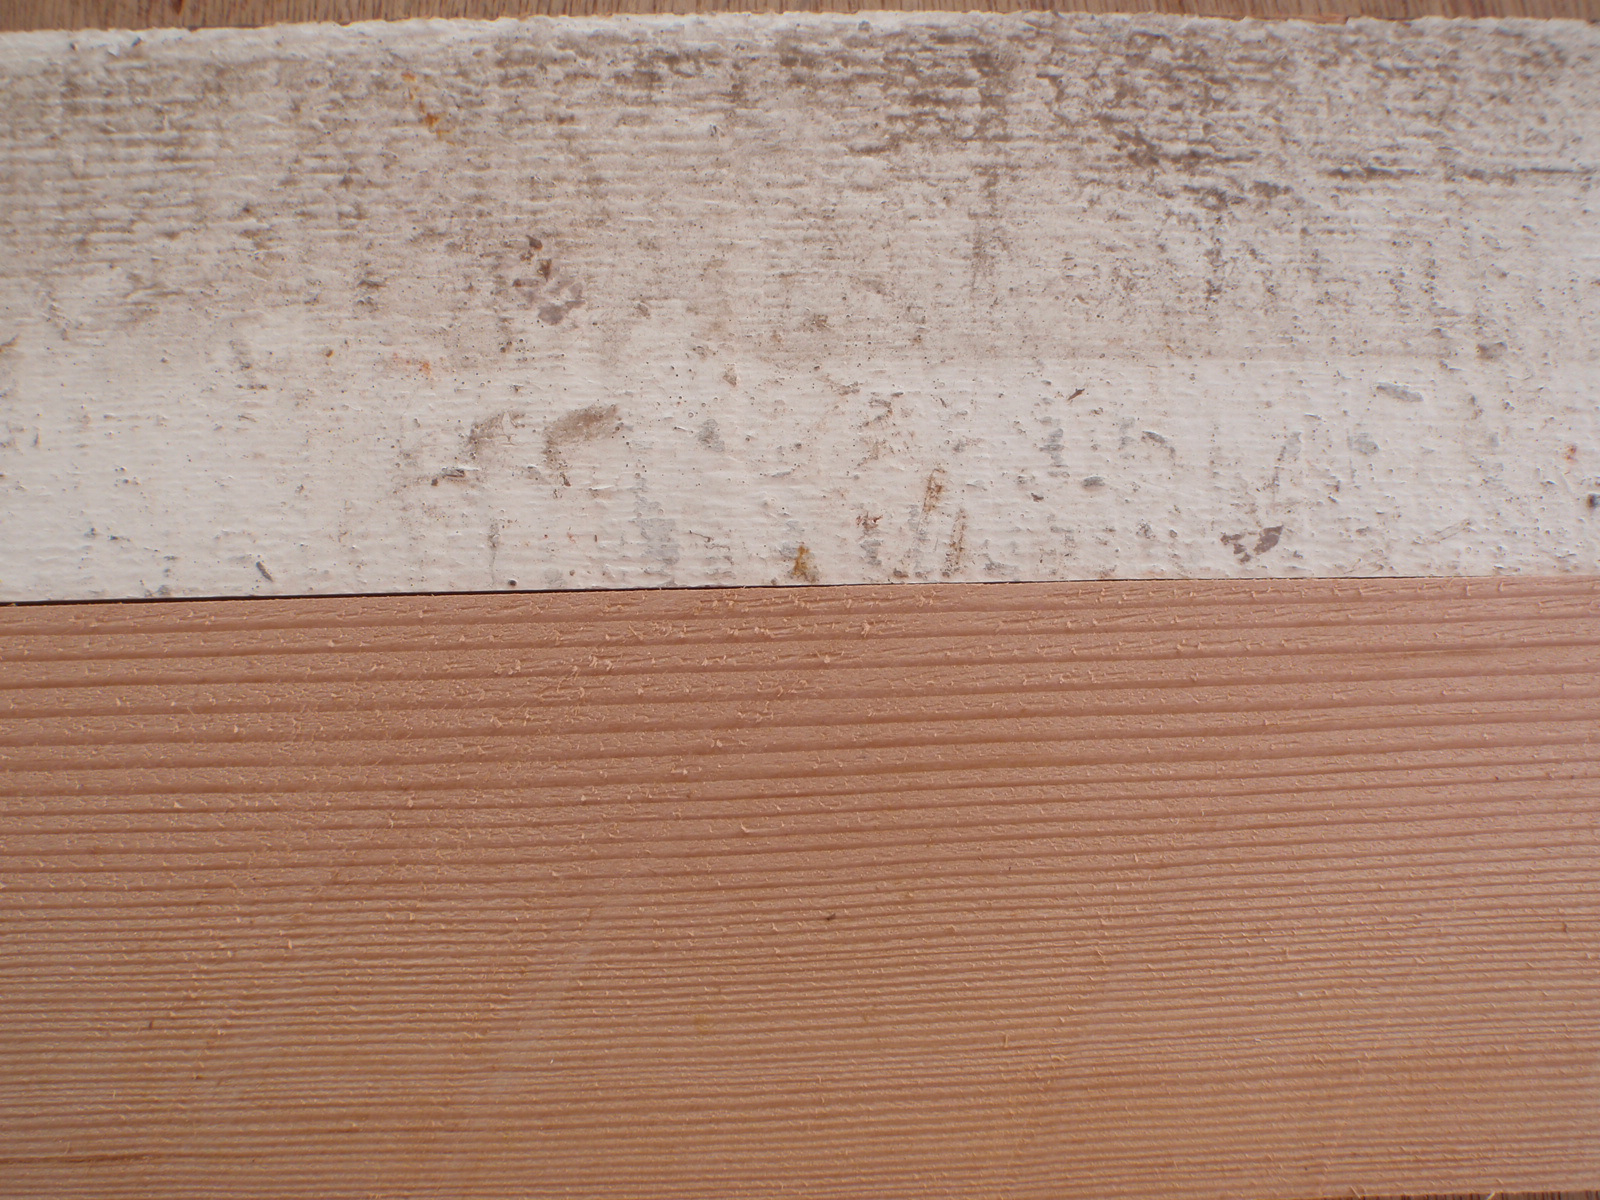
The photo on the left shows what I love about recycled timber. The top half of the photo is a piece of shitty painted Oregon that I am buying for roughly $20 a meter (250mmx50mm). Then when I get it home I machine it up and the result is the bottom half of the photo. Pretty sexy I think.
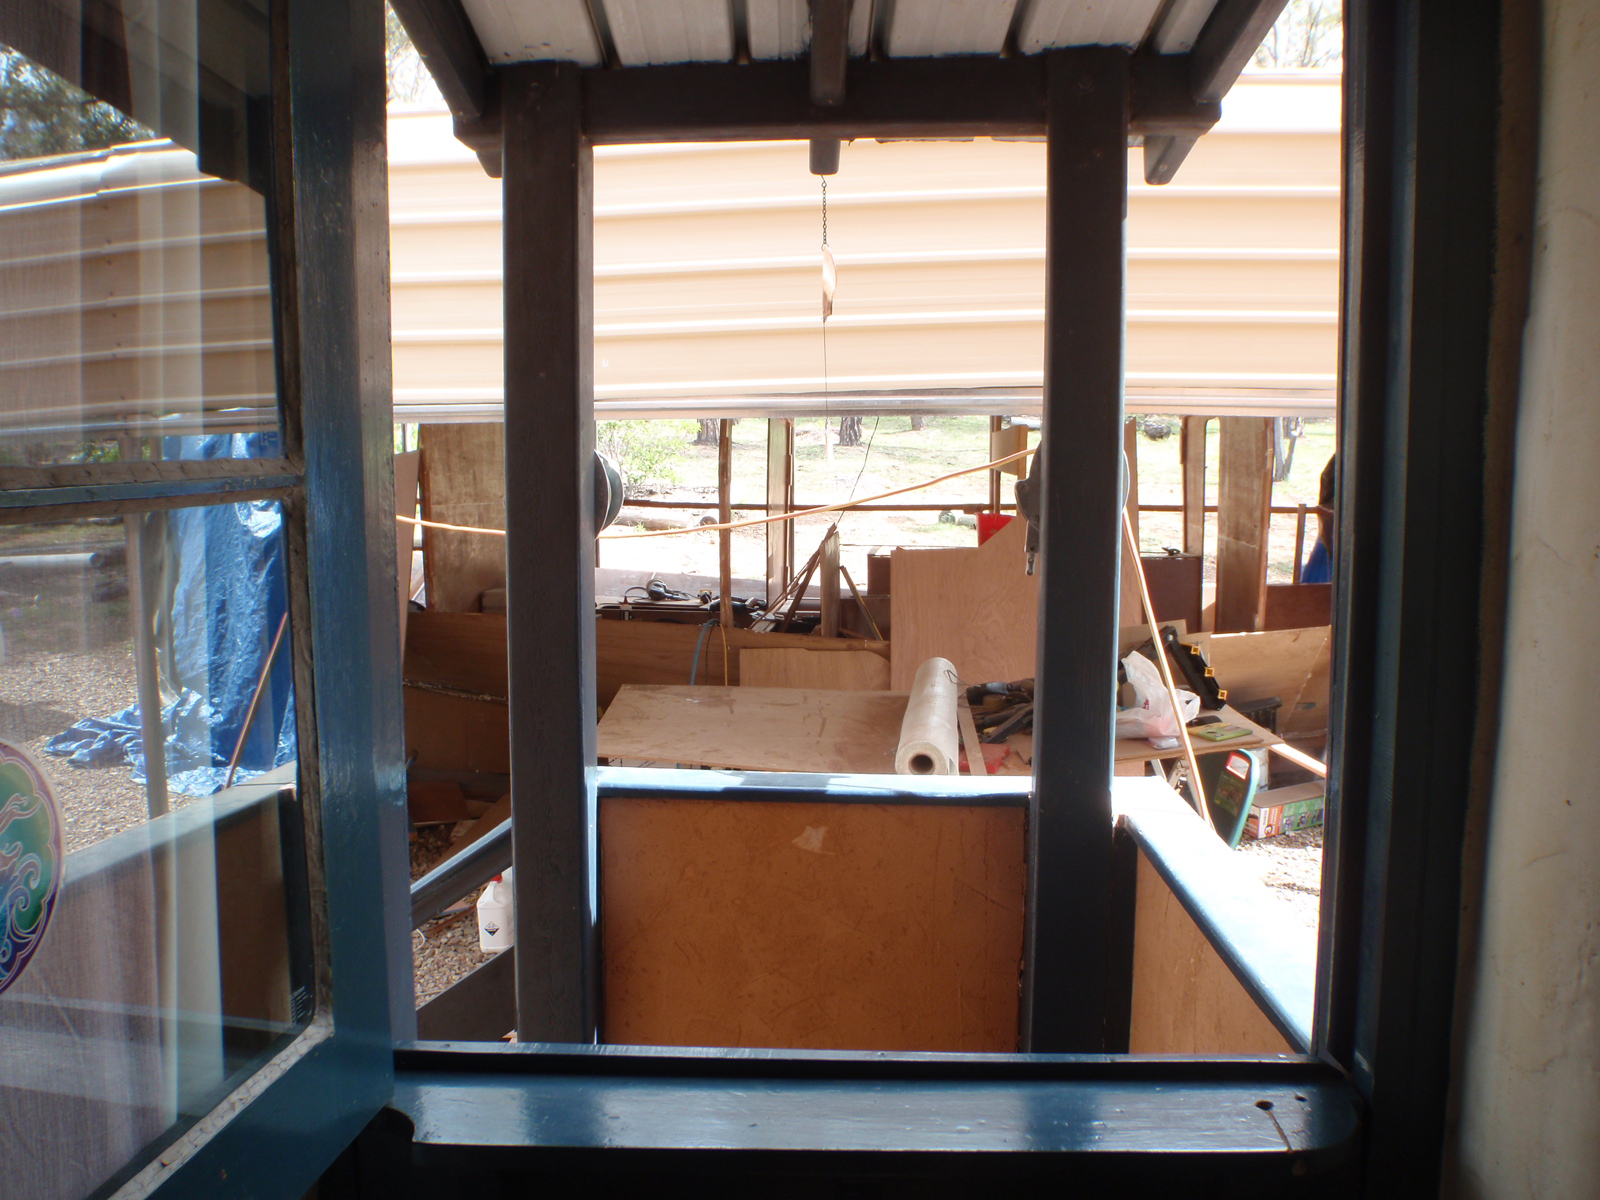
The next photo is the reason why I am so slow getting my surveys done. As soon as I step out the front door the Volks Cruiser is just begging me to work on her, so the choice is writing a survey report or getting my hands dirty. It is a no brainer really, anyway whats a few days between friends?
My lesson learned today is not only do the kids borrow my tools but Tina is also on the act. I had to use a clamp as a hammer today until Tina and the kids got home from the school run. Then I asked Jonah the usual suspect where my hammer was? Before I could accuse him to much Tina piped up and said she had been using it inside! Bloody hell worse than working with my mate Erik.
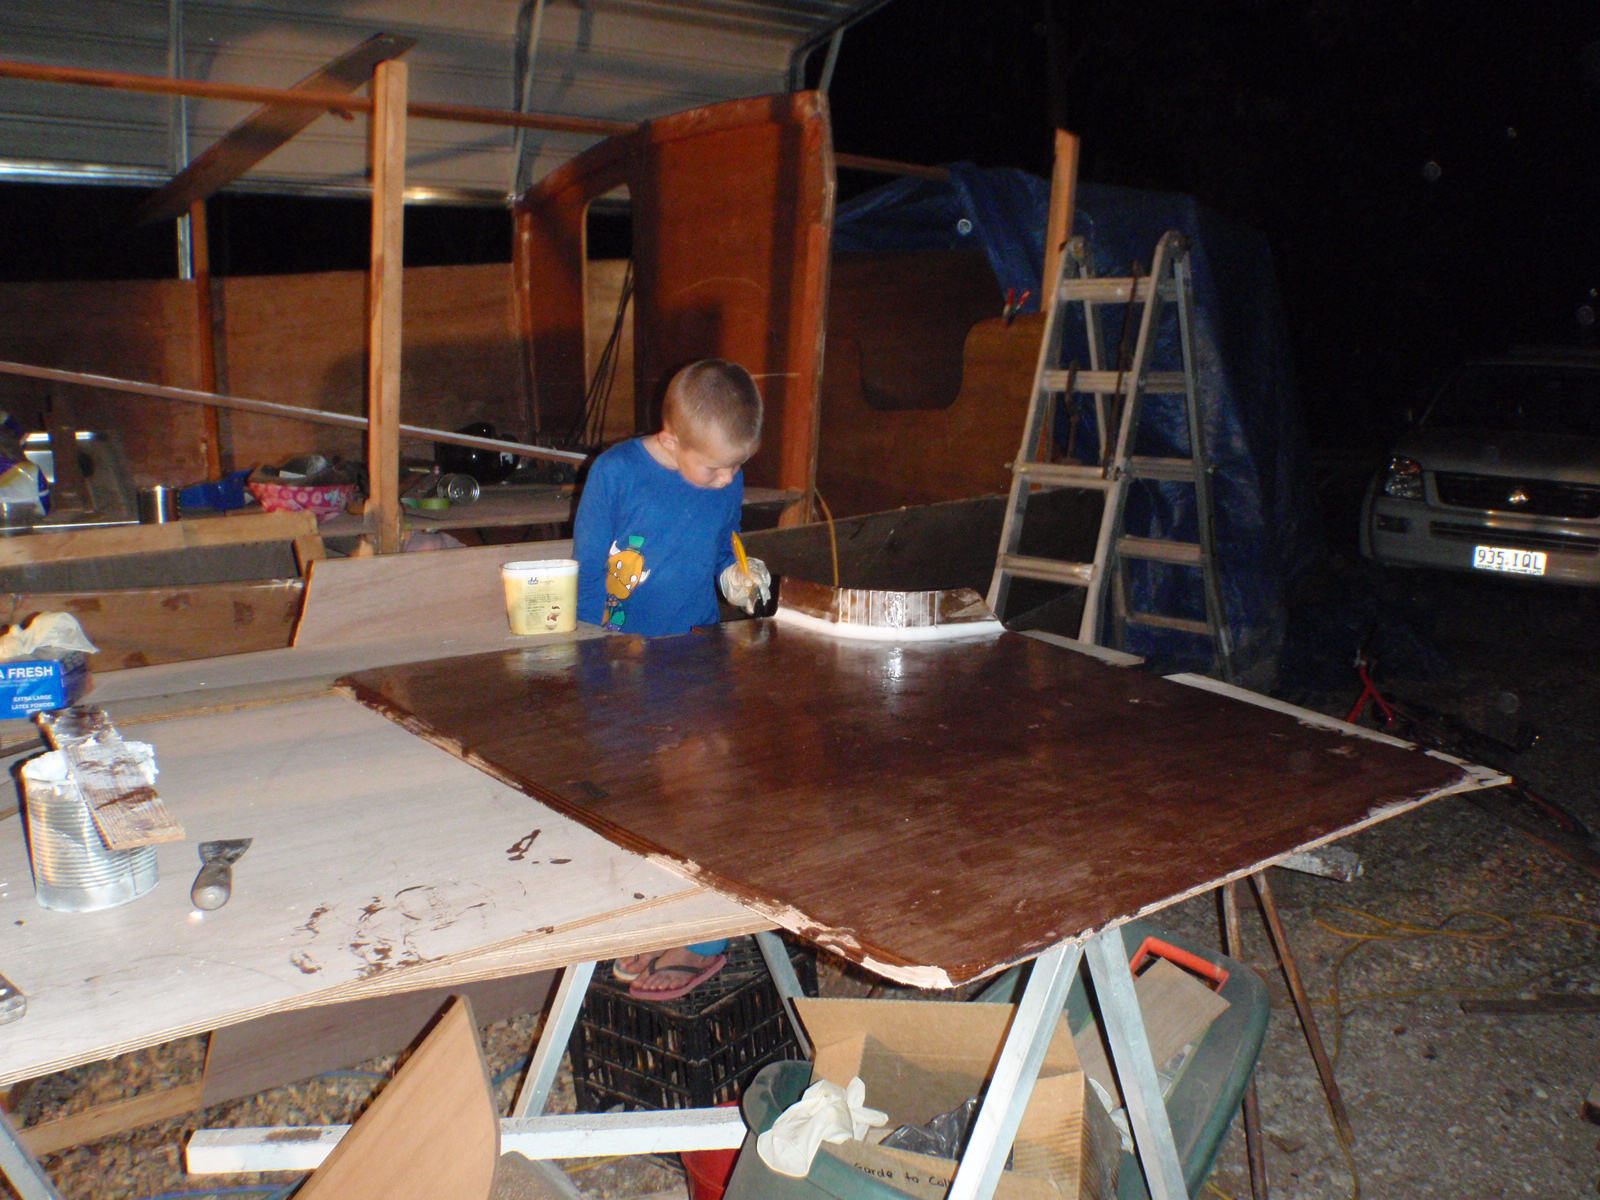
The photo on the left is off the shower/toilet floor before I glue it down. Its all hardwood soaked in epoxy resin then a layer of 9mm plywood glued on top. the white cove is a glue powder and Q-cell mix. The second photo is Jonah epoxy resin coating the bottom of the plywood panel. These sorts of jobs kids love and with a bit of guidance they do it well. He fully understands that he must wear gloves and keep the epoxy off his skin. Another job Jonah does is drill holes with a 25mm spade bit, he drills from both sides of plywood and then sands them smooth. These sorts of jobs are never going to be seen so a couple of epoxy runs or extra splinters are not going to worry me.
The lesson learned this week is that if you keep an eye on your kid he can actually be very useful. Not just a vandal with a heat gun.
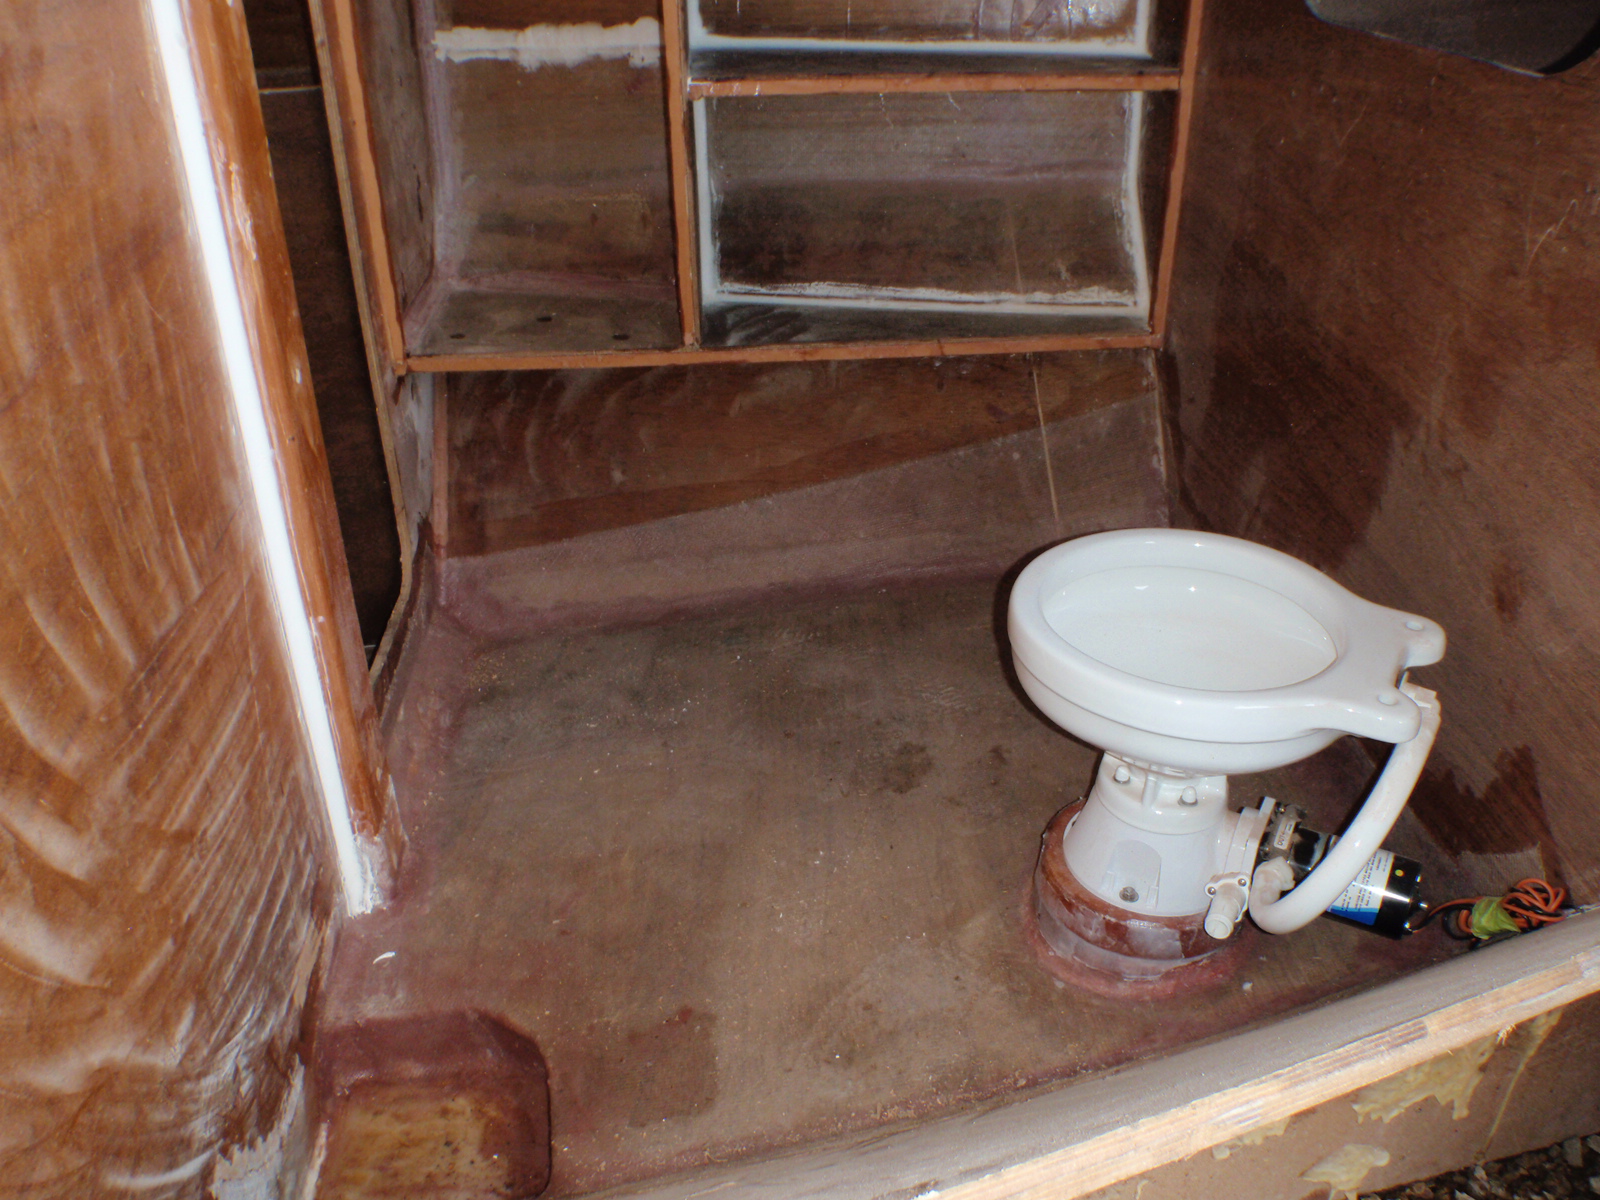
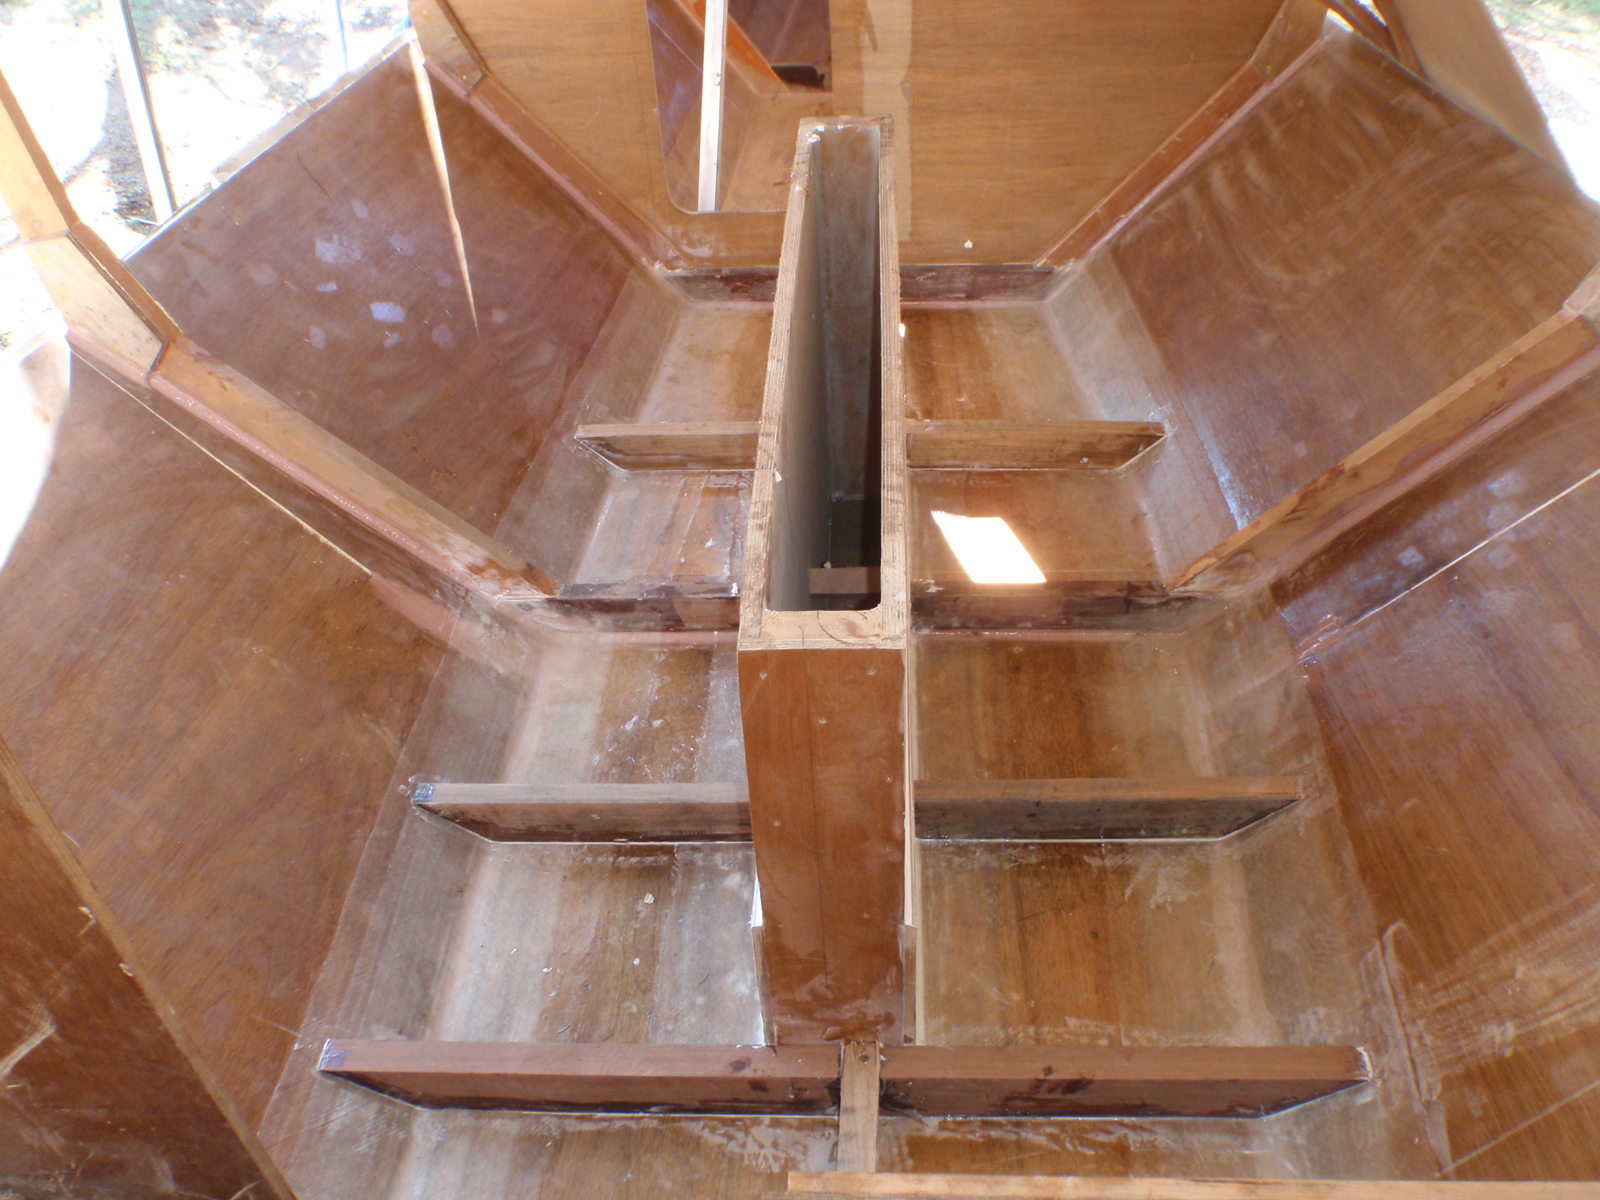
The photo on the left is the starboard side of the centreboard case, this is where the 400 litre plastic water tank is going. The right hand photo is the toilet base and shower floor all glassed in place with the lockers in the background. The idea with the shower floor is that it all slopes to starboard and drains into that little sump which will have a bilge pump with a float switch in it. The toilet is Jabsco electric my favourite by far.
I have learned this week not to rush my epoxy mixes on cold nights. For the last week I have been finding sticky spots on the boat in the morning after having finished resin coating the plywood the night before. This has made me super careful with my mix ratios and making me mix the resin very well and I was still getting the sticky spots in the morning? The other night I ran out of resin and mixed up half a cupful to finish the job. Well no surprise in the morning this was a sticky spot, I am using slow hardner but usually the residue from the old mix helps kick it all off. So now at night I mix the resin then wait five minutes and surprise surprise I have no sticky spots in the morning. It must just need that time to start to react with itself instead of being brushed onto a cold surface then having the temperature keep dropping all night. Anyway it works so that is all that matters.
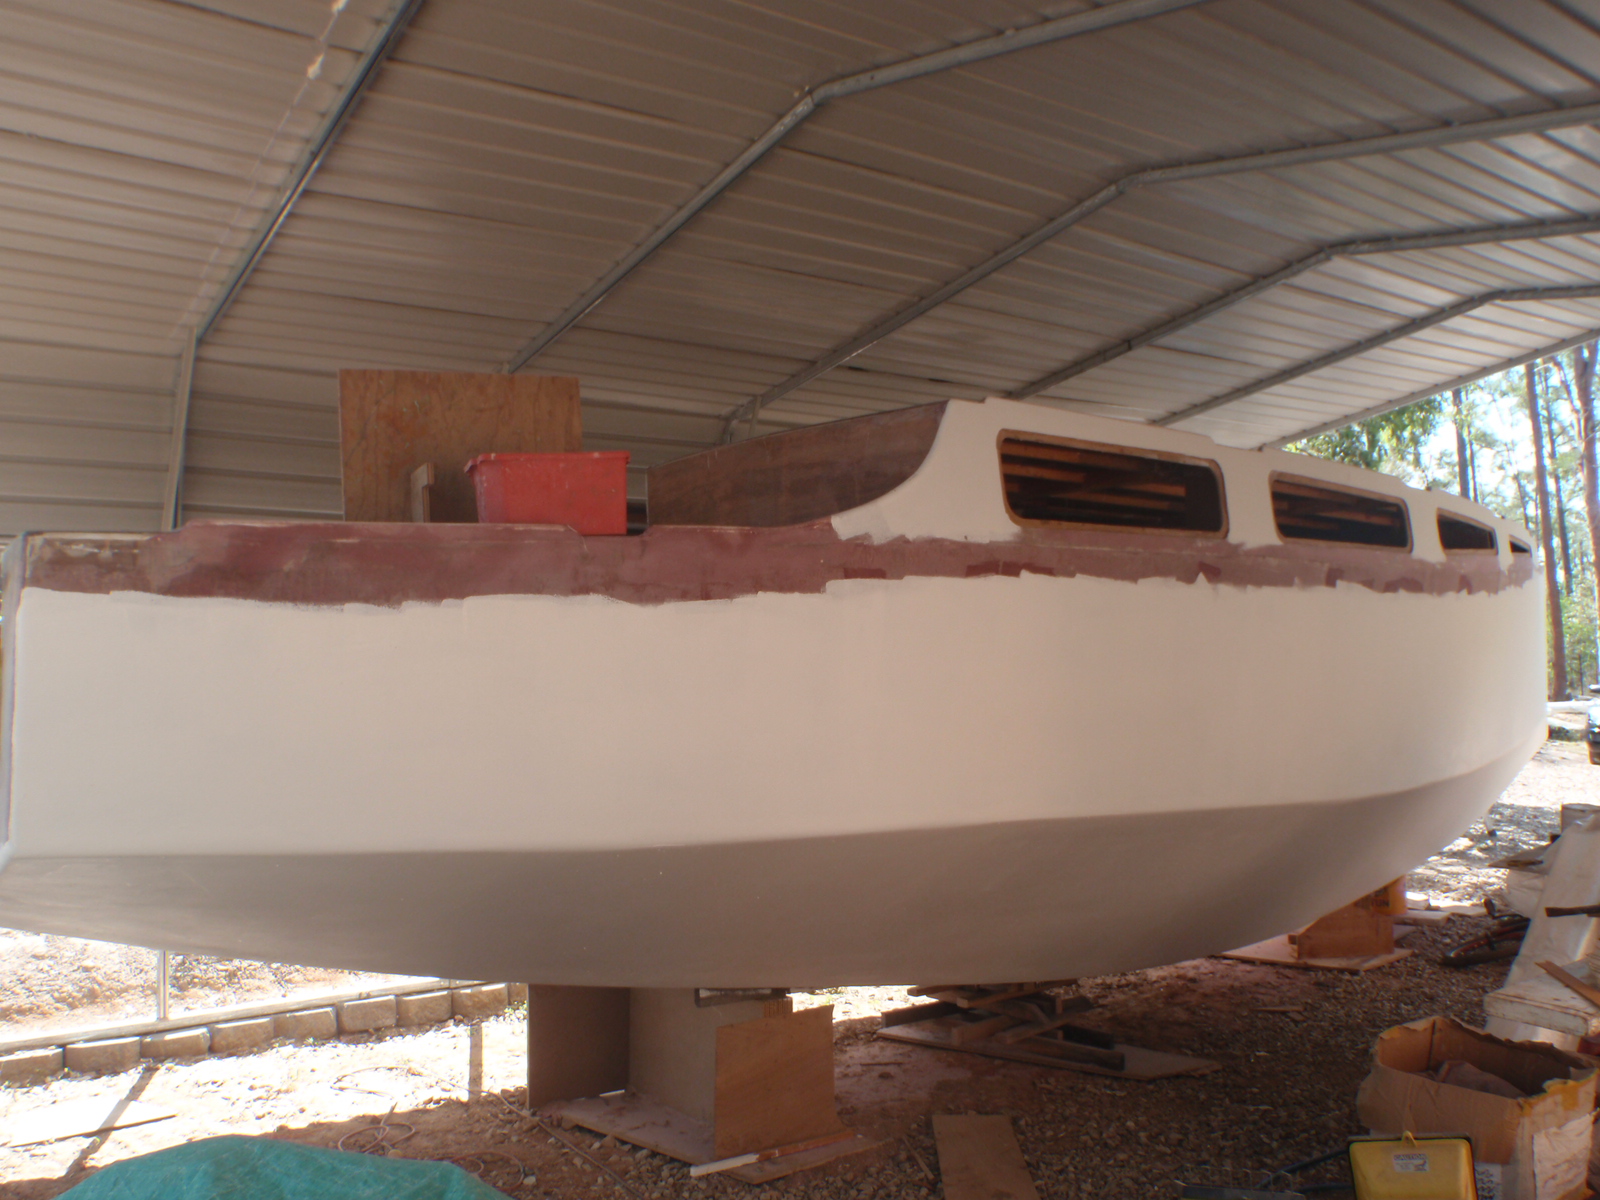
Well that is the port side cabin side on, now there is just the fairing and glassing to go. The starboard side has all the sheets roughly fitted and yesterday after blasting and bumping around Tin Can Bay on a Hartley 16 I came home and cut the sheer and trimmed the sheets ready to glue together. Which after my coffee today I am about to go and tackle. This is a messy job, using at least eight litres of glue and hundreds of screws with washes to help spread the pulling power into the timber. I then remove the screws and washes later. The only screws that remain are the stainless screws into the frames. A big glue job like this involves good planning, slow hardener and plenty of speed. The biggest hassle is holding the screws with latex gloves and not getting the gloves caught while you start the screw into the plywood. On this type of job I have boxes of gloves inside the boat and outside the boat. I have seen some bad cases of epoxy poisoning and it would ruin my career if I got sensitised to epoxy resins.
This week I have learned....actually it was just yesterday that even though you have a centreboard and shoal draft you still cannot walk on water.
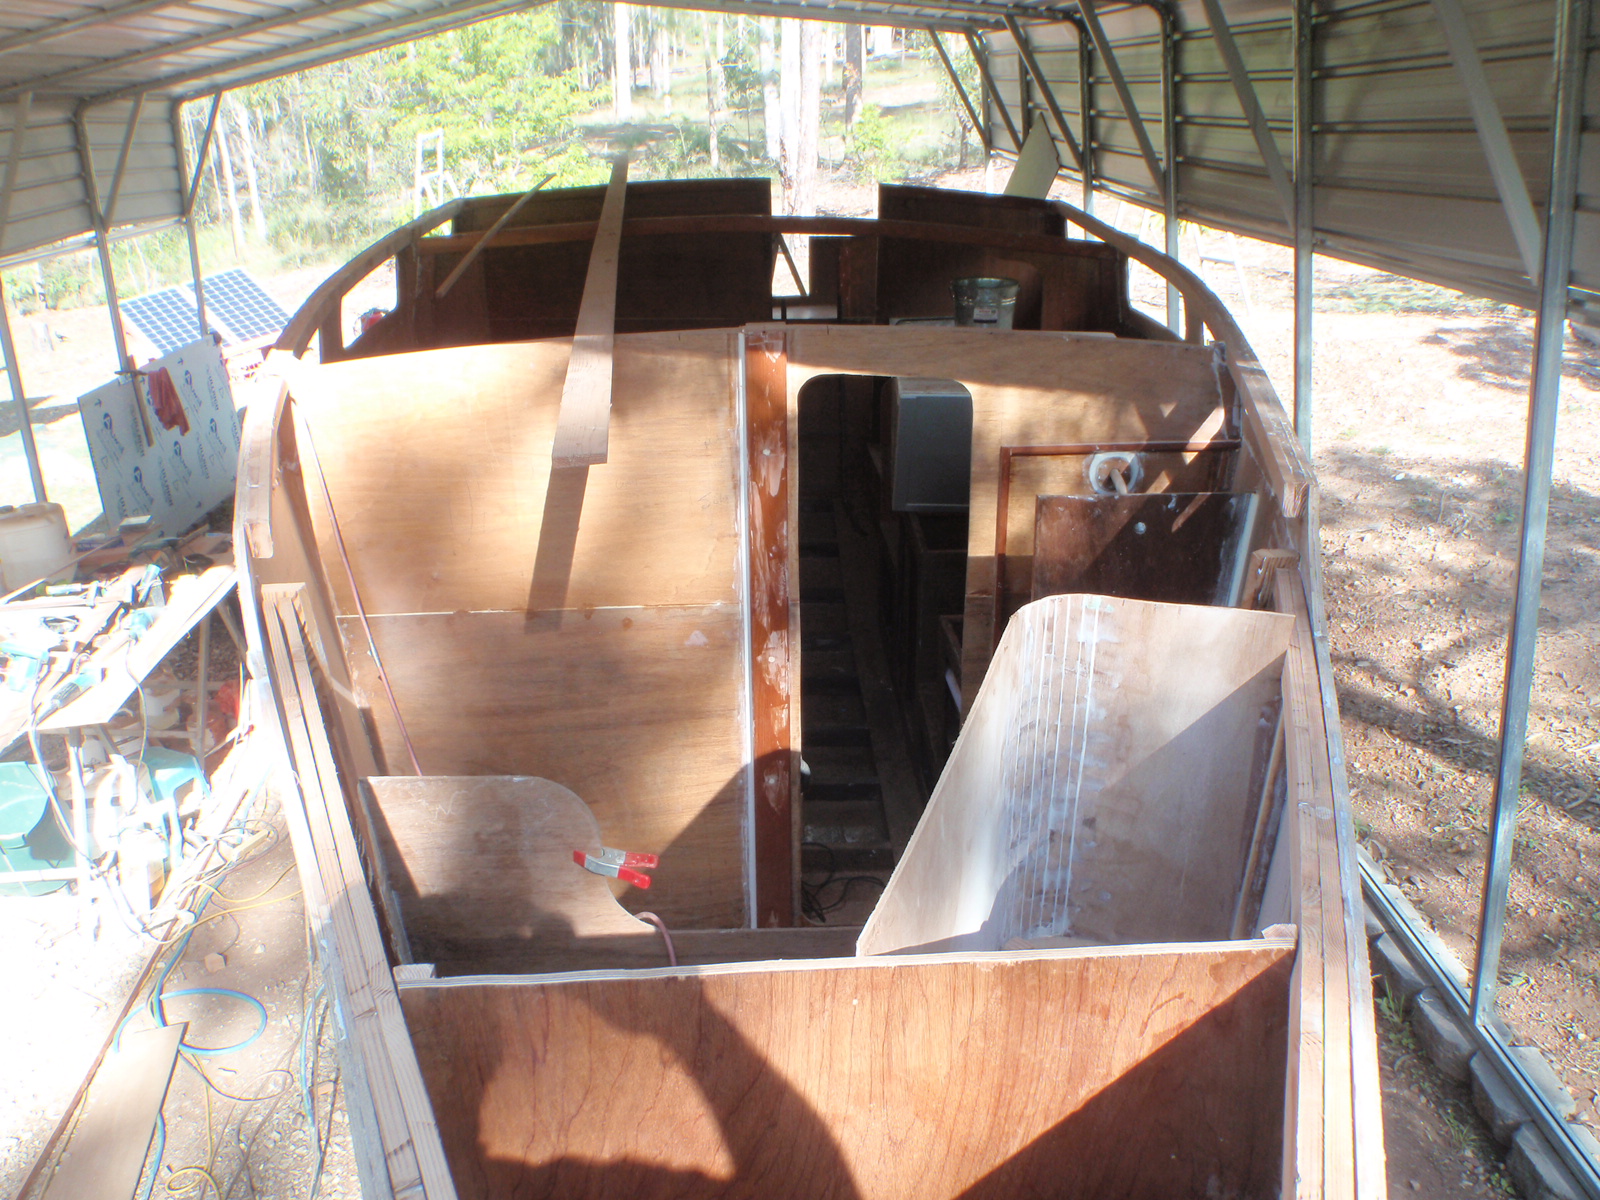
Well things are moving along slowly here with the starboard side all finished and ready for fibre glassing. I took the right hand photo while standing in the anchor locker which is all fibre glassed and ready to be used. This morning I dry fitted the bow deck and will hopefully glue it all down this week. The locker in the foreground is the gas locker, that is one thing I have learned as a surveyor that gas lockers can be fitted anywhere as long as they drain overboard. I always have had them in the stern area but up forward this time is actually closer to the stove. All the interior fibre glass tape joins are finished and now it is time to do the ballast and water tank.
I noticed I have not mentioned the cost of this project so far, my best estimate is around $11,000 so far. That is really just the hull and materials, the big ticket items are yet to come. One of the biggest is the motor.....a 20hp Nanni diesel will cost me about $9000 with another $2000 for all the extras. I have searched around for a second hand diesel but I have found nothing that makes me happy. Well really I hate mucking around with old motors in confined spaces, oil leaks and unreliability just get on my nerves. So I am thinking of going down the brand new motor with warranty path. I have owned Yanmar, Bukh, Drofin and Volvo diesels all second hand and all have giving me problems at some stage. Mainly because they are getting old and really a new motor should just go and go fingers crossed.
I have learned this week after many phone calls that no one takes a good diesel motor out of a yacht for no reason. So I am not interested in buying someone else's problem even if the motor is a real "Bargain"
Christmas in July, what a crock of marketing shit I always thought. But the other day I had to go buy another load of demolition Oregon from our local scrap yard. I pulled up in my ute and started looking for their pile of Oregon (3rd time this year they have moved it) and one of the workers asked me what I was looking for? I said I was looking for the Oregon and straight away he said what sort of boat am I building. I countered with "had much to do with boats" To which he replied "sailed twice around the world, once via the Horn!" Yo ho ho here was my Christmas in July. I then proceeded to load up my trailer with some very dry tight grained Oregon all the while shooting the breeze about boats and sailing offshore. When it came time to pay, Santa gave me a very good price and I was a very happy chappy.
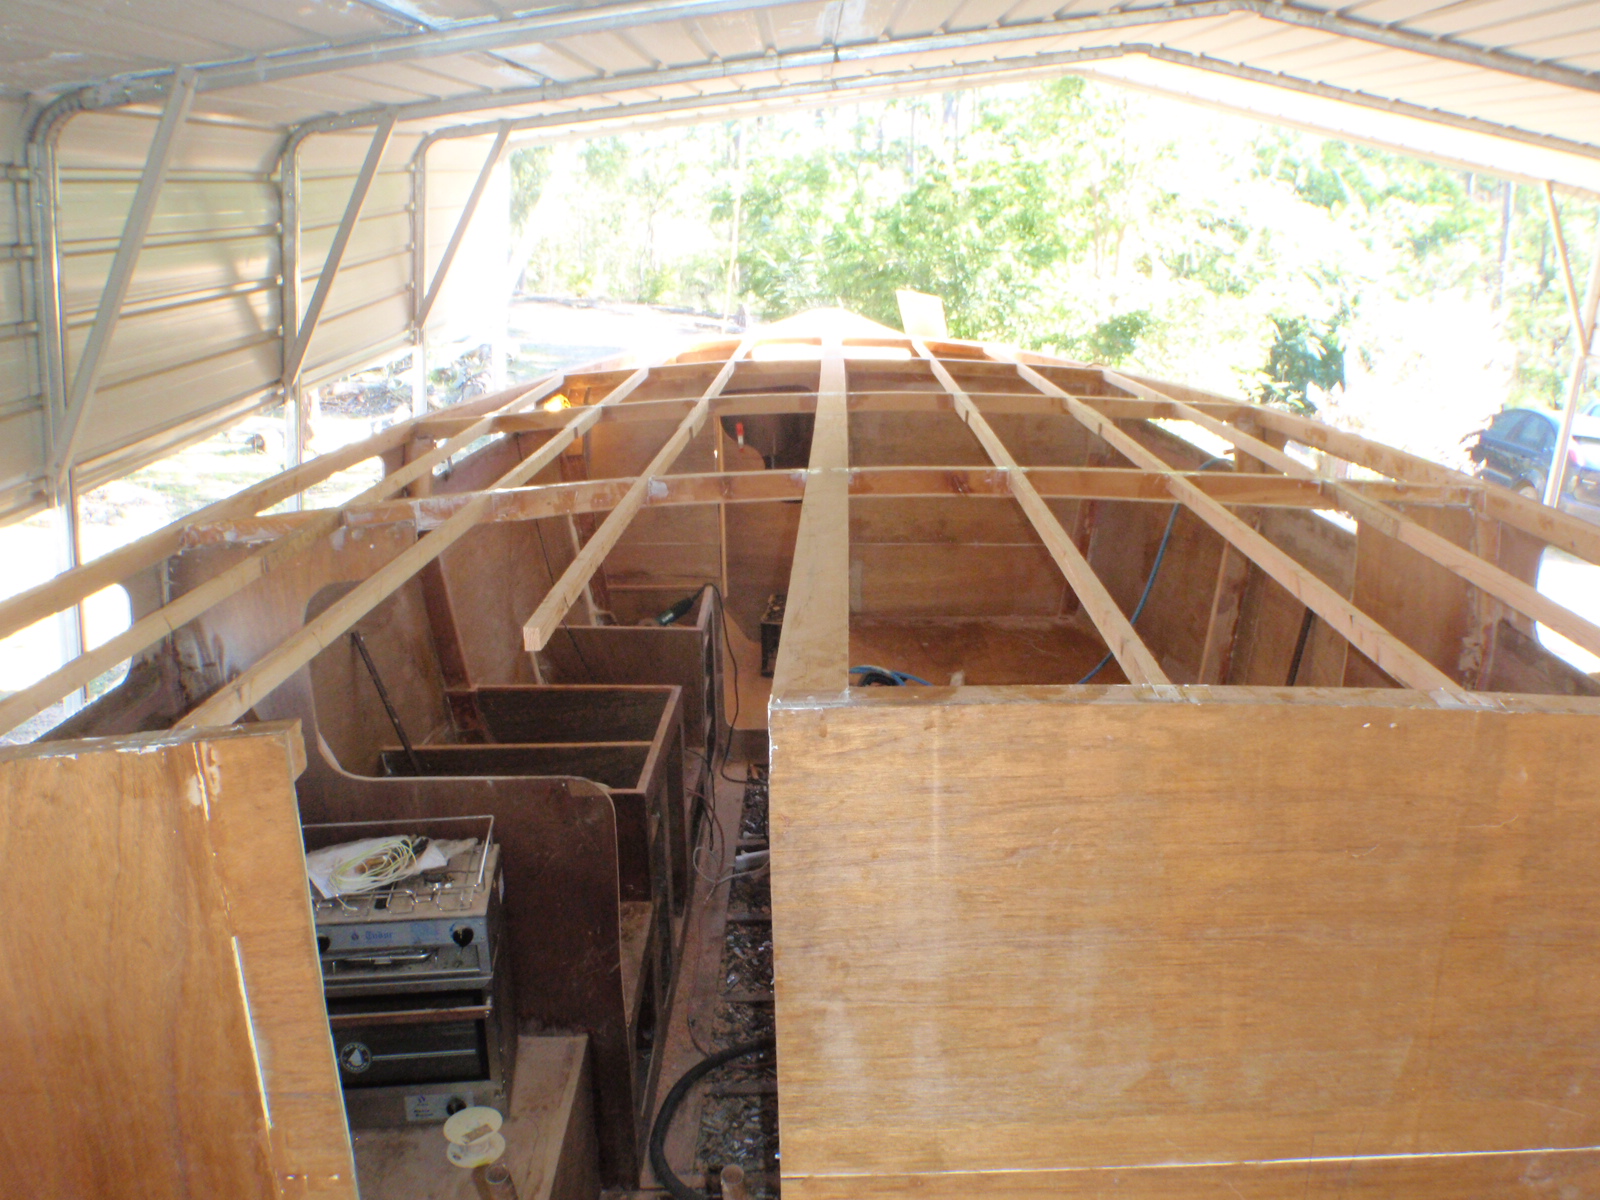
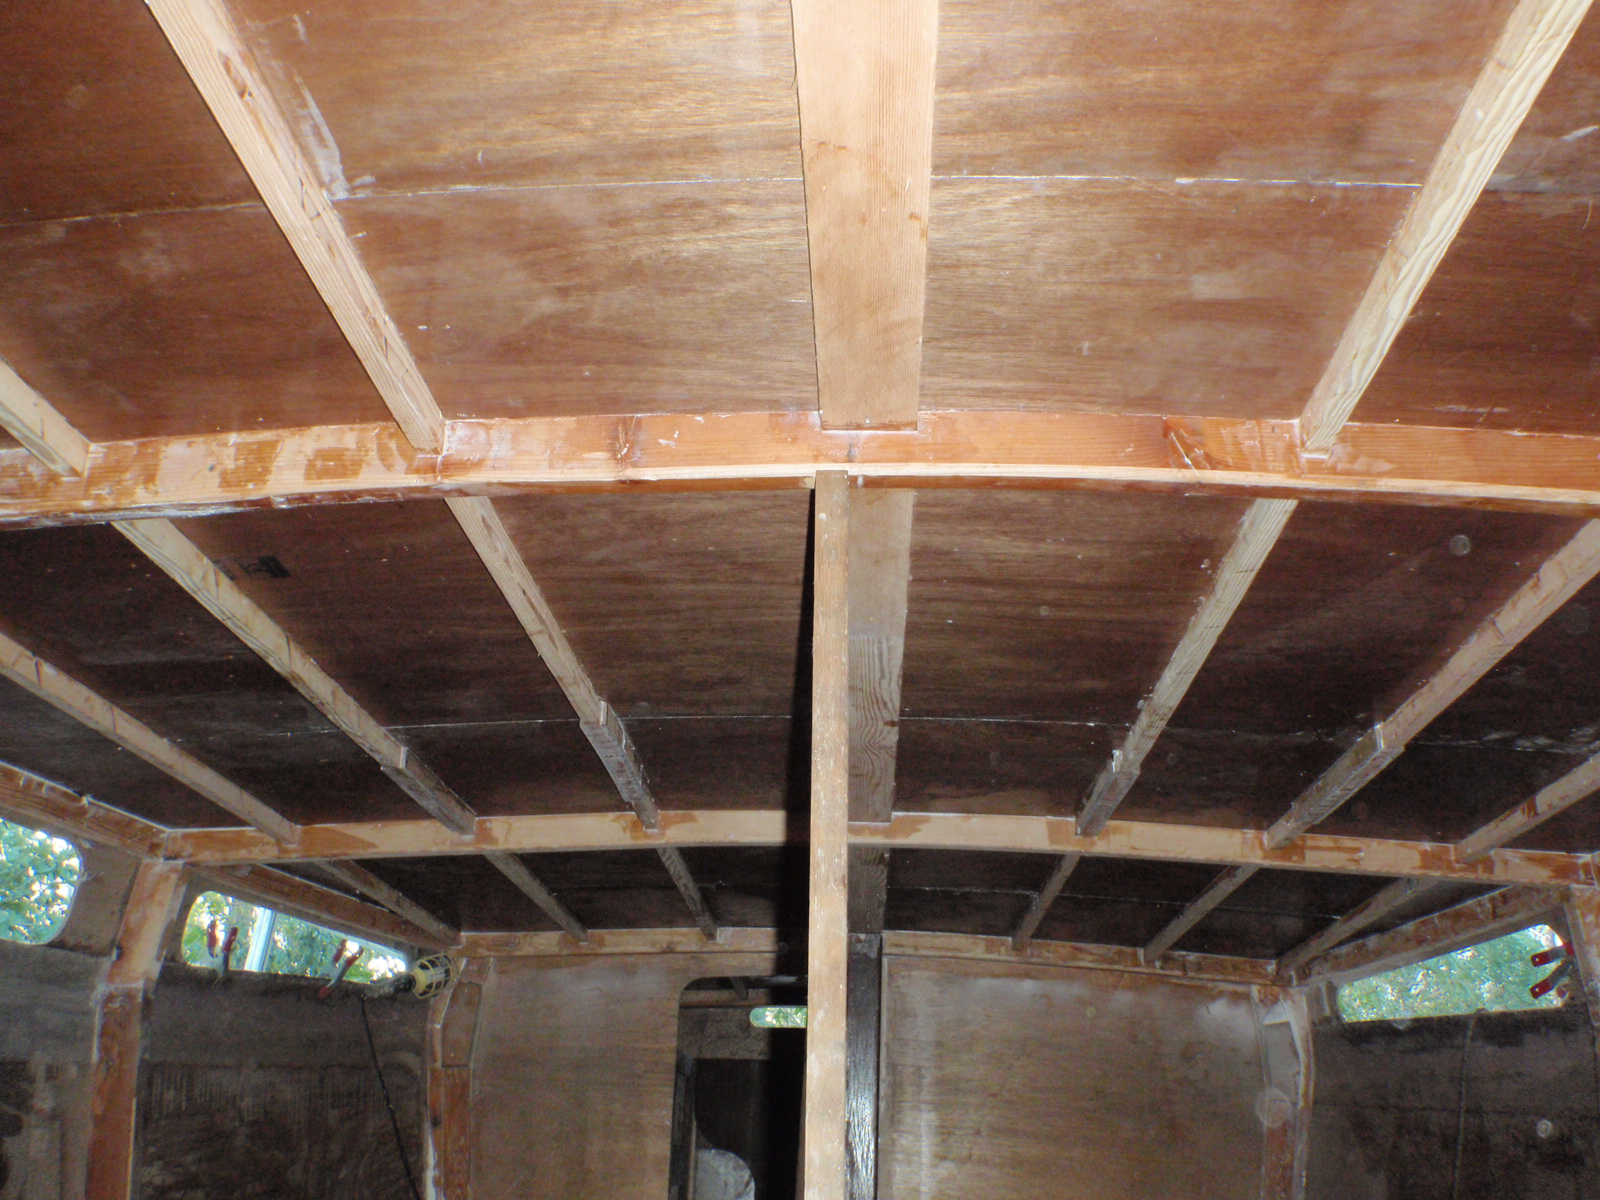
Anyway enough of my good luck story, the photo on the left is some of that lovely Oregon turned into stringers and king plank before the deck goes on. What a headache getting the stringers and beams all to line up evenly and sit on a flat plane for the plywood to lay on. I used three string lines and a ton of patience before I was happy. The stringers were on 365mm center's, which is just enough for me to get my fat chest in between. Then on top of the stringers is two layers of 6mm plywood, all fastened down with 30mm stainless steel brads. I also used a heap of removable screws where the plywood sheets joined each other. The join on the 1200mm side is hidden behind a stringer, so there is just the 4 glue joins going from port to starboard on the whole underside of the roof.
The second photo is the underside of the deck looking forward. Before I laid the plywood down I resin coated each sheet, the next coat is going to be messy having to do it upside down. It was also bloody messy trying to handle these sheets when they are wet. It took me a solid 9 1/4 hours to lay this deck, with not a single break just Tina serving coffee. The idea behind this was that it would be one solid unit when finished and while the glue was wet the sheets still had enough flex to mould themselves to a fair curve. This helped catch any imperfections in the fairing of the deck beams and stringers.
I have learned this week that a catalogue special can some times be just bullshit. Last Saturday I brought a new Makita planer for $198 from Mitre 10 and on Monday I got a Mitre 10 catalogue in the mail advertising the same planer on sale for $228? What the hell, is that all about? Pay another $30 to buy it on special? That must be why I am not rich, I am completely missing some thing when it comes to business?
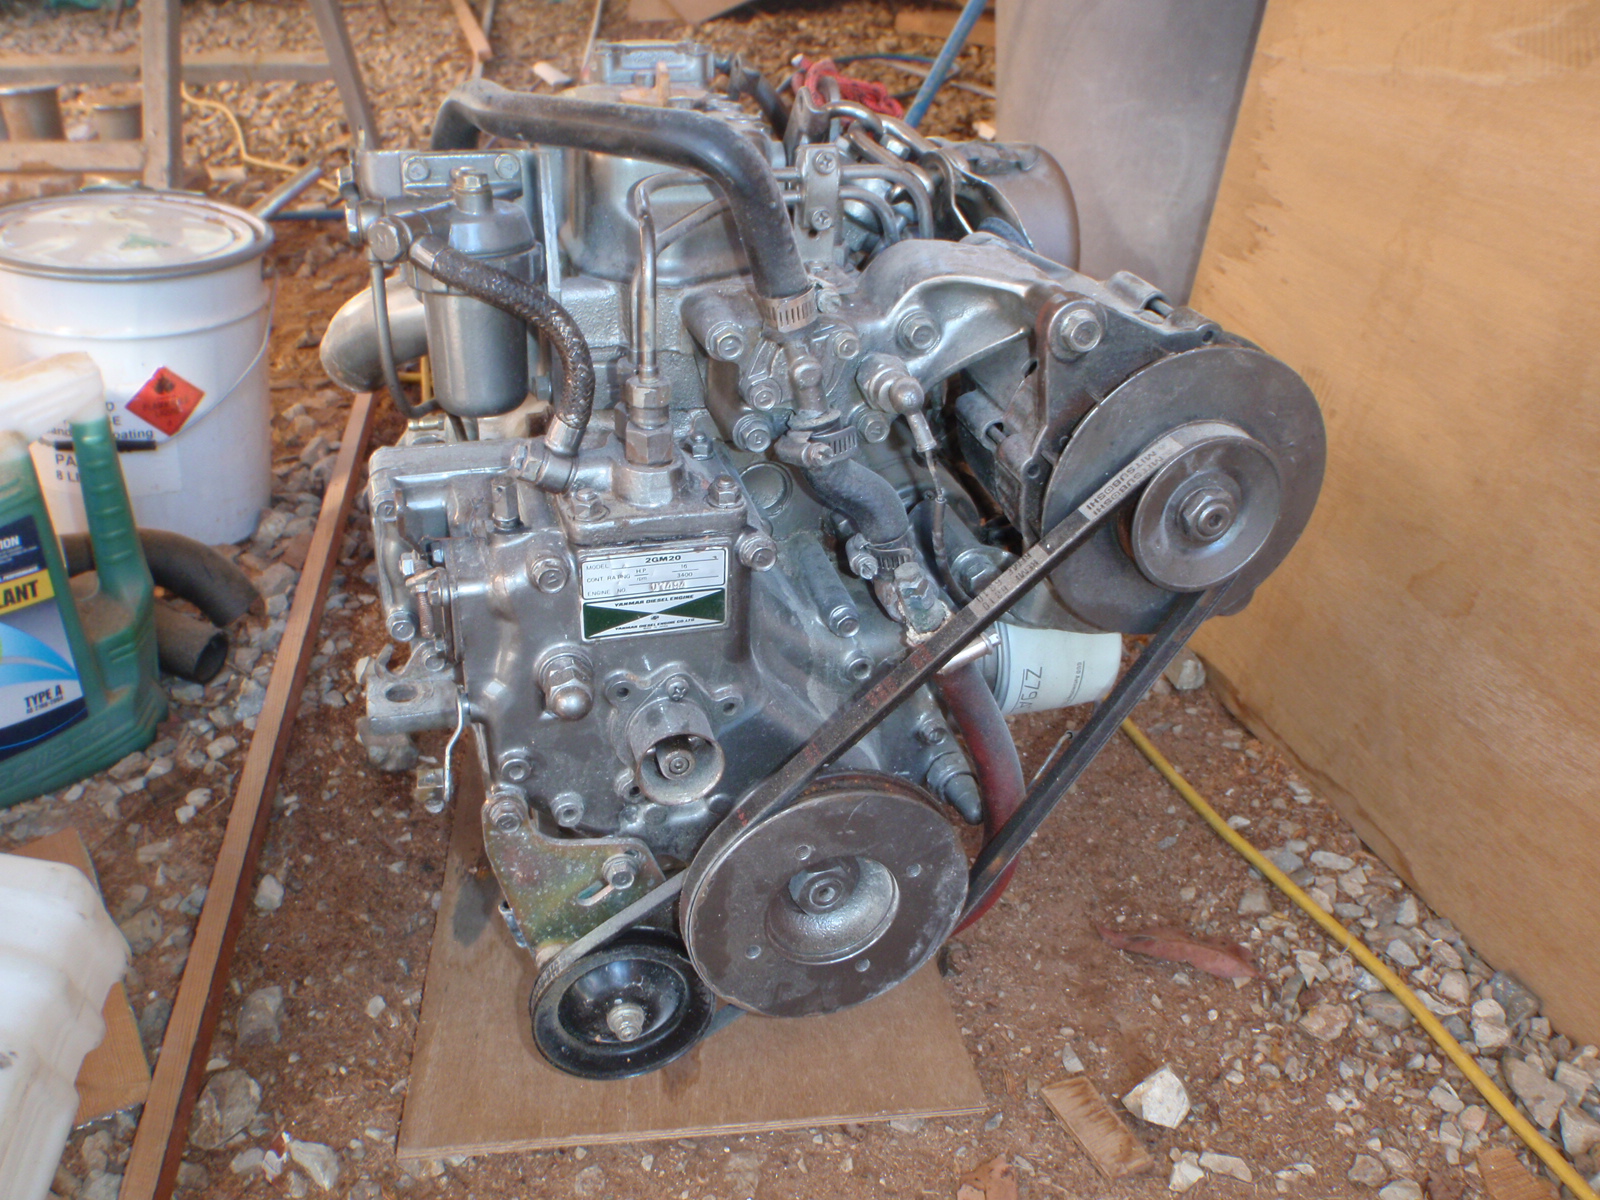
Well the photo on the left is the second hand Yanmar diesel (1200 hours) I have just purchased. I know a used diesel goes against everything I have said but the guy had a genuine reason for getting rid of it and at $3000 I think I can live with any hassles I may have. I may come to regret buying it but at least I have saved $6000 which means I can buy more stuff for the boat. and not worry about going broke before the launching.......
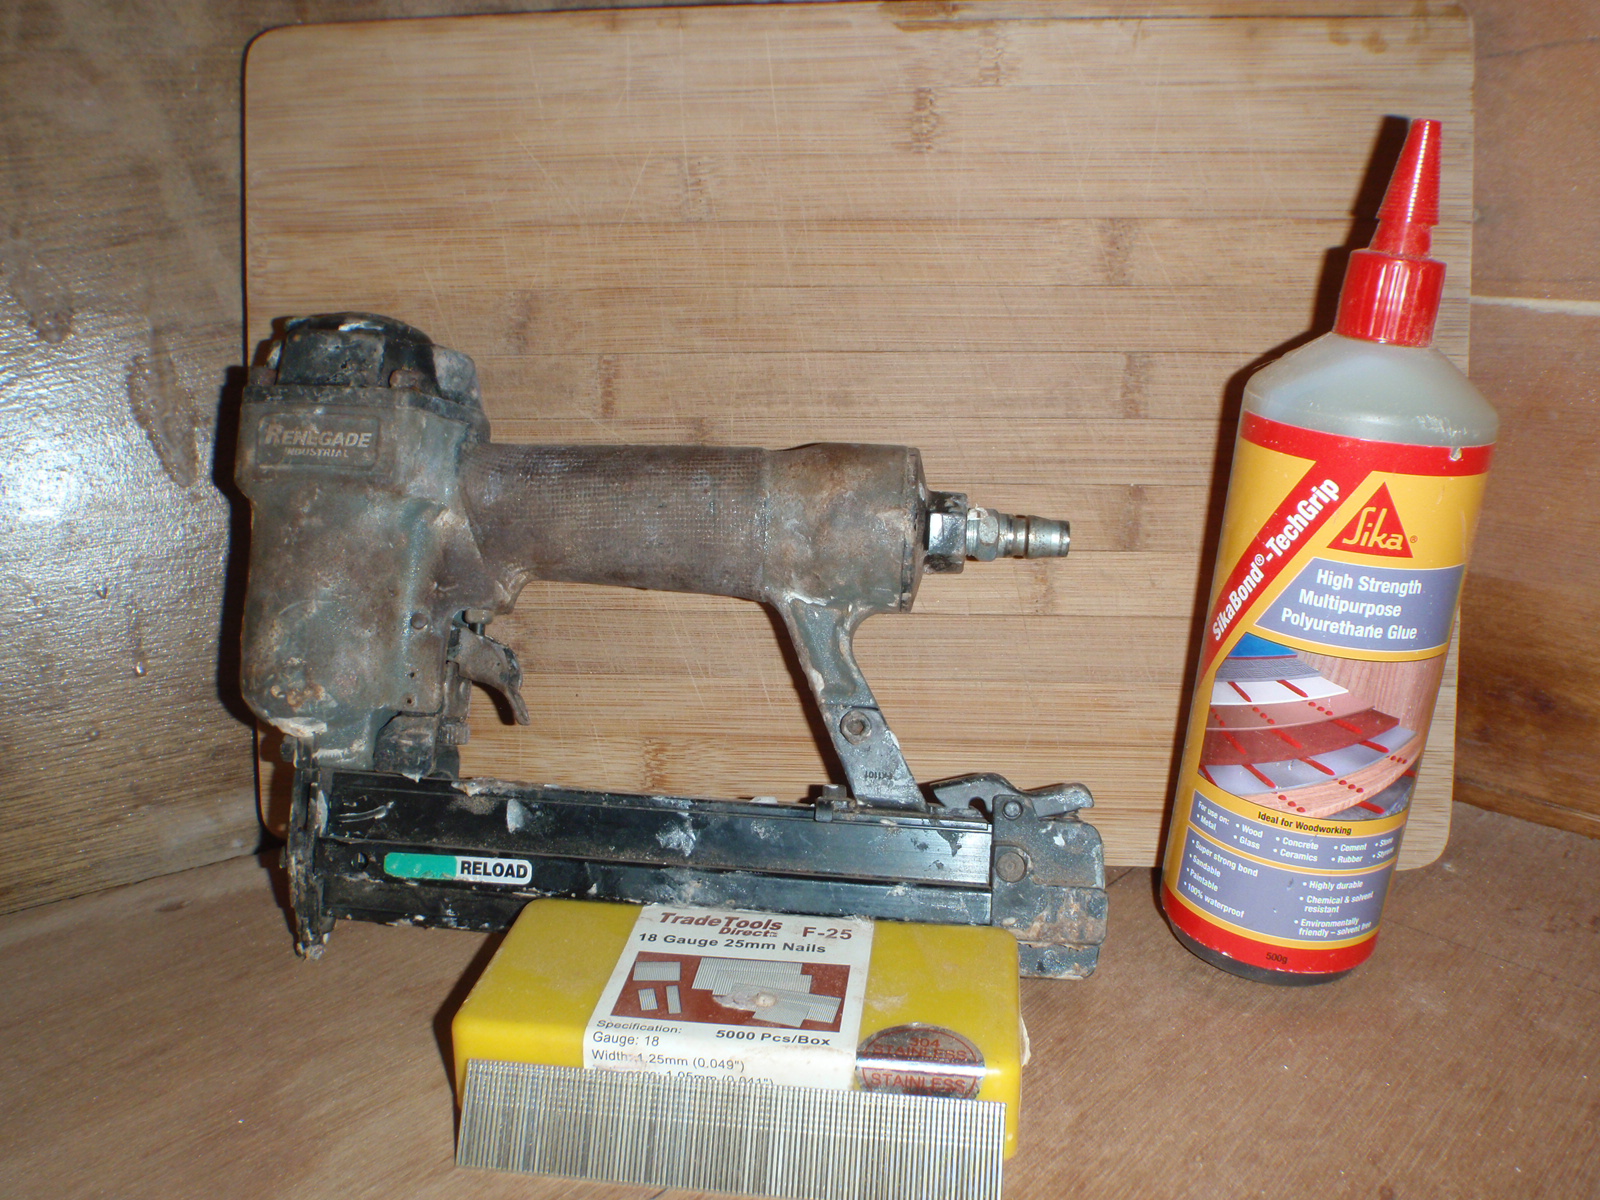
The second photo is the best tool I have ever owned. That's a brad gun which shoots out 25mm and 35mm stainless steel brads (304 grade). I buy 5000 brads for $25 and are yet to use a whole box on the boat. There is almost no screws on the boat, everything is held together with glue and brads. They are quick and easy to use and I must have used a few thousand on the deck. The other items are polyurethane glue and the timber chopping board that I glued back together using that glue. That chopping board gets washed at least twice a day and has still stayed glue together after a year, which I think is a pretty good test of the glues capabilities. That glue is what I have used on the interior joinery. I basically have a drop saw, router that puts a radius on the timber and my brad gun. Using them I have put the interior together in a record time.
I have learned this week that it is fantastic when you get mentioned in you hero's blog. I had such a head swell for days.
I have given up on Yola this week, I cannot load the pictures I want no matter what I try. Will give it a shot later.
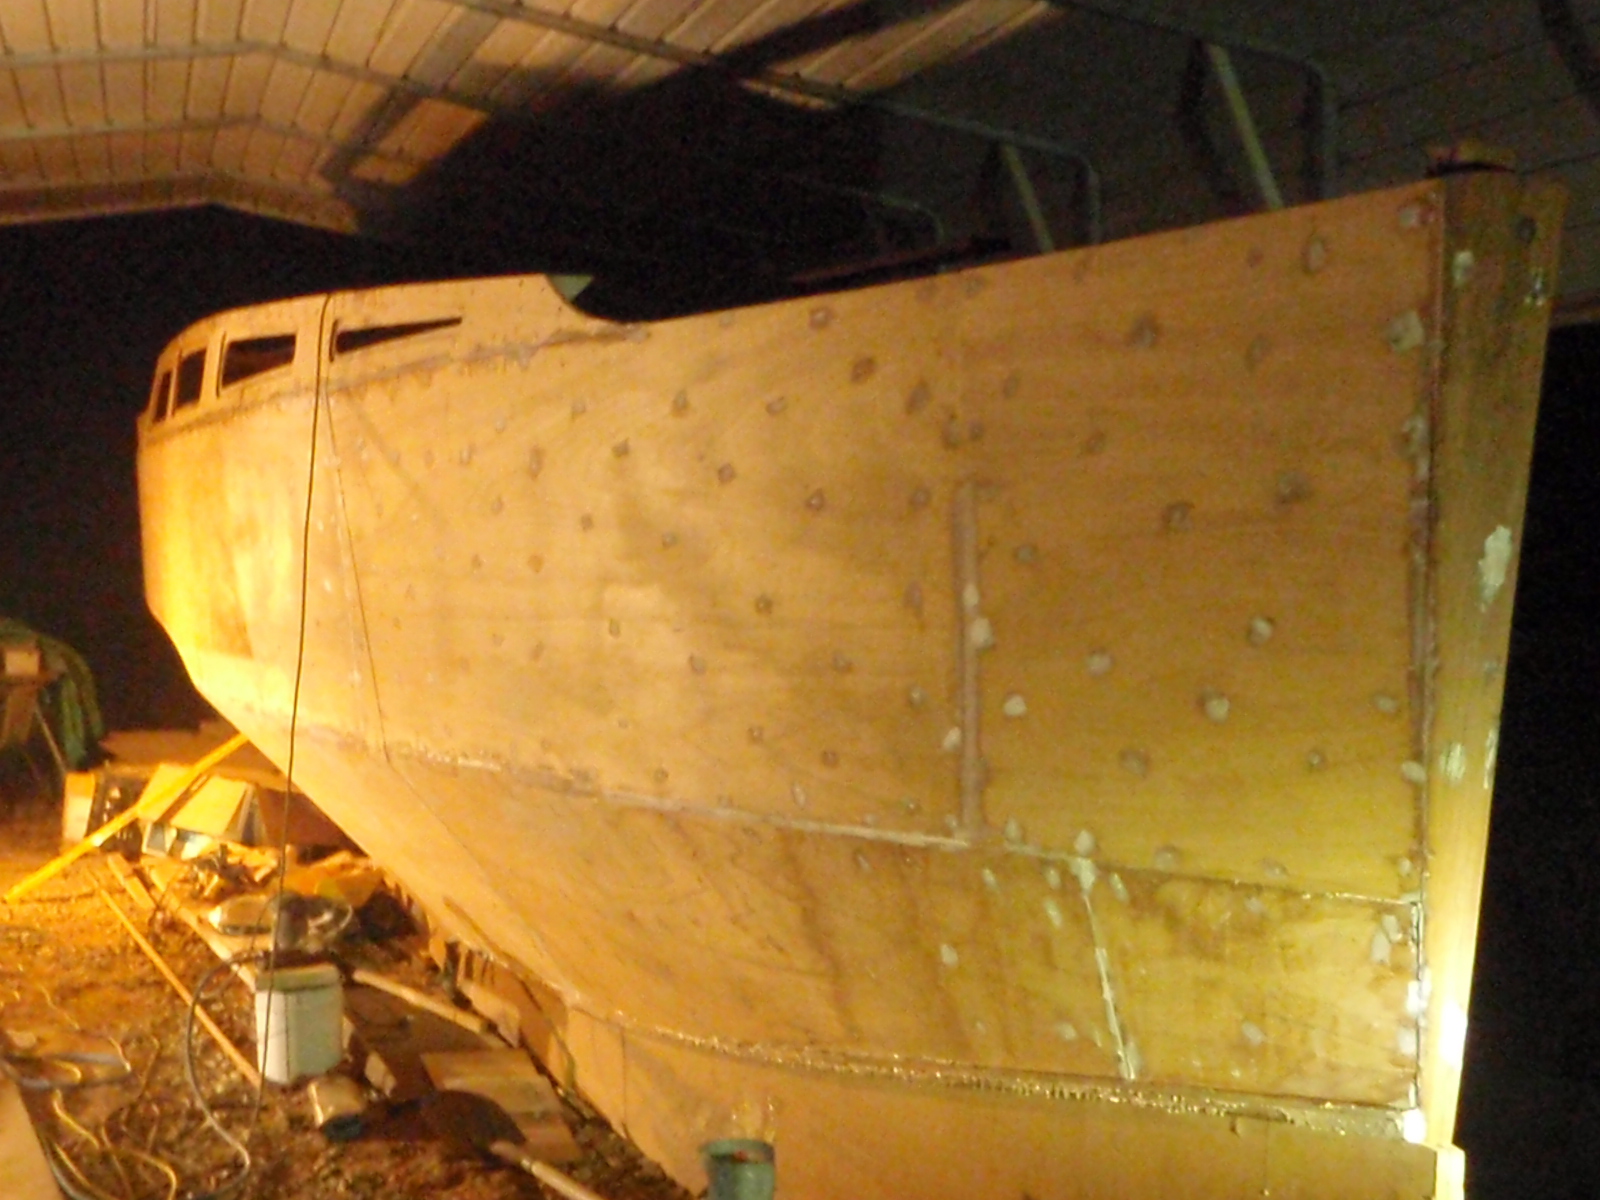
The photo on the left is the 200 gram plain weave that I sheathed the entire yacht with. On the chines is an extra layer of 450 gram double bias 200mm wide. I nailed the cloth to the hull using plywood washers and as I wet the glass out I removed the washers. It took a day a side to glass Ninky, longer than I thought but the upside bit at the stern was a real killer.
The second photo is the transom with the start of the micro balloons fairing compound being applied. When the glass had dried I sanded all the joins smooth and then with Jonah's help I rolled a sloppy mix of filler over the hull. I am only going for a work boat finish so one board sand then spot filler and paint is all Ninky will get. I am not a big fan of immaculate topside finishes, they always get knocked around if you use the boat lots. I surveyed a plywood power boat just this week and they had glassed the hull then rolled paint straight on top of the glass. I actually liked it, you could see the double bias weave but standing on the deck or far away it looked fine.
I have learned this week that Jonah (7 years old) is getting right into this boat building. He was rolling the filler on as quick as I could mix a batch up.
Well it looks like my teachers were right when they said I should stick to working with my hands and not use my brain.....The web page problem turned out to be there is only so much data you can put on one page. I only just clicked today when I was doing my usual computer tango and trying to download more photos and suddenly I had a flash of inspiration to try another page. So now I am back online I better fill you in on the last few months progress.
As you can see we covered the boat with Microballoons, then I spent a week fairing it all, well just a work boat fairing job. Then we rolled some paint on and what a shocker. Once the boat was a uniform colour you could really see the slack job I did on the torture board. So back to another few days of sanding and filling and I called it quits with the boat about 90% fair. Which is good enough for me and most people will not even notice the last 10% that I have missed.
I learned that week why I hate torture boarding and since when did a 100% fair hull become essential in boatbuilding? Plenty of steel and ferro yachts cruised the world with a less than perfect finish.

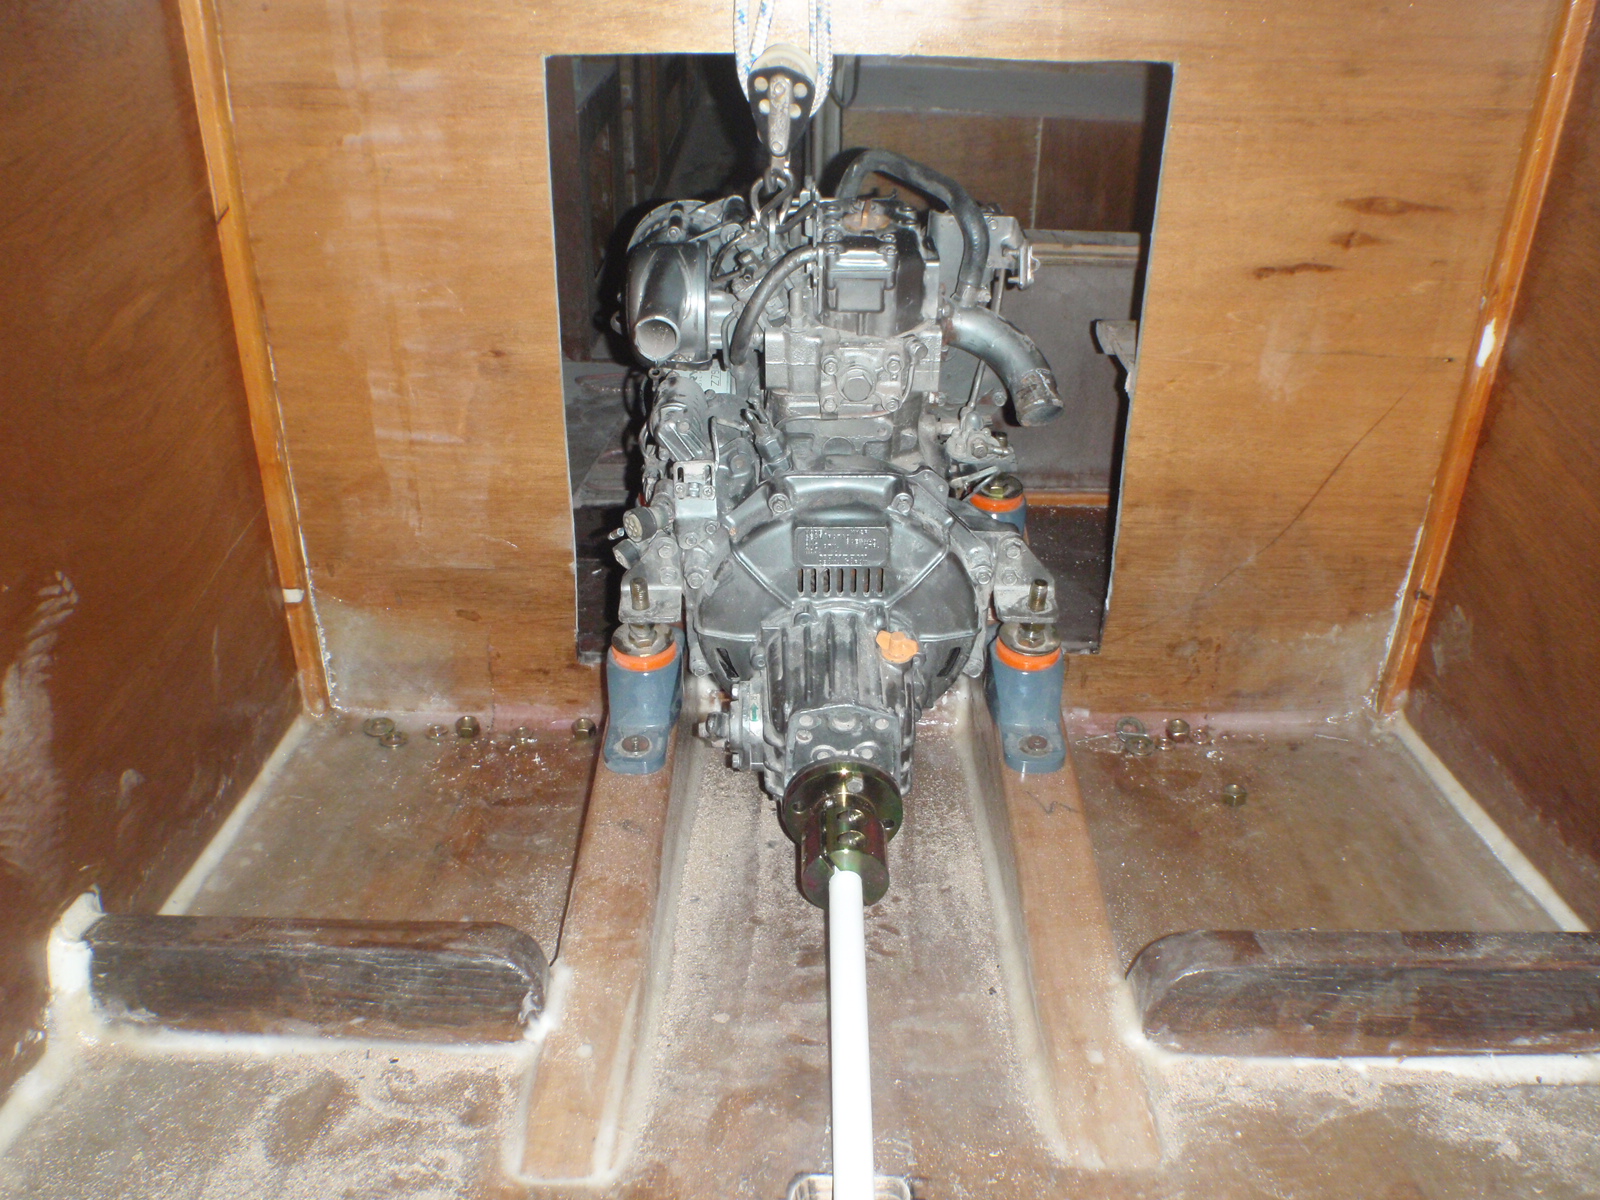
Well the next big step was getting the Yanmar diesel onto the engine beds. This was pretty easy really, I had already made a plywood mock up of the engine and so had the engine beds just right. I just used an old mainsheet tackle system I had and some scaffolding to lift the motor up and lower it into the boat. The Yanmar 2GM only weighs 106kg so the loads were not huge.
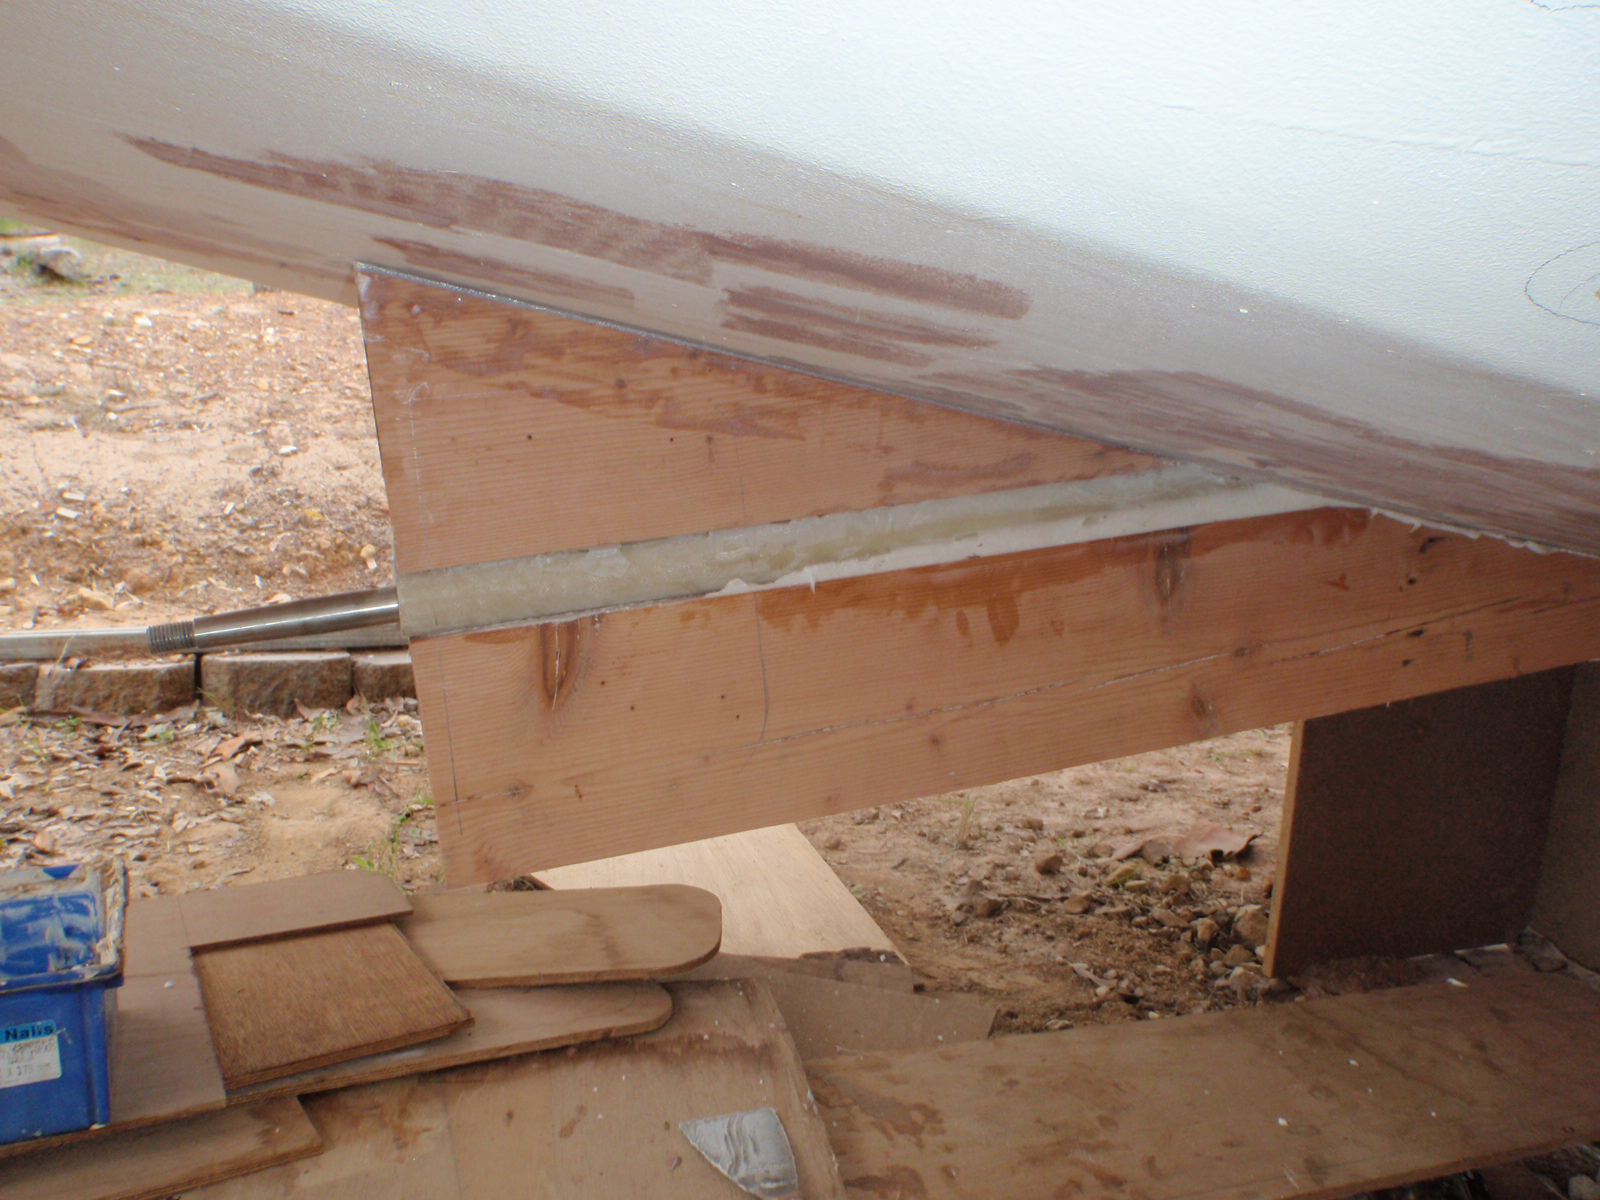
Then once the motor was in I called install the shaft tube and surrounding timber. The tube is wedged in-between to large pieces of Oregon and then a layer of 12mm plywood either side then coved and sheathed with 450gm double bias cloth. The skeg is just big enough to protect the propeller when sitting on the beach. We will be swinging a 13' three bladed bronze prop.
I learned that week that all this effort better pay off, an outboard would have been waaay easier to install.
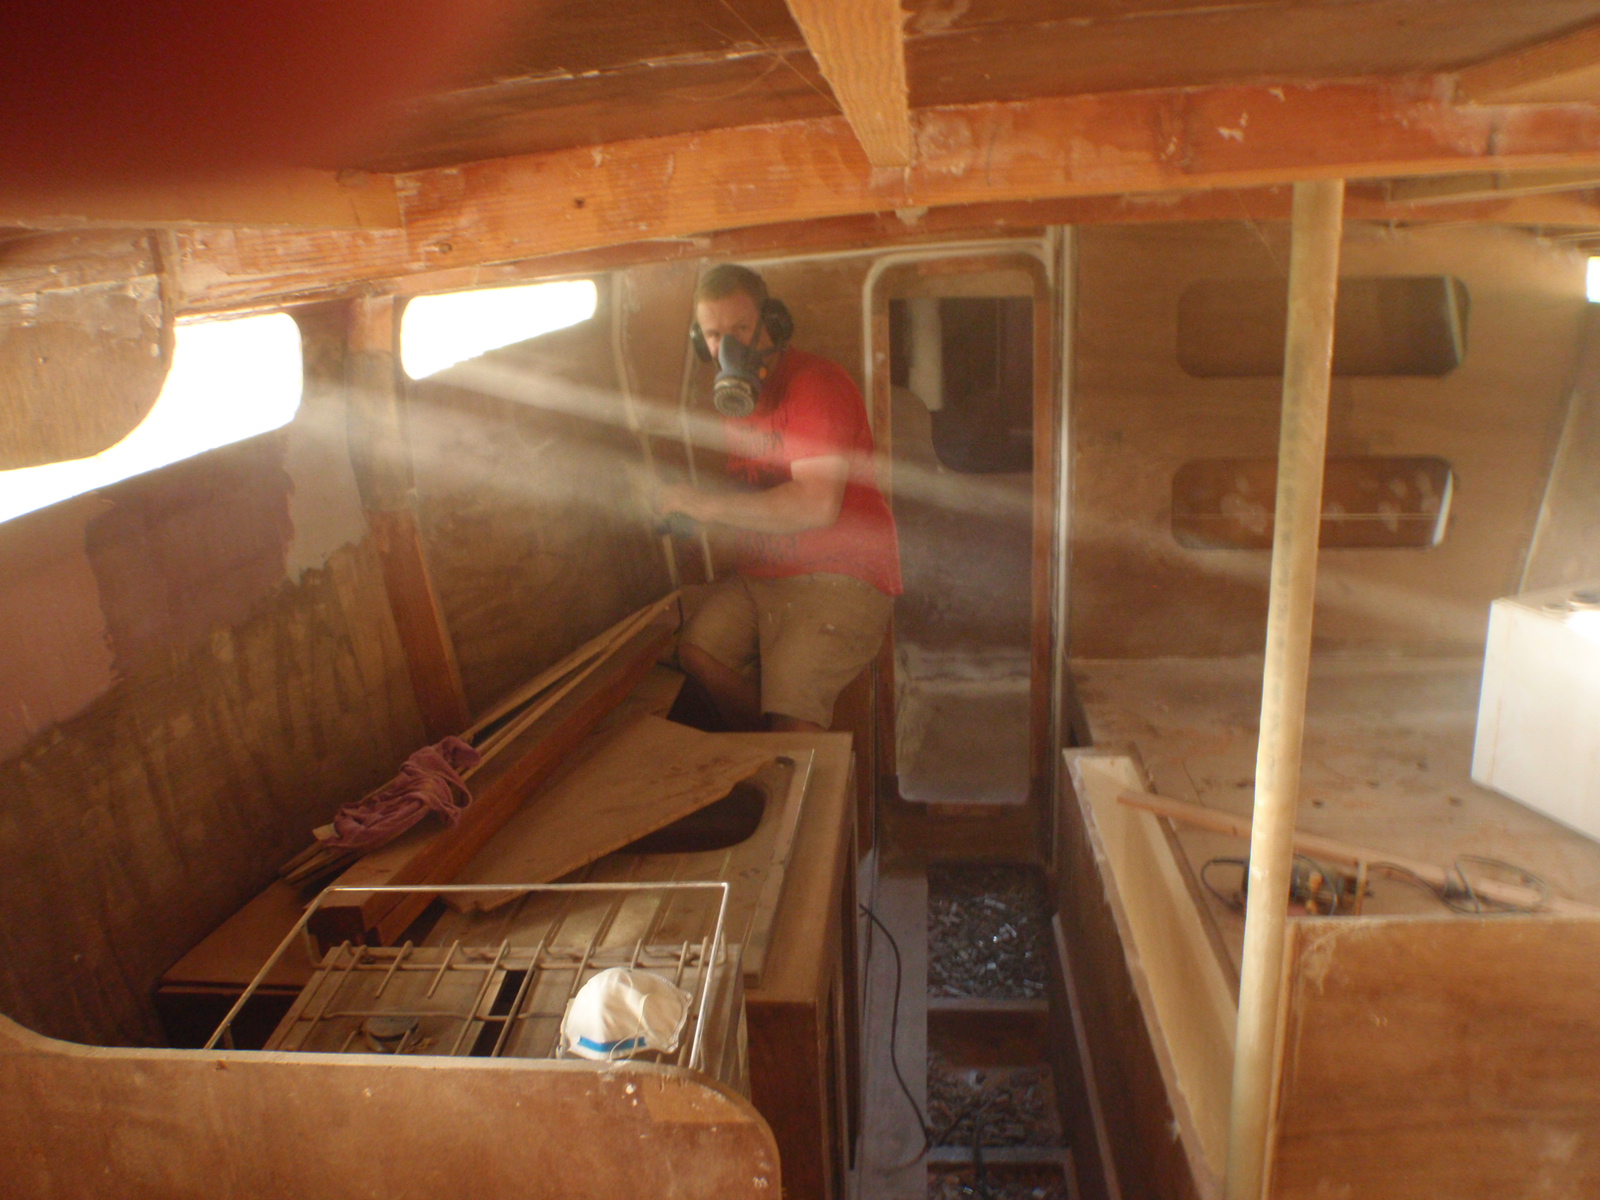
That's me sanding the inside, I had just finished a eight hour day sanding Steve's yacht and came home to do another hours sanding on the boat. But I cannot complain 99% of all the interior sanding was done by Tina, I just smashed the last flat bits with the random orbital.
Tina and I then cleaned the boat and started a marathon painting session and painted the whole interior in an afternoon. We used International Prekote which is the best single pack undercoat around. It goes on flat and sands like a two pack paint. Plus there was a few patches of bare plywood and I resined them then painted it an hour later.
I have learned this week that if you buy a $400 sander you better not hide the box in the backseat of the car!! The good old "I have had that for ages" just does not work some times.
Well it has been a long time since I have updated the building of Ninky Nonk. Time just fly's when you are busy with family work and trying to squeeze as much spare time as possible into building a yacht.
The photo on the left is a carbon fibre tabernacle I have made. I just wrapped masking tape around the mast then glassed directly onto that. I then popped it off the mast and glassed it to the deck. The carbon fibre layup is 6mm thick so hopefully that is strong enough? The reason I ended up doing this was I was quoted $1400 for an aluminium tabernacle. I made this carbon fibre one from some carbon fibre I had lying around and I already had plenty of epoxy resin. So the cost was hardly anything and the labour was maybe 8 hours including the sanding and fairing.
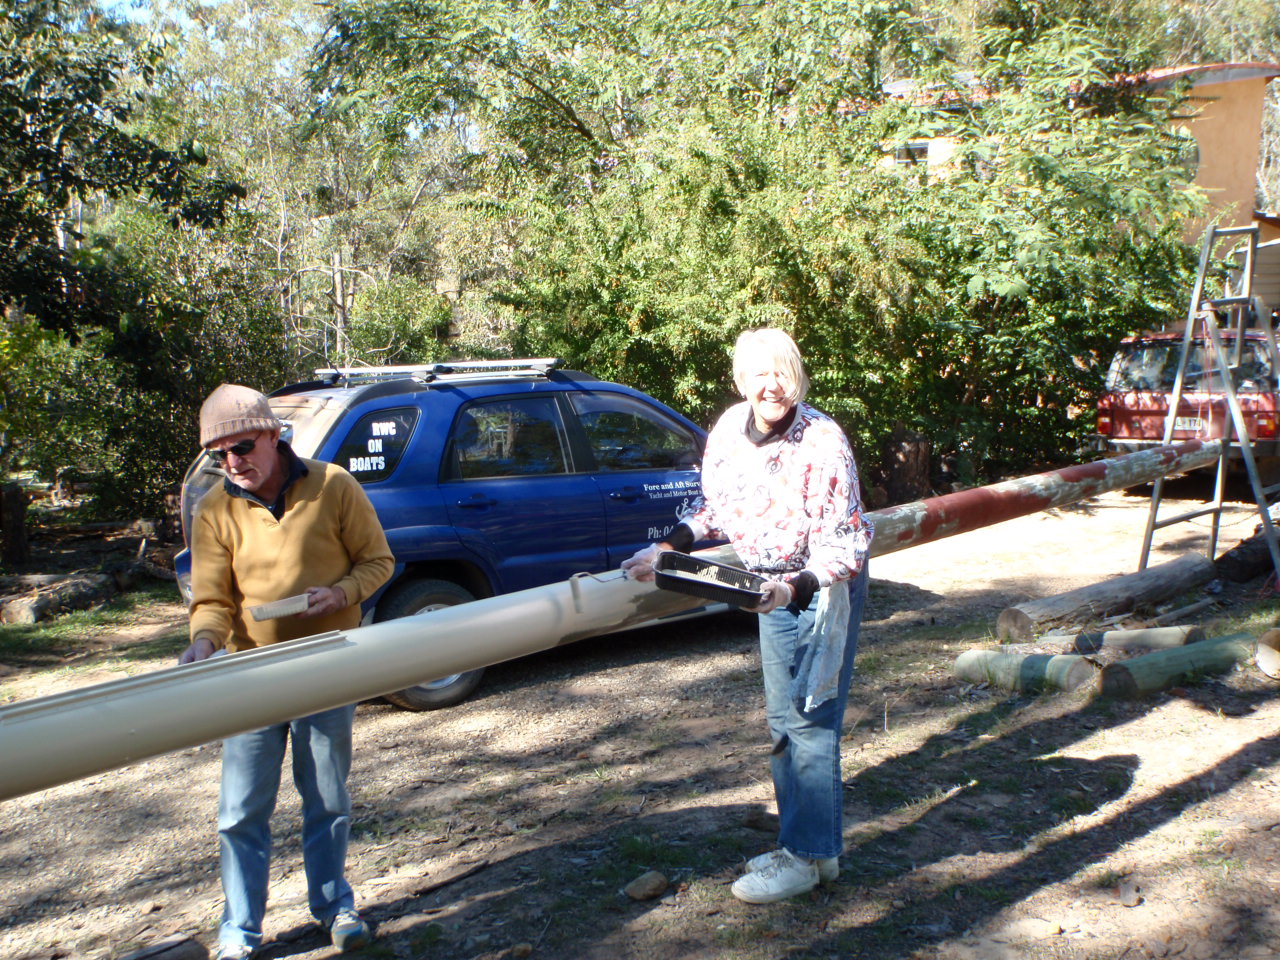
The photo on the right is our good friends Hal and Lucy top coating our alloy mast that I picked up for $150. The mast was from a ferro yacht that was getting crushed.
I have learned this week that it is handy having friends and family to help you out building a boat. Even if they drink all your coffee and eat all your cake!
Well it has been another busy busy time. The deck has been top coated and the windows installed.
I have just been reading the boat bits blog and Loose Moose mentioned that no one mentions the mistakes that happen when boatbuilding. Well the first one that pops in mind was bidding and winning an online auction where I forgot to check the location of the auction.......so postage was going to cost more than the item was worth. So good bye $100, another was mentioned at the start of the project where I completely stuffed up the dimensions of the bulkhead. Goodbye at least another $100. Really this is yacht number five Tina and I have owned. So I have already been down the path of getting a gearbox reconditioned for a motor that was stuffed and barely did another 100 hours before it died. (goodbye thousands)
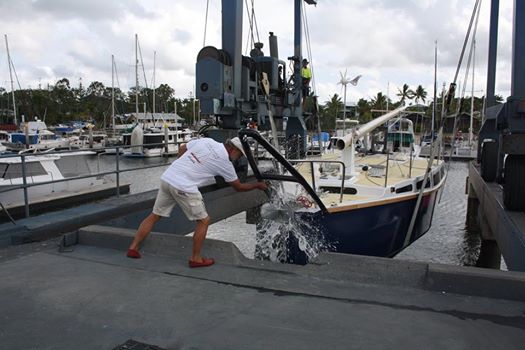
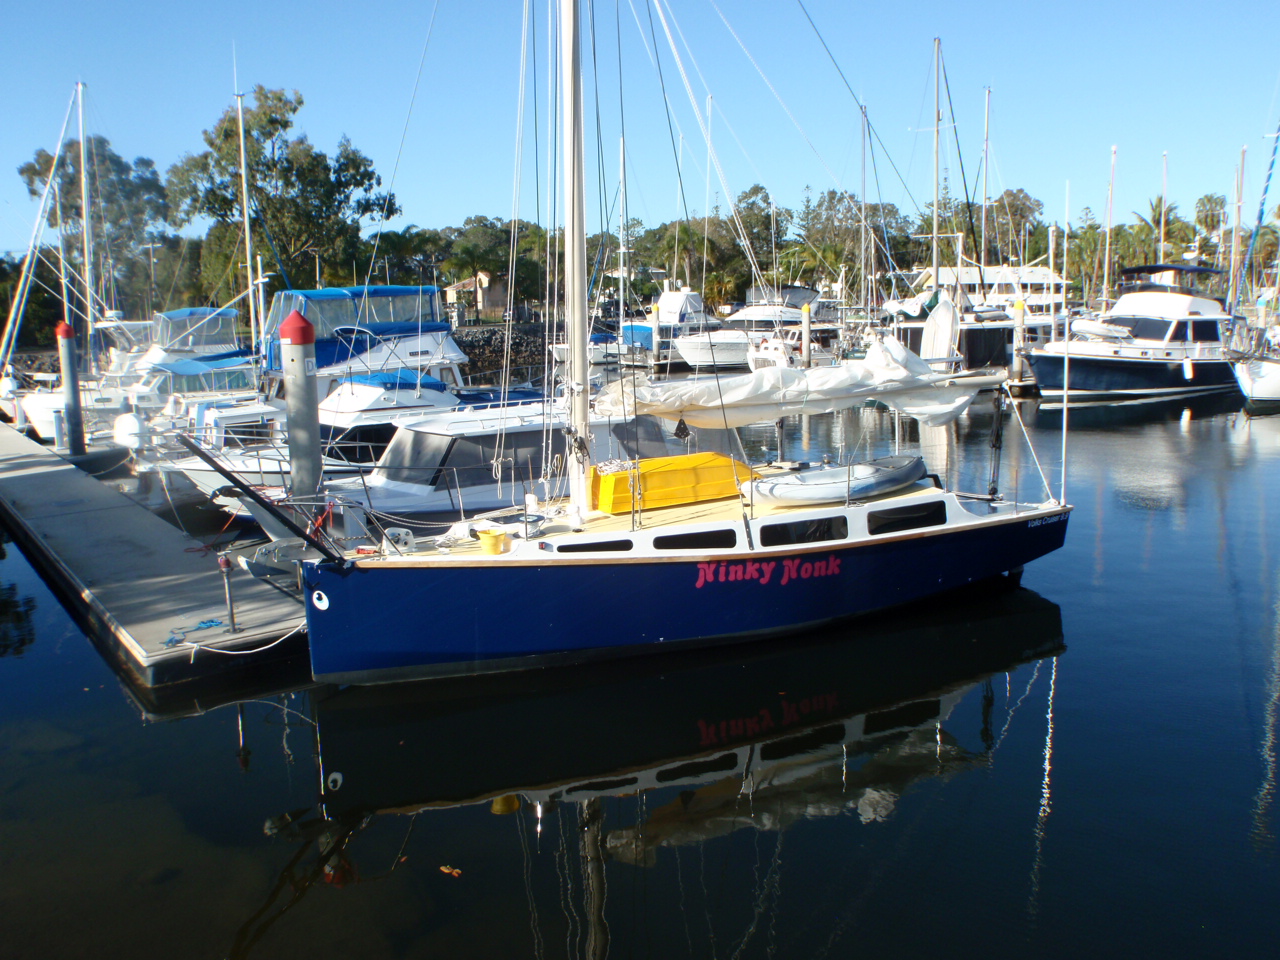
Well it has been a a huge delay since I have given an update on the build of Ninky Nonk. I will update this website a bit more now that I have finally caught my breath and recovered from a bad case of burn out. As you can see from the photos we launched Ninky Nonk on the 20th of March this year and to tell you the truth that was a pretty hectic two years of building her. Not only did I work full time surveying but I also spent every spare moment working on Ninky Nonk. To keep the momentum up I just hammered my Visa whenever I did not have sufficient funds in the bank to cover material costs. To many times I have seen projects stall then lose all traction when the money gets tight. I decided (there was no we in this decision) to just keep on rolling and worry about the money after the launching......I saved heaps by using Gumtree and E-bay and getting good trade discounts from all my suppliers. Over all I think Ninky Nonk cost $30,000ish max as she sits in the water, second hand sails, galvanised rigging , low hour Yanmar diesel engine, fiberglass over plywood all done with epoxy resin and two pack paint on the exterior. We are happy and I looked around the used market and I cannot find another boat that ticks all our boxes for 30g.
I have learned this week that it pays to listen to the Tina (the wife) when it comes to launching parties. Tina was not keen on doing our own catering and supplying drinks for the launching she wanted to use the Tin Can Bay marina restaurant and let them take care of it all. I was dead against it as we were broker than broke, but you know what they say "Happy Wife Happy Life" so I relented and we talked to Richard about doing a deal. A couple of cheap beers and wines plus some hot finger food and Richard would give me the nod when the tab went over $500. It turned out to be a great idea, after the launching we all walked over to the restaurant for a feed and drink. Richard really did me a deal and around 9 pm the last of the guests and my family staggered out after a bloody great night. My Pocket was $550 lighter but what a great night and we did not have to clean up.
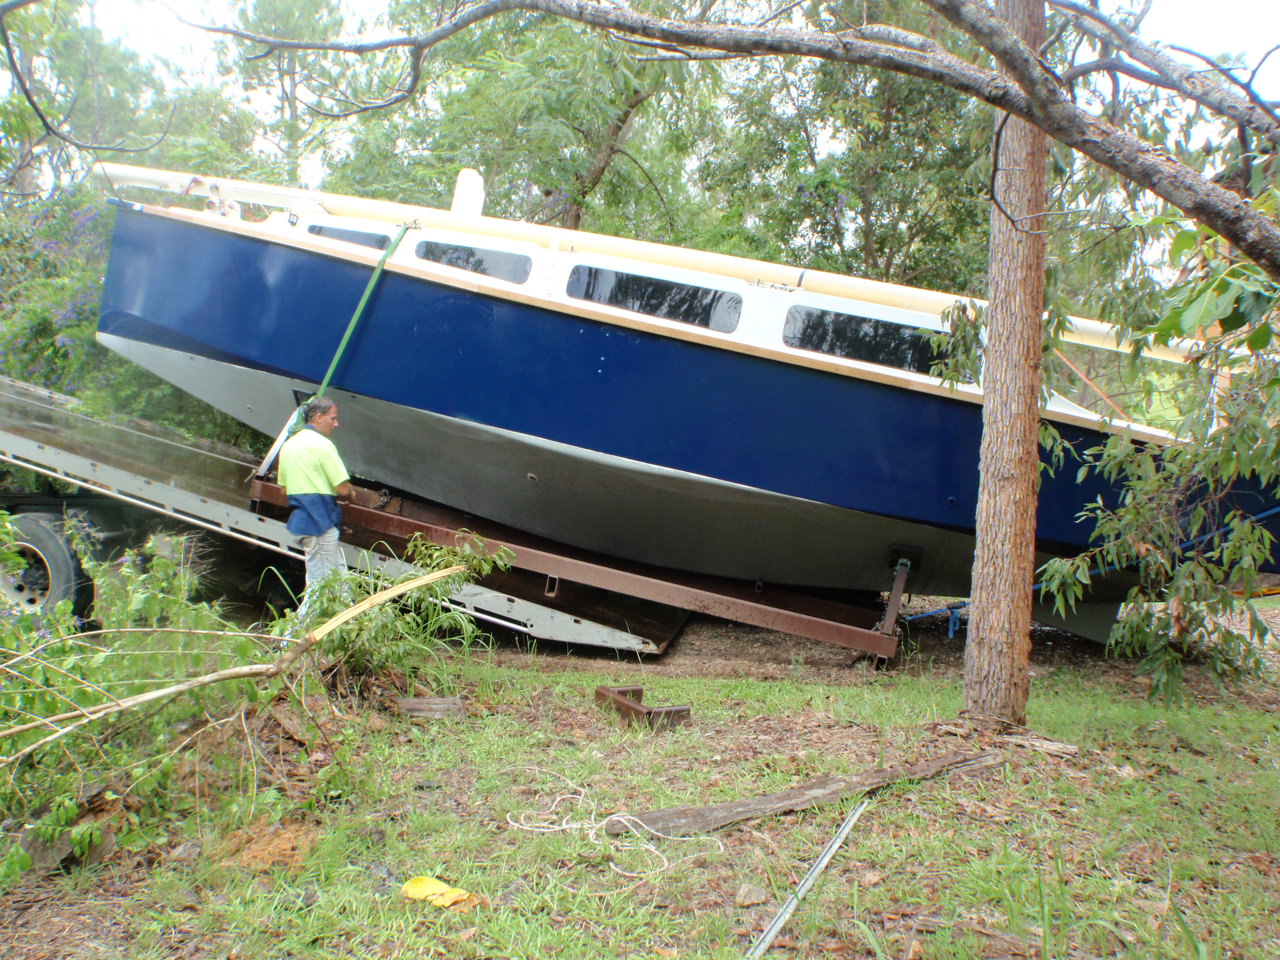

Well as we got closer to launching the big question was how were we going to move Ninky Nonk to the marina slipway. I started talking to all my mates about a cheap solution to move Ninky to the water. A tilt tray truck and some sort of metal skid/cradle was looking like the cheapest option, now I just needed to find one. I spoke to everyone I knew and looked around everywhere for a cradle. It turned out my mate Phil had a metal cradle that had been used to ship a Bavaria 40 to Australia. Phil had it laying in his back yard and for a $100 (it could even have been $50, I forget and so does Phil) it was mine, I paid another $150 to have it trucked over and then I man handled it under Ninky. The cradle just needed me to shorten the four metal arms with an angle grinder and that was it. The cradle was exceptional and way better than anything I thought I would get. I then paid $400 to have a large tilt tray pick her up and take her down to the marina. That was a bloody exciting day, the guy with the truck was bloody skilled and picked Ninky up without a single drama. At the marina Pete picked her up with the travel lift and put her down on the cradle. Once launch day was over I took the above photo of the cradle and advertised it for free on Gumtree. Within hours a guy with a boat project picked it up.
I learned that week that sometimes you can get bloody lucky just by asking around. I also learned that Phil has plenty of crap laying around his backyard. He tried to chuck in another cradle for free and some other nautical junk. I was lucky to leave his place with just the cradle........

Well once Ninky was in the water the next task was to get the mast up. Cheaply of course is the only way for me. I checked out the price of a crane and it worked out the same price of four Ronstan spinnaker ends and some aluminium tube. Which I can then make my own mast tabernacle legs/spinnaker poles. I made up the legs then made an A-frame to raise the mast. I have never done this before and I was hoping to raise a 10 meter mast for the first time. I planned it all and thought of every scenario possible. Dropping the mast on the deck could be a very costly mistake. Finally after a couple of days of nervous planning I just decide to do it and see what happens. Tina was on stand by next to the mast and the kids were well away on the dock. Within 10 minutes of me frantically winching the mast was up. Not a single hitch and there was a big YAHOO yell from one of the marina watchers. I then proceeded to cut all the rigging to the proper size and start running all the halyards for the gaff rig mainsail and two head sails. As you can see from the photos it was a family affair sorting out the rigging. In the end my arms gave out and 5 year old Pippi went up in the bosun chair and ran the last few halyards through the proper blocks. Jonah her older brother is only comfortable up to the spreaders, where as Pippi will go right to the top of the mast!
I learned that week that you never know who is watching you. A big thanks to Mel from Tin Can Bay Chandlery who took these pictures without us knowing.